javaScript操作dom的事件(3个案例+代码+效果图)
目录
1.焦点事件
案例:登录表单的验证
1.代码
2.效果
3.解释
2.鼠标事件
案例:单击鼠标使小球跳跃
1.代码
2.效果
3.解释
3.键盘事件
案例:使用左右键控制小球左右移动
1.代码
2.效果
编辑
3.解释
1.焦点事件
- focus 当获得焦点时出发(不会冒泡)
- blur 当失去焦点时出发(不会冒泡)
案例:登录表单的验证
1.代码
<!DOCTYPE html>
<html lang="en">
<head><meta charset="UTF-8"><meta name="viewport" content="width=device-width, initial-scale=1.0"><title>登录表单的验证</title><style>body {font-family: Arial, sans-serif;background-color: #f0f0f0;margin: 0;padding: 20px;display: flex;justify-content: center;align-items: center;height: 100vh;}.myLoginStyle {background-color: #fff;border: 1px solid #ccc;border-radius: 5px;padding: 20px;width: 300px;box-shadow: 0 2px 4px rgba(0, 0, 0, 0.1);}.myNameDivStyle,.myPassowordStyle {margin-bottom: 10px;display: flex;align-items: center;}.myNameDivStyle label,.myPassowordStyle label {width: 60px;text-align: right;margin-right: 10px;}.myNameInputStyle,.myPasswordInputStyle {width: calc(100% - 70px); /* 减去标签宽度 */padding: 10px;border: 1px solid #ccc;border-radius: 5px;font-size: 16px;}.myNameInputStyle:focus,.myPasswordInputStyle:focus {outline: none;border-color: #007bff;box-shadow: 0 0 5px rgba(0, 123, 255, 0.5);}button {background-color: #007bff;color: white;border: none;padding: 10px 20px;font-size: 16px;cursor: pointer;border-radius: 5px;margin-top: 10px;transition: background-color 0.3s ease;width: 100%;}button:hover {background-color: #0056b3;}</style>
</head>
<body><div class="myLoginStyle"><div class="myNameDivStyle"><label for="username">用户:</label><input type="text" id="username" placeholder="请输入用户名" class="myNameInputStyle"></div><div class="myPassowordStyle"><label for="password">密码:</label><input type="password" id="password" placeholder="请输入密码" class="myPasswordInputStyle"></div><button id="submitButtonStyle">登录</button></div><!-- 表单验证 --><script>//获取用户输入框var myNameInput = document.querySelector(".myNameInputStyle");//获取密码框var myPasswordInput = document.querySelector(".myPasswordInputStyle");//获取登录按钮var submitButton = document.querySelector("#submitButtonStyle");//用户输入框获得焦距修改样式myNameInput.onfocus = function () {//文字样式修改myNameInput.style.borderColor = "#007bff";myNameInput.style.boxShadow = "0 0 5px rgba(0, 123, 255, 0.5)";myNameInput.style.fontSize = "16px"; // 修复字体大小}myPasswordInput.onfocus = function () {//文字样式修改myPasswordInput.style.borderColor = "#007bff";myPasswordInput.style.boxShadow = "0 0 5px rgba(0, 123, 255, 0.5)";myPasswordInput.style.fontSize = "16px"; // 修复字体大小}//输入框失去焦距修改样式myNameInput.onblur = function () {//文字样式修改myNameInput.style.borderColor = "#ccc";myNameInput.style.boxShadow = "none";myNameInput.style.fontSize = "16px"; // 修复字体大小if (myNameInput.value === "") {alert("用户名不能为空");}}myPasswordInput.onblur = function () {//文字样式修改myPasswordInput.style.borderColor = "#ccc";myPasswordInput.style.boxShadow = "none";myPasswordInput.style.fontSize = "16px"; // 修复字体大小if (myPasswordInput.value === "") {alert("密码不能为空");}}// 登录按钮的判断submitButton.onclick = function () {// 获取用户输入的用户名和密码var username = myNameInput.value;var password = myPasswordInput.value;// 判断用户名和密码是否为空if (username === "" || password === "") {alert("用户名或密码不能为空");return;}alert("登录成功!"+ "\n用户名:" + username+ "\n密码:" + password);}</script>
</body>
</html>
2.效果
初始界面

用户名验证

密码框验证
注:这里只是简单的使用了一下非空判断,如果要进行复杂的判断可以使用正则表达式去判断
登录验证


密码验证不去实验了有兴趣可以自己去测试
登录成功验证


3.解释
HTML结构
- 页面有一个标题“登录表单的验证”。
- 页面中心有一个登录框,它包含两个输入字段:一个是用户名,另一个是密码。
- 用户名和密码输入框都有占位符提示用户输入什么内容。
- 有一个登录按钮。
CSS样式
- 页面整体使用了浅灰色背景,字体为Arial或无衬线字体。
- 登录框是一个白色的方块,有圆角、边框和阴影效果,看起来比较美观。
- 输入框旁边有标签显示“用户:”和“密码:”,并且当输入框获得焦点时会有蓝色边框和阴影效果。
- 登录按钮是蓝色的,鼠标悬停时颜色会变深一点。
JavaScript功能
- 当用户名输入框获得焦点时,边框颜色变成蓝色,并且出现一个轻微的蓝色阴影效果。
- 当用户名输入框失去焦点时,如果用户没有输入任何内容,则会弹出警告提示“用户名不能为空”。
- 密码输入框的行为与用户名输入框类似,只是它检查的是密码是否为空。
- 当点击登录按钮时,脚本会检查用户名和密码是否都已填写。如果有任何一个为空,就弹出警告说“用户名或密码不能为空”。如果都填写了,则会弹出一个消息窗口显示“登录成功!”以及用户输入的用户名和密码。
2.鼠标事件
- click 鼠标单击出发
- dbclick 鼠标双击出发
- mouseover 鼠标悬浮触发
- mouseenter 鼠标移入触发
- mouseleave 鼠标移除出发
- mousedown 鼠标任意按下按下出发
- mouseup 鼠标任意案件抬起出发
- mousemove 当元素内鼠标指针移动时持续触发
案例:单击鼠标使小球跳跃
1.代码
<!DOCTYPE html>
<html lang="en">
<head><meta charset="UTF-8"><meta name="viewport" content="width=device-width, initial-scale=1.0"><title>单击鼠标使小球跳跃</title><style>body {font-family: Arial, sans-serif;background-color: #f0f0f0;margin: 0;padding: 20px;display: flex;justify-content: center;align-items: center;height: 100vh;}#ballContainStyle {position: relative;width: 300px;height: 300px;background-color: #fff;border: 1px solid #ccc;border-radius: 5px;box-shadow: 0 2px 4px rgba(0, 0, 0, 0.1);overflow: hidden;}#ball {position: absolute;width: 30px;height: 30px;background-color: #007bff;border-radius: 50%;bottom: 0;left: 50%;transform: translateX(-50%);transition: all 0.5s ease;animation: ballBreath 1s linear infinite;}/*呼吸动画*/@keyframes ballBreath {0% {transform: scale(1);}50% {transform: scale(1.2);}100% {transform: scale(1);}}</style>
</head>
<body><div id="ballContainStyle"><div id="ball"></div></div><audio id="myAudio" src="https://freepd.com/music/The%20Celebrated%20Minuet.mp3" loop autoplay hidden></audio><script>// 获取容器和小球var ballContain = document.querySelector("#ballContainStyle");var ball = document.querySelector("#ball");// 初始化小球位置ball.style.bottom = '0px';// 点击事件处理ballContain.onclick = function () {// 获取小球当前的 bottom 值var ballBottom = parseInt(ball.style.bottom || 0);// 计算新的 bottom 值var newBottom = ballBottom + 200; // 向上跳// 检查新位置是否有效if (0 <= newBottom && newBottom <= ballContain.clientHeight) {ball.style.bottom = newBottom + "px";ball.style.transition = "all 0.5s ease";}};// 使用 setInterval() 小球自动下落setInterval(function () {// 获取小球当前的 bottom 值var ballBottom = parseInt(ball.style.bottom || 0);// 计算新的 bottom 值var newBottom = ballBottom - 10; // 向下落// 检查新位置是否有效if (0 <= newBottom && newBottom <= ballContain.clientHeight) {ball.style.bottom = newBottom + "px";} else if (newBottom < 0) { // 如果超出范围,重置到底部ball.style.bottom = '0px';}}, 30);</script>
</body>
</html>

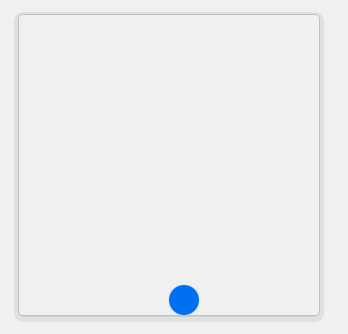
2.效果

3.解释
-
HTML部分:
- 页面有一个标题“使用左右键控制小球移动”。
- 有一个300x300像素大小的白色方块(
#ballContainStyle),里面包含一个蓝色的小球(#ball)。 - 页面还有一段隐藏的背景音乐,会自动播放并循环。
-
CSS样式:
- 整个页面居中显示,背景颜色是浅灰色。
- 小球容器有圆角、边框和阴影效果,看起来更美观。
- 小球是一个圆形,初始位置在容器底部中间,并且它会周期性地放大缩小,像是在呼吸一样。
-
JavaScript功能:
- 当你点击小球容器时,小球会向上跳起一段距离。
- 每隔30毫秒(大约每秒33次),小球会自动向下落一点。如果小球掉到容器外面了,它会重新出现在容器底部。
- 如果你按住左箭头键,小球会向左边移动;当你松开右箭头键时,小球会向右边移动。不过这里有个小问题:通常我们会在按键按下时处理移动逻辑,而不是在按键松开时。所以可能需要调整一下,让右箭头键也在按下时就触发移动。
3.键盘事件
- keypress 按键盘按键时触发
- keydown 按键盘按键时触发
- keyup 键盘按键弹起时触发
案例:使用左右键控制小球左右移动
1.代码
<!DOCTYPE html>
<html lang="en">
<head><meta charset="UTF-8"><meta name="viewport" content="width=device-width, initial-scale=1.0"><title>使用左右键控制小球移动</title><style>body {font-family: Arial, sans-serif;background-color: #f0f0f0;margin: 0;padding: 20px;display: flex;justify-content: center;align-items: center;height: 100vh;}#ballContainStyle {position: relative;width: 300px;height: 300px;background-color: #fff;border: 1px solid #ccc;border-radius: 5px;box-shadow: 0 2px 4px rgba(0, 0, 0, 0.1);overflow: hidden;}#ball {position: absolute;width: 30px;height: 30px;background-color: #007bff;border-radius: 50%;bottom: 0;left: 50%;transform: translateX(-50%);transition: all 0.5s ease;animation: ballBreath 1s linear infinite;}/*呼吸动画*/@keyframes ballBreath {0% {transform: scale(1);}50% {transform: scale(1.2);}100% {transform: scale(1);}}</style>
</head>
<body><div id="ballContainStyle"><div id="ball"></div></div><audio id="myAudio" src="https://freepd.com/music/The%20Celebrated%20Minuet.mp3" loop autoplay hidden></audio><script>// 获取容器和小球var ballContain = document.querySelector("#ballContainStyle");var ball = document.querySelector("#ball");// 初始化小球位置ball.style.bottom = '0px';// 点击事件处理ballContain.onclick = function () {// 获取小球当前的 bottom 值var ballBottom = parseInt(ball.style.bottom || 0);// 计算新的 bottom 值var newBottom = ballBottom + 200; // 向上跳// 检查新位置是否有效if (0 <= newBottom && newBottom <= ballContain.clientHeight) {ball.style.bottom = newBottom + "px";ball.style.transition = "all 0.5s ease";}};// 使用 setInterval() 小球自动下落setInterval(function () {// 获取小球当前的 bottom 值var ballBottom = parseInt(ball.style.bottom || 0);// 计算新的 bottom 值var newBottom = ballBottom - 10; // 向下落// 检查新位置是否有效if (0 <= newBottom && newBottom <= ballContain.clientHeight) {ball.style.bottom = newBottom + "px";} else if (newBottom < 0) { // 如果超出范围,重置到底部ball.style.bottom = '0px';}}, 30);//左键小球位移向左移动document.onkeydown = function (event) {var keyCode = event.keyCode;//这是键盘按下时触发//如果是左键的话修改小球位置// 左键if (keyCode === 37) {var ballLeft = parseInt(ball.style.left || 50);var newLeft = ballLeft - 10;if (newLeft >= 0) {ball.style.left = newLeft + "%";}}}//右键小球向右移动document.onkeyup = function (event) {var keyCode = event.keyCode;//这是键盘弹起时触发//如果是右键的话修改小球位置// 右键if (keyCode === 39) {var ballLeft = parseInt(ball.style.left || 50);var newLeft = ballLeft + 10;if (newLeft <= 100) {ball.style.left = newLeft + "%";}}}</script>
</body>
</html>

2.效果
3.解释
-
HTML结构:
- 页面有一个标题“使用左右键控制小球移动”。
- 有一个容器
#ballContainStyle,里面包含一个小球#ball。 - 还有一段隐藏的背景音乐。
-
CSS样式:
- 页面设置了背景颜色、居中对齐等基本样式。
- 小球容器是一个300x300像素的白色盒子,有轻微的阴影效果。
- 小球是蓝色的圆形,初始位置在容器底部中央,并且有一个呼吸动画让它周期性地放大缩小。
-
JavaScript功能:
- 当你点击小球容器时,小球会向上跳起一定距离。
- 每隔30毫秒(即每秒约33次),小球会自动向下落一点,如果它落到容器底部以下,则会重新出现在底部。
- 如果按下左箭头键(键盘上的向左箭头),小球会向左移动一段距离。
- 如果松开右箭头键(键盘上的向右箭头),小球会向右移动一段距离。不过这里有个小错误,通常我们会在按键按下的时候处理移动逻辑,而不是在按键松开的时候。