《花100块做个摸鱼小网站! 》第六篇—将小网站部署到云服务器上
⭐️基础链接导航⭐️
服务器 → ☁️ 阿里云活动地址
看样例 → 🐟 摸鱼小网站地址
学代码 → 💻 源码库地址
一、前言
到这一篇我们终于把环境搭好,也做好了几个热搜小组件,为了让我们方便展示成果或者方便自己摸鱼,我们需要将这个小网站部署上云。整体流程并不复杂,但有很多个小细节。如果某个细节处理不当,可能会导致部署失败,因此这是一个不断尝试和调整的过程。基本流程包括:修改配置、打包、上传、运行和调试,然后反复进行,直到成功。
二、前端资源打包
1. 修改配置
找到apiService.js文件,将baseURL改成自己的服务器的IP地址,端口建议使用80,因为http协议默认端口是80,https协议默认端口是443,这个应该都知道吧,如下:
// apiService.js
import axios from "axios";// 创建axios实例并配置基础URL
const apiClient = axios.create({baseURL: "http://ip:80/api",headers: {"Content-Type": "application/json"},
});export default {// 封装Get接口get(fetchUrl) {return apiClient.get(fetchUrl);}
};
找到vue.config.js文件,将下面的配置替换一下,主要用于优化打包出来的文件,将一些不必要的文件去掉,如下:
const { defineConfig } = require('@vue/cli-service')
module.exports = defineConfig({transpileDependencies: true,// 去除Vue打包后js目录下生成的一些.map文件,用于加速生产环境构建。productionSourceMap: false,// 去除Vue打包后.css和.js文件名称中8位hash值,跟缓存有关;一般为true就行。filenameHashing:false
})
2. 执行打包命令
打开命令行,输入打包命令,如下:
npm run build
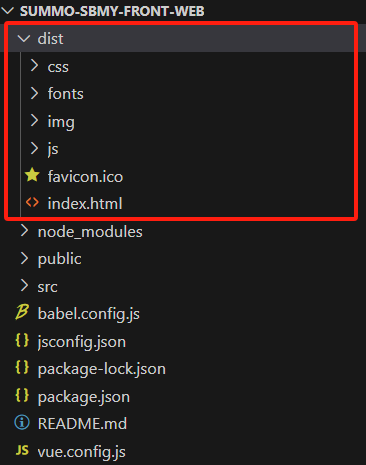
打包结束后,会有一个dist文件夹,里面包括html、js、css等文件,如下:
3. 提供资源访问接口
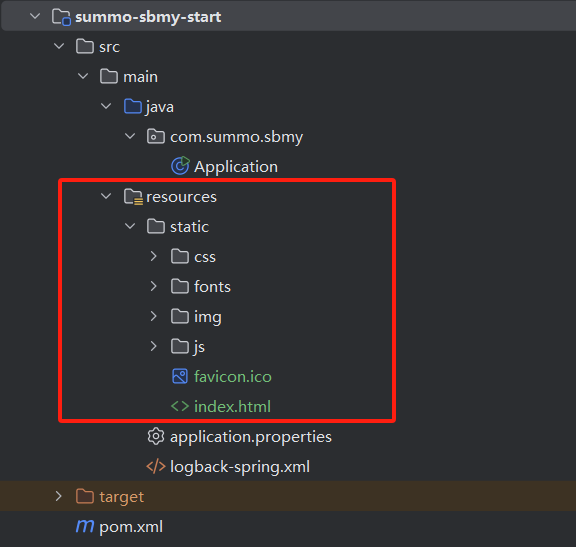
在summo-sbmy-start这个module的resources目录下创建一个static文件,把dist里面的内容复制进去(ps:不包括dist目录本身),如下:
在application.properties中添加thymeleaf配置,如下:
spring.thymeleaf.prefix=classpath:/static/
spring.thymeleaf.suffix=.html
spring.thymeleaf.mode=HTML
最后在在summo-sbmy-web这个module下创建IndexController.java,如下:
package com.summo.sbmy.web.controller;import org.springframework.stereotype.Controller;
import org.springframework.web.bind.annotation.GetMapping;@Controller
public class IndexController {@GetMapping("/")public String index(){return "index";}
}
这些做好之后,启动应用,访问http://localhost/,没有问题的话,应该就可以访问了。
如果你发现图标加载不出来,那可能是有个打包配置没有弄好,将<include>**/*.svg</include>这行配置放到summo-sbmy-start这个module的 <build>标签下,如下:
<resources><resource><!-- 指定配置文件所在的resource目录 --><directory>src/main/resources</directory><includes><include>application.properties</include><include>logback-spring.xml</include><include>**/*.html</include><include>**/*.js</include><include>**/*.css</include><include>**/*.svg</include></includes><filtering>true</filtering></resource><resource><!-- 指定配置文件所在的resource目录 --><directory>src/main/resources</directory><includes><include>**/*.woff</include><include>**/*.ttf</include><include>**/*.xdb</include><include>**/*.jks</include><include>**/*.svg</include></includes><filtering>false</filtering></resource>
</resources>
配置和接口都弄好之后,启动应用重新访问一下,这时应该就可以看到图标了。

三、后端应用打包
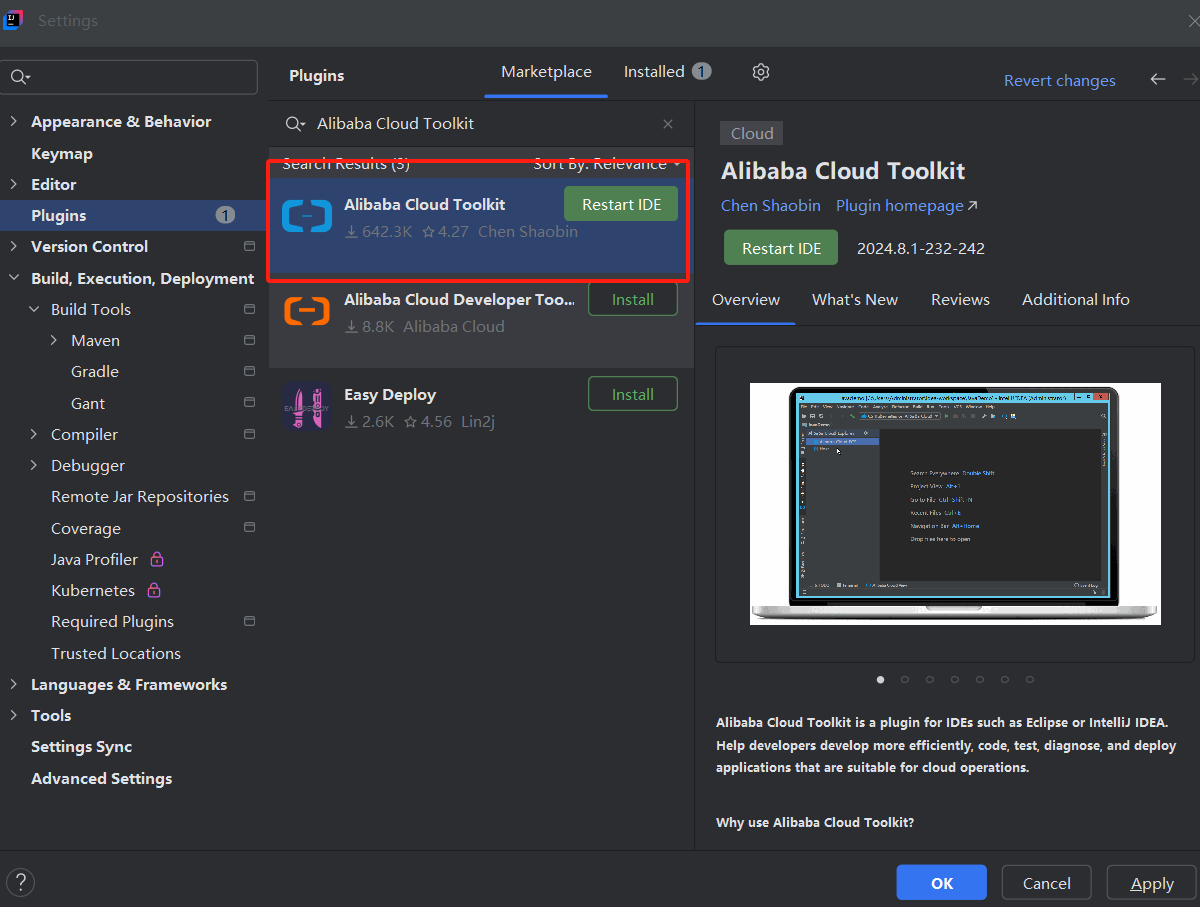
在打包上传之前我们先做一些小准备,打开我们的idea工具,找到插件管理,一般是File —> Settings —> Plugins,搜索Alibaba Cloud Toolkit,下载安装一下,如下:
下载安装好之后,有一个Alibaba Cloud View,这里可以直接连接到我们买的阿里云ECS服务器,如下:

这个插件可以上传文件,也可以直接打开终端,这样就不用下载专门的软件连接ECS了,很方便。
1. xxl-job应用部署
(1) 应用打包
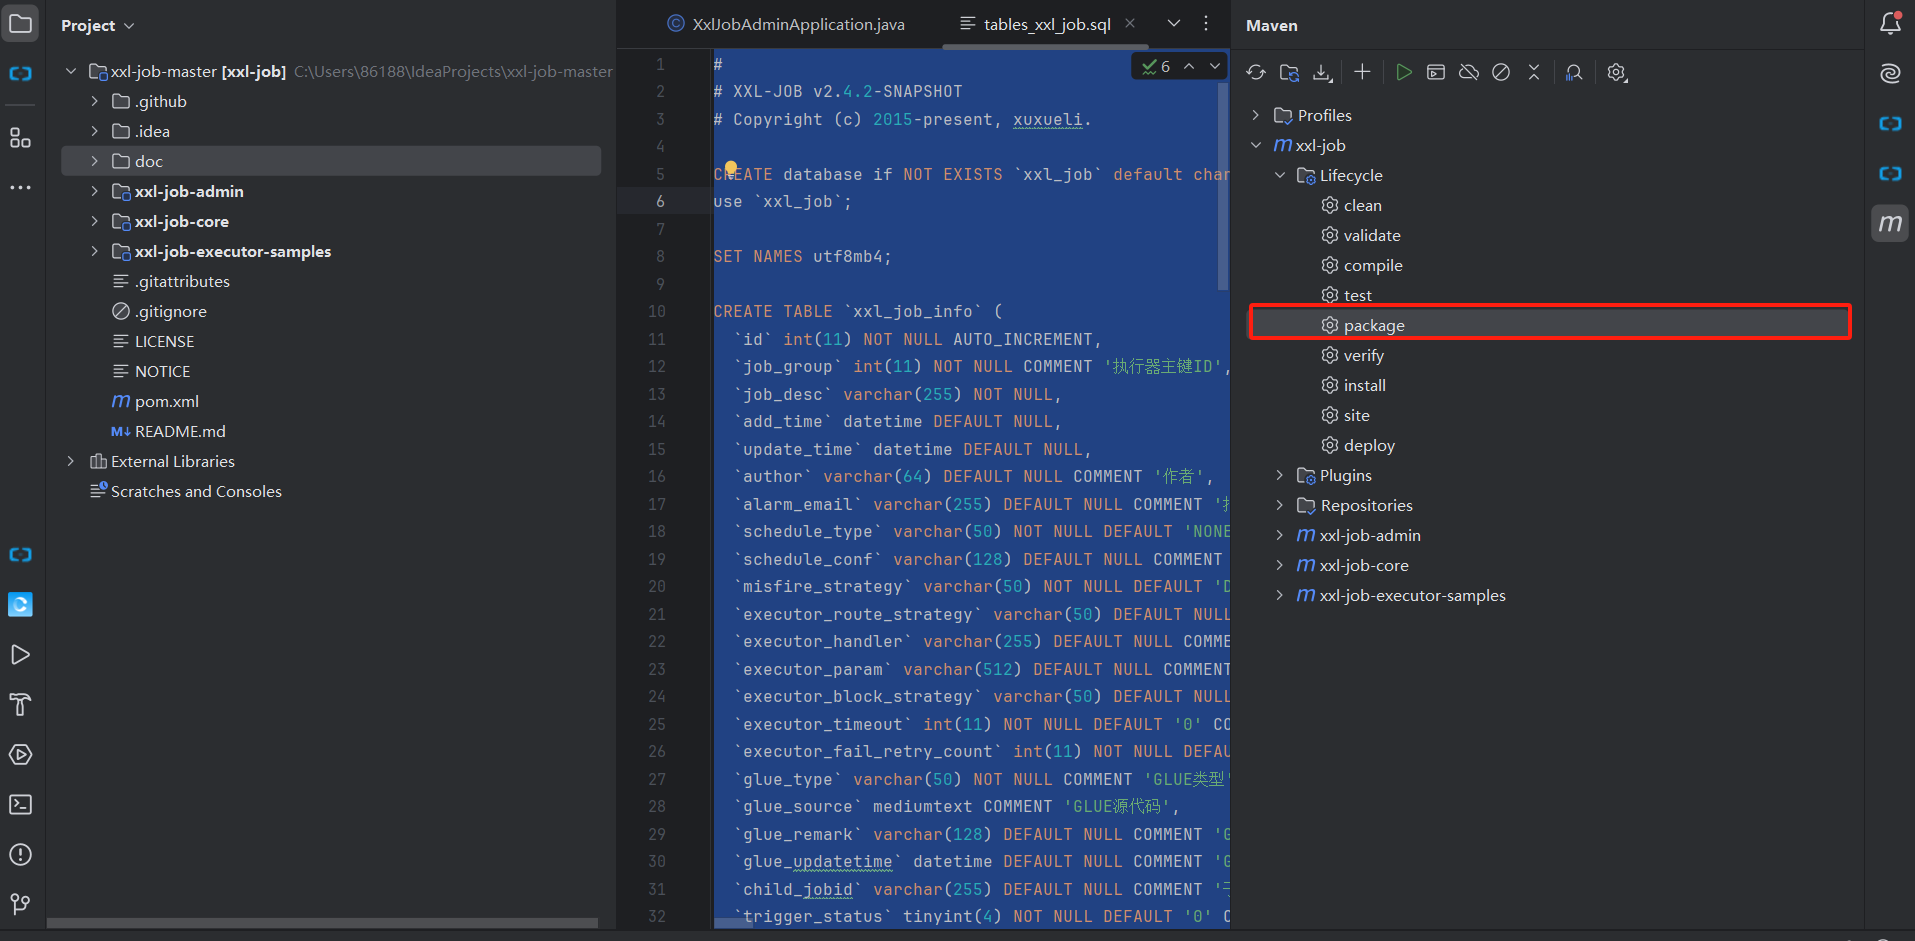
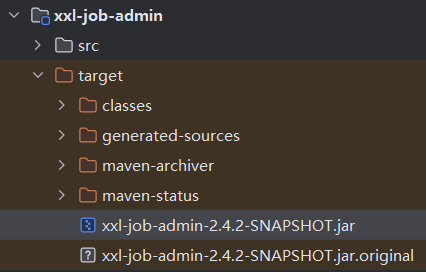
找到Maven插件,执行package命令,如下:
打包出来,如下:
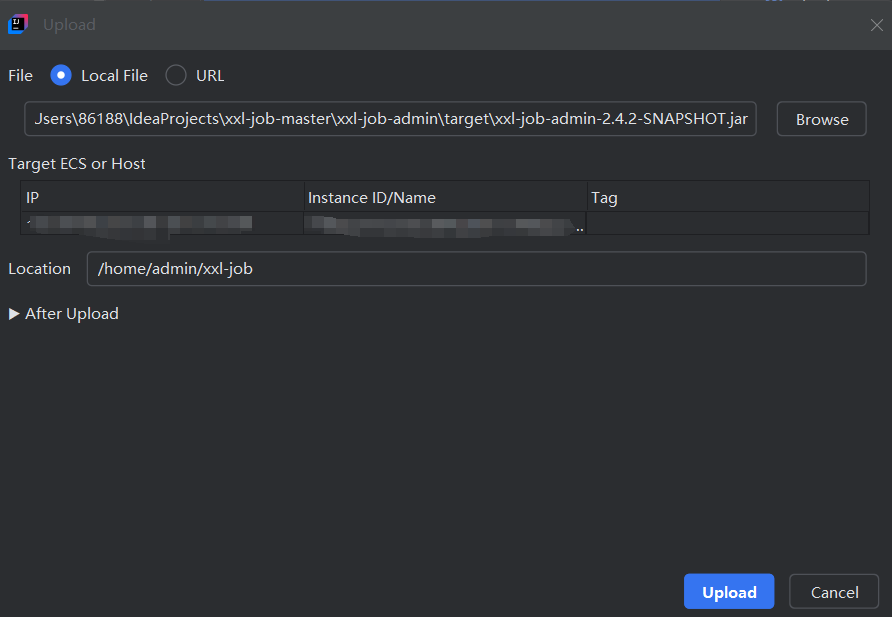
(2) 应用上传
使用刚才下载的阿里云插件,可以直接将打包出来的jar包上传到指定的目录,我设置的是/home/admin/xxl-job,如下:
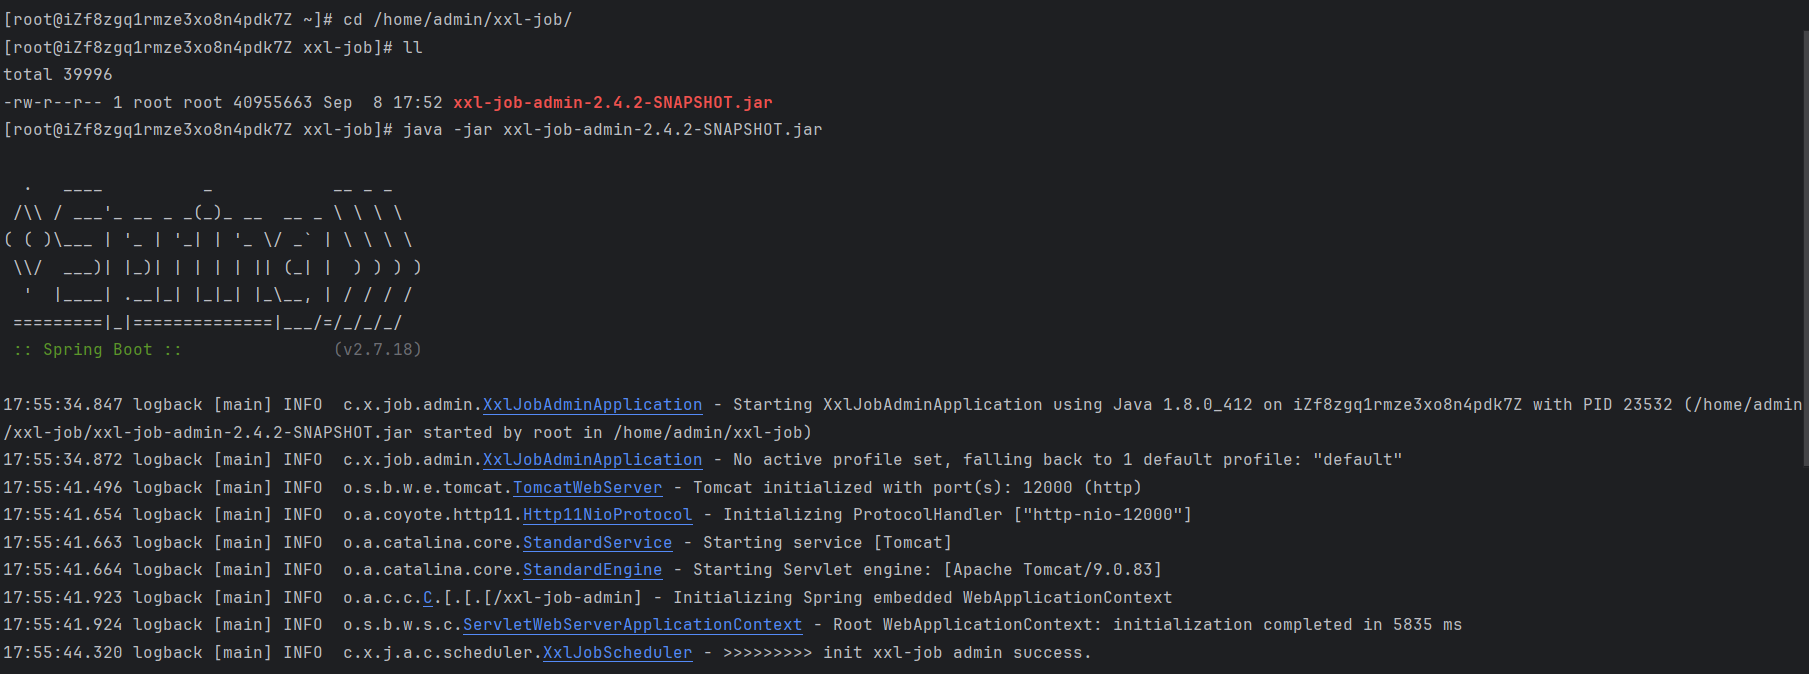
上传后,打开终端,可以启动一下,看看有没有问题,如下:
(3) 执行脚本
在我们使用SpringBoot框架开发完一个项目后,需要将该项目打成jar包,放到用于生产的服务器上去运行。一般都是执行 java -jar xxx.jar &命令运行,但是这样是有问题的。
比如启动时需要加入参数,如-Dxxx=xxx,这个命令就会很长不易读且容易忘。所以,最好是使用shell脚本将配置与命令维护起来。
新建一个shell脚本,名为start.sh,如下:
#!/bin/bash
#这里可替换为你自己的执行程序,其他代码无需更改
APP_NAME=xxx.jar#使用说明,用来提示输入参数
usage() {echo "Usage: sh 脚本名.sh [start|stop|restart|status]"exit 1
}#检查程序是否在运行
is_exist(){pid=`ps -ef|grep $APP_NAME|grep -v grep|awk '{print $2}' `#如果不存在返回1,存在返回0if [ -z "${pid}" ]; thenreturn 1elsereturn 0fi
}#启动方法
start(){is_existif [ $? -eq "0" ]; thenecho "${APP_NAME} is already running. pid=${pid} ."elsenohup java -jar /home/admin/$APP_NAME > /dev/null 2>&1 &echo "${APP_NAME} start success"fi
}#停止方法
stop(){is_existif [ $? -eq "0" ]; thenkill -9 $pidelseecho "${APP_NAME} is not running"fi
}#输出运行状态
status(){is_existif [ $? -eq "0" ]; thenecho "${APP_NAME} is running. Pid is ${pid}"elseecho "${APP_NAME} is NOT running."fi
}#重启
restart(){stopstart
}#根据输入参数,选择执行对应方法,不输入则执行使用说明
case "$1" in"start")start;;"stop")stop;;"status")status;;"restart")restart;;*)usage;;
esac
使用方式如下:
- 给start.sh文件授权:
chmod 744 start.sh - 启动服务,在当前目录下执行:
./start.sh start - 关闭服务,在当前目录下执行:
./start.sh stop - 重启服务,在当前目录下执行:
./start.sh restart - 查看服务状态,在当前目录下执行:
./start.sh status
2. summo-sbmy应用部署
打包、上传、启动和上面的xxl-job应用一样的步骤,我就不赘述了。
这里说一点别的:在打包时如何指定配置文件?
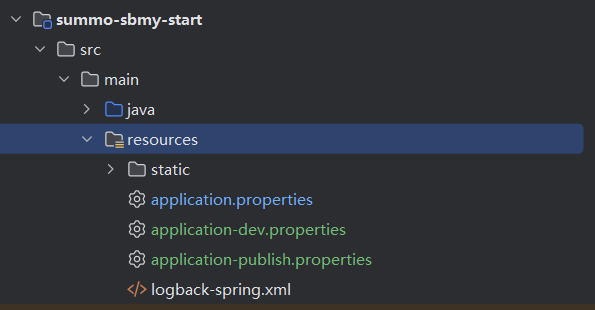
就是开发的时候我们一般会有两个配置文件(或者更多):日常的application-dev.properties;线上的application-publish.properties。这两个文件配置是一样的,但是使用的资源不同,开发和线上的MySQL、Redis等资源是两套,就像这样,如下:
这里可能有同学有疑惑,既然有了日常和线上环境的配置文件,为啥还要有application.properties这个文件?
这里的application.properties我们可以当做是一个配置文件容器,它可以将其他配置文件的内容加到这里来。还有一个原因就是因为SpringBoot项目启动的时候只认识application.properties文件,不认识其他的。
(1) 环境配置区分
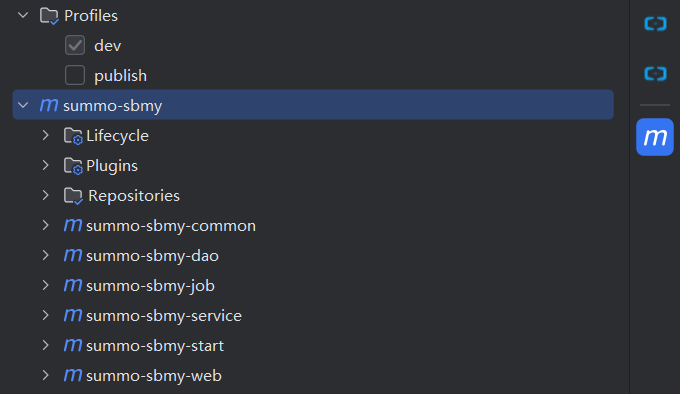
首先我们在这个module下添加环境配置,如下:
 <!-- 添个环境的变量,变量名为environment -->
<profiles><profile><id>dev</id><activation><activeByDefault>true</activeByDefault></activation><properties><environment>dev</environment></properties></profile><profile><id>publish</id><properties><environment>publish</environment></properties></profile>
</profiles><build><finalName>summo-sbmy</finalName><resources><resource><!-- 指定配置文件所在的resource目录 --><directory>src/main/resources</directory><includes><include>application.properties</include><include>application-${environment}.properties</include></includes><filtering>true</filtering></resource>... 其他配置</resources>
</build>
刷新一下Maven插件,这两个配置就会被扫描到了,如下:
(2) 使用spring.profiles.active指定环境
在application.properties文件中加入spring.profiles.active=@environment@配置,将那些不变的配置也可以放进来,如下:
#通过配置的方式激活环境
spring.profiles.active=@environment@# 项目名称
spring.application.name=summo-sbmy
# 服务器端口
server.port=80# 资源扫描配置
spring.thymeleaf.prefix=classpath:/static/
spring.thymeleaf.suffix=.html
spring.thymeleaf.mode=HTML# Mybatis自动映射
mybatis.configuration.auto-mapping-behavior=full
# Mybatis自动映射下划线到驼峰格式
mybatis.configuration.map-underscore-to-camel-case=true
# MyBatis-Plus Mapper的XML映射文件路径
mybatis-plus.mapper-locations=classpath*:/mybatis/mapper/*.xml
(3) 打包命令
- 日常环境打包指令
mvn clean package -Dmaven.test.skip=true -P=daily
- 正式环境打包指令
mvn clean package -Dmaven.test.skip=true -P=publish
四、小结一下
上面说的在打包时指定配置文件,如果大家嫌麻烦的话,也可以只用一份application.properties文件,省的麻烦。我是开发环境和线上环境的数据库是两套,所以使用不同的配置文件。
包打好之后上传到云服务器这一步不难,启动方式建议使用我推荐的start.sh脚本,这个应该也不难。阿里云ECS的安全组规则好像默认对80、443端口是全量放开的,所以只要你启动没有什么问题的话,在浏览器输入你的机器公网IP就可以访问达到你的小网站了。
因为部署的细节比较多,可能大家会出现这样那样的问题,如果有问题的话,欢迎评论区留言。
番外:百度贴吧热榜爬虫
1. 爬虫方案评估
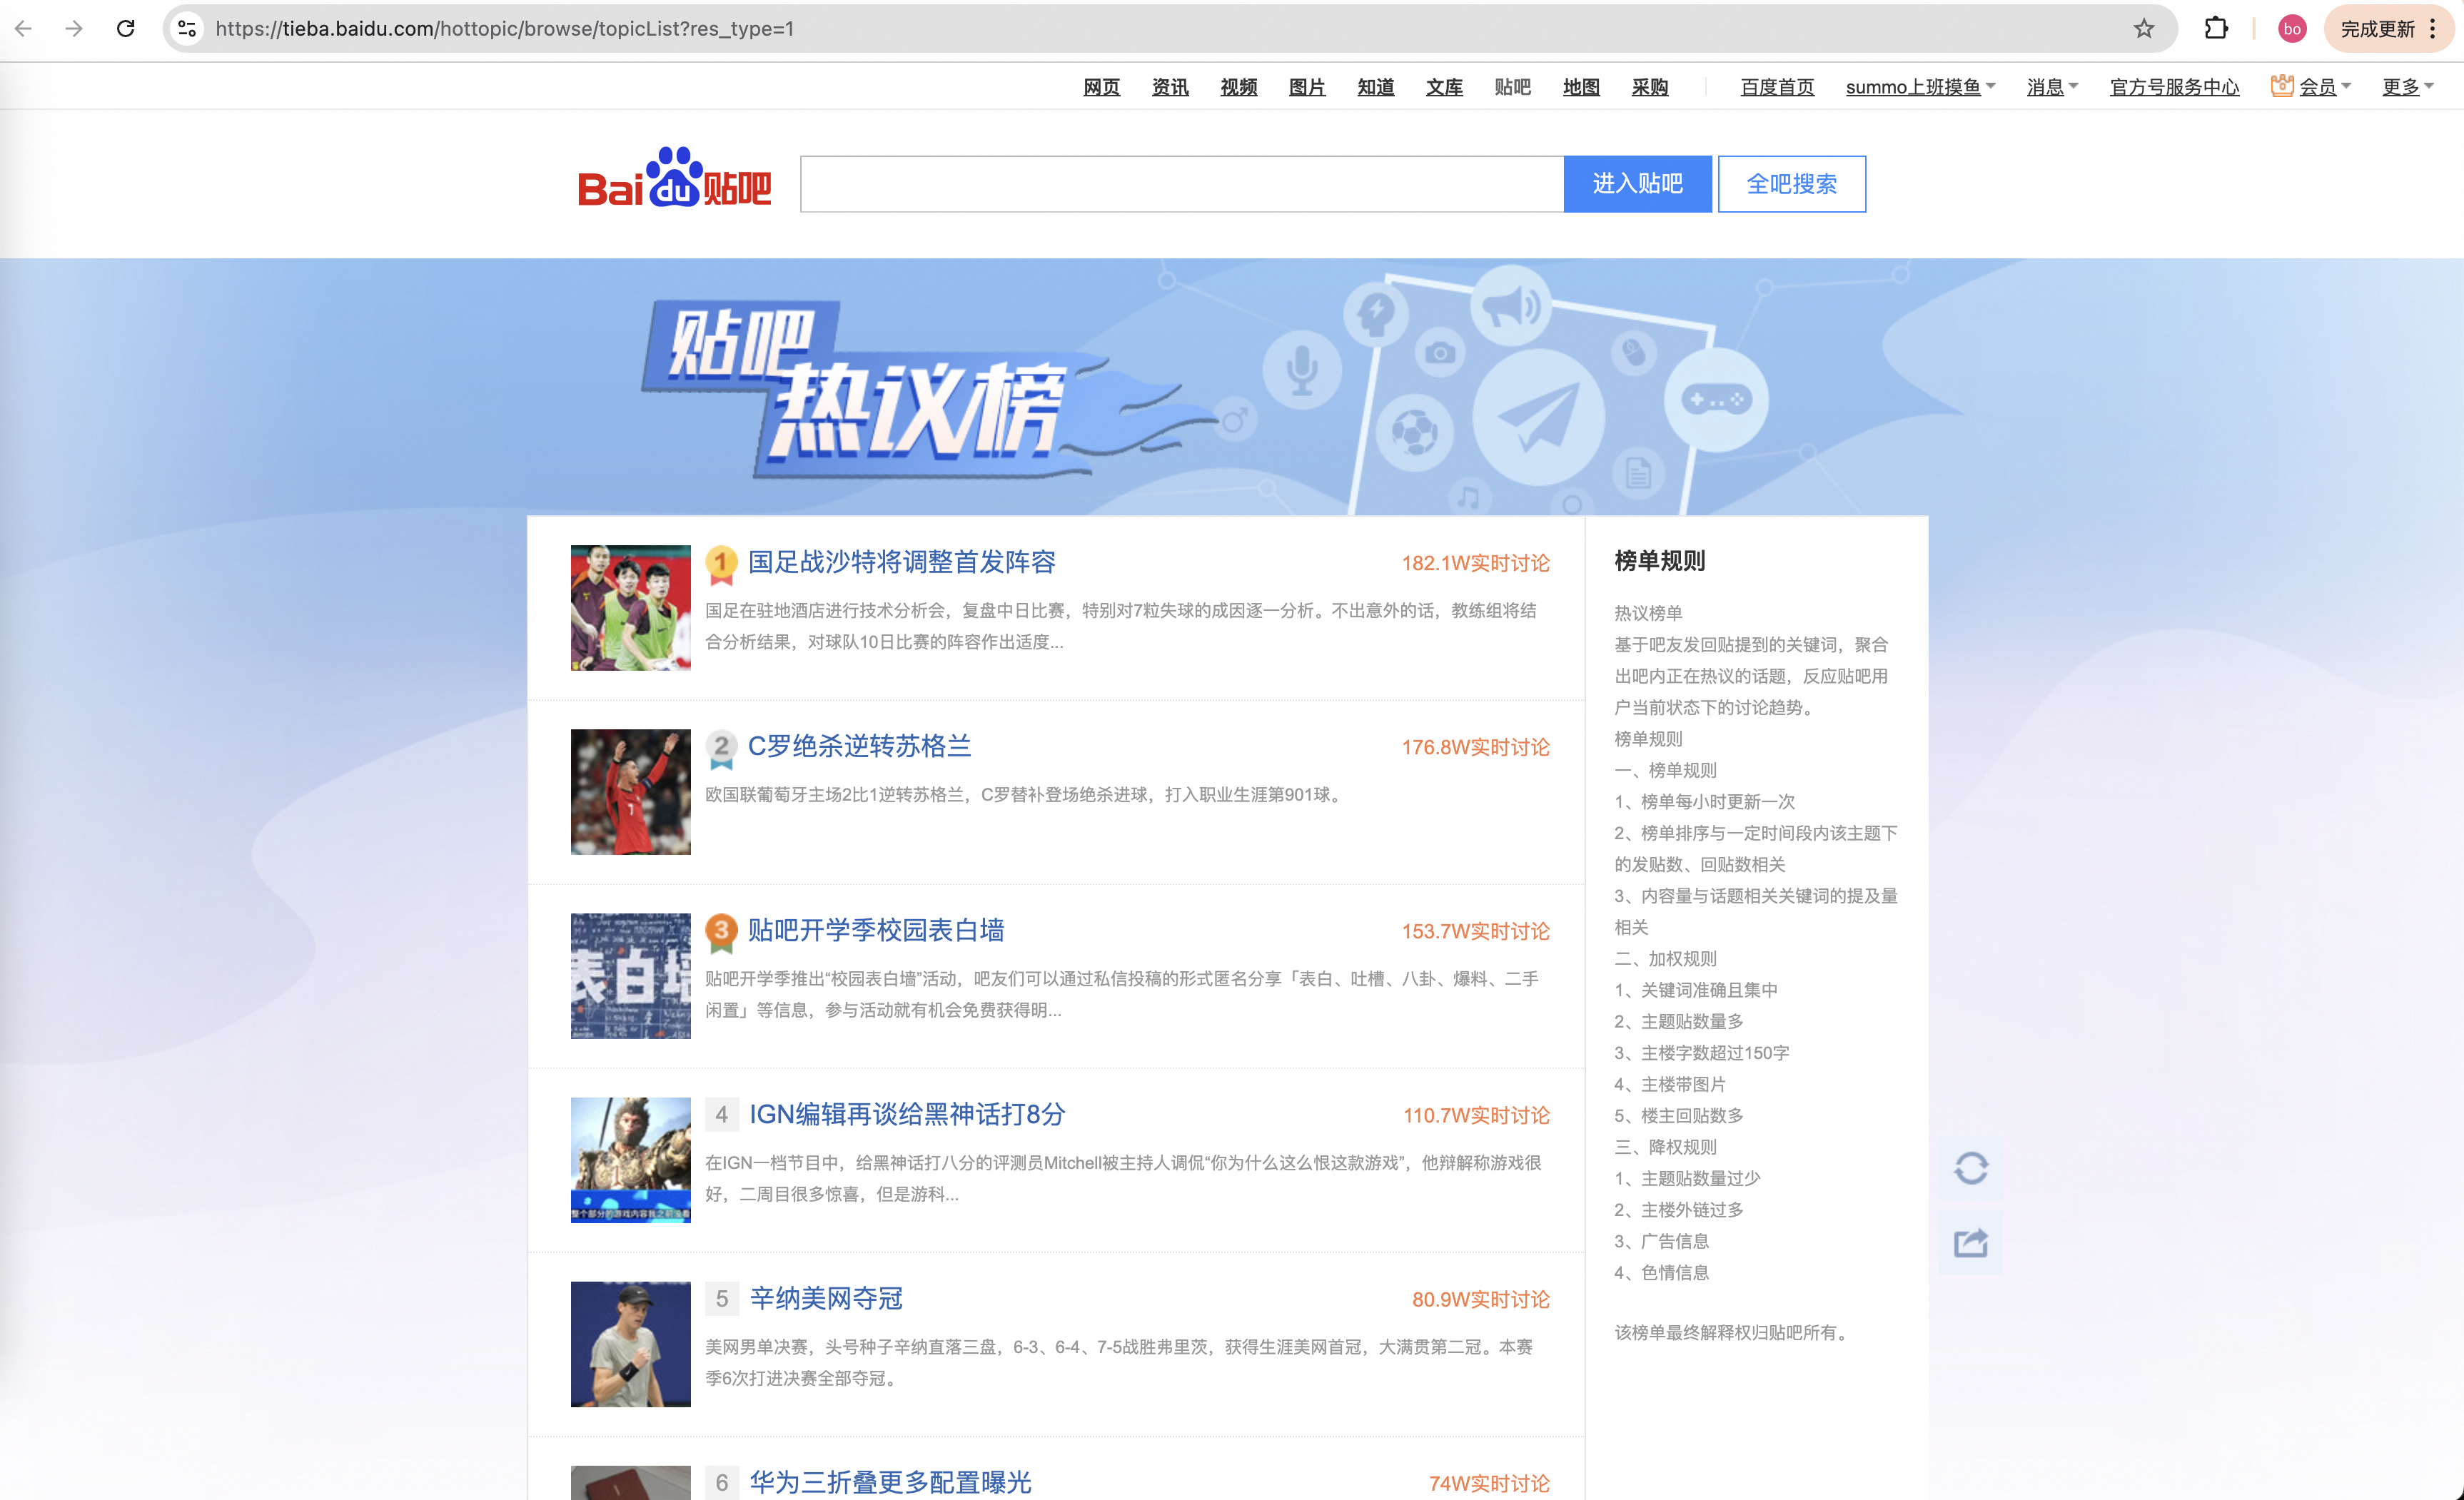
百度贴吧热榜是这样的, 接口是:https://tieba.baidu.com/hottopic/browse/topicList?res_type=1
这又是一个网页版热搜榜,网页版的数据解析需要用户到jsoup,这个工具的使用在前面已经说过了,我直接放代码了。
2. 网页解析代码
TiebaHotSearchJob.java
package com.summo.sbmy.job.tieba;import java.io.IOException;
import java.net.URI;
import java.net.URLDecoder;
import java.nio.charset.StandardCharsets;
import java.util.Calendar;
import java.util.HashMap;
import java.util.List;
import java.util.Map;
import java.util.stream.Collectors;import javax.annotation.PostConstruct;import com.google.common.collect.Lists;
import com.summo.sbmy.common.model.dto.HotSearchDetailDTO;
import com.summo.sbmy.dao.entity.SbmyHotSearchDO;
import com.summo.sbmy.service.SbmyHotSearchService;
import com.summo.sbmy.service.convert.HotSearchConvert;
import com.xxl.job.core.biz.model.ReturnT;
import com.xxl.job.core.handler.annotation.XxlJob;
import lombok.extern.slf4j.Slf4j;
import org.apache.commons.collections4.CollectionUtils;
import org.apache.commons.lang3.StringUtils;
import org.jsoup.Jsoup;
import org.jsoup.nodes.Document;
import org.jsoup.select.Elements;
import org.springframework.beans.factory.annotation.Autowired;
import org.springframework.stereotype.Component;import static com.summo.sbmy.common.cache.SbmyHotSearchCache.CACHE_MAP;
import static com.summo.sbmy.common.enums.HotSearchEnum.TIEBA;/*** @author summo* @version DouyinHotSearchJob.java, 1.0.0* @description 贴吧热搜Java爬虫代码* @date 2024年08月09*/
@Component
@Slf4j
public class TiebaHotSearchJob {@Autowiredprivate SbmyHotSearchService sbmyHotSearchService;@PostConstructpublic void init() {try {// 调用 hotSearch 方法hotSearch(null);} catch (IOException e) {log.error("启动时调用热搜爬虫任务异常", e);}}@XxlJob("tiebaHotSearchJob")public ReturnT<String> hotSearch(String param) throws IOException {log.info("贴吧热搜爬虫任务开始");try {String url = "https://tieba.baidu.com/hottopic/browse/topicList?res_type=1";List<SbmyHotSearchDO> sbmyHotSearchDOList = Lists.newArrayList();Document doc = Jsoup.connect(url).get();//标题Elements titles = doc.select(".topic-top-item-desc");//热搜链接Elements urls = doc.select(".topic-text");//热搜指数Elements levels = doc.select(".topic-num");for (int i = 0; i < levels.size(); i++) {SbmyHotSearchDO sbmyHotSearchDO = SbmyHotSearchDO.builder().hotSearchResource(TIEBA.getCode()).build();//设置文章标题sbmyHotSearchDO.setHotSearchTitle(titles.get(i).text().trim());//设置文章连接sbmyHotSearchDO.setHotSearchUrl(urls.get(i).attr("href"));//设置知乎三方IDsbmyHotSearchDO.setHotSearchId(getValueFromUrl(sbmyHotSearchDO.getHotSearchUrl(), "topic_id"));//设置热搜热度sbmyHotSearchDO.setHotSearchHeat(levels.get(i).text().trim().replace("W实时讨论", "") + "万");//按顺序排名sbmyHotSearchDO.setHotSearchOrder(i + 1);sbmyHotSearchDOList.add(sbmyHotSearchDO);}if (CollectionUtils.isEmpty(sbmyHotSearchDOList)) {return ReturnT.SUCCESS;}//数据加到缓存中CACHE_MAP.put(TIEBA.getCode(), HotSearchDetailDTO.builder()//热搜数据.hotSearchDTOList(sbmyHotSearchDOList.stream().map(HotSearchConvert::toDTOWhenQuery).collect(Collectors.toList()))//更新时间.updateTime(Calendar.getInstance().getTime()).build());//数据持久化sbmyHotSearchService.saveCache2DB(sbmyHotSearchDOList);log.info("贴吧热搜爬虫任务结束");} catch (IOException e) {log.error("获取贴吧数据异常", e);}return ReturnT.SUCCESS;}/*** 从链接中获取参数** @param url   链接* @param param 想要提取出值的参数* @return* @throws Exception*/public static String getValueFromUrl(String url, String param) {if (StringUtils.isAnyBlank(url, param)) {throw new RuntimeException("从链接中获取参数异常,url或param为空");}try {URI uri = new URI(url);String query = uri.getQuery();Map<String, String> queryPairs = new HashMap<>();String[] pairs = query.split("&");for (String pair : pairs) {int idx = pair.indexOf("=");String key = URLDecoder.decode(pair.substring(0, idx), StandardCharsets.UTF_8.name());String value = URLDecoder.decode(pair.substring(idx + 1), StandardCharsets.UTF_8.name());queryPairs.put(key, value);}return queryPairs.get(param);} catch (Exception e) {log.error("提取参数发生异常", e);throw new RuntimeException("从链接中获取参数异常");}}
}