性能测试:Locust使用介绍(一)
介绍
Locust是一个用于HTTP和其他协议的开源性能/负载测试工具。使用Python代码编写测试脚本。
Locust可以从命令行或使用其基于web的UI运行。吞吐量、响应时间和错误可以实时查看和/或导出以供以后分析。
可以将常规Python库导入到测试中,并且使用Locust的可插拔架构,它可以无限扩展。与使用大多数其他工具不同,测试设计永远不会受到GUI或特定领域语言的限制。
安装
pip3 install locust
验证是否安装成功
locust -V
示例
Locust测试本质上只是一个向要测试的系统发出请求的Python程序。这使得它非常灵活,尤其擅长实现复杂的用户流。但它也可以进行简单的测试,所以让我们从这里开始:
from locust import HttpUser, taskclass HelloWorldUser(HttpUser):@taskdef hello_world(self):self.client.get("/hello")self.client.get("/world")
此用户将向/hello发出HTTP请求,然后向/world发出请求,然后重复。
Web界面
将/hello和/world更改为要测试的网站/服务上的一些实际路径,将代码放在当前目录中名为locostfile.py的文件中,然后运行locust:
locust
[2024-09-09 11:01:43,743] zhangkexin-ThinkPad-E480/INFO/locust.main: Starting web interface at http://0.0.0.0:8089
[2024-09-09 11:01:43,758] zhangkexin-ThinkPad-E480/INFO/locust.main: Starting Locust 2.31.5
打开http://localhost:8089
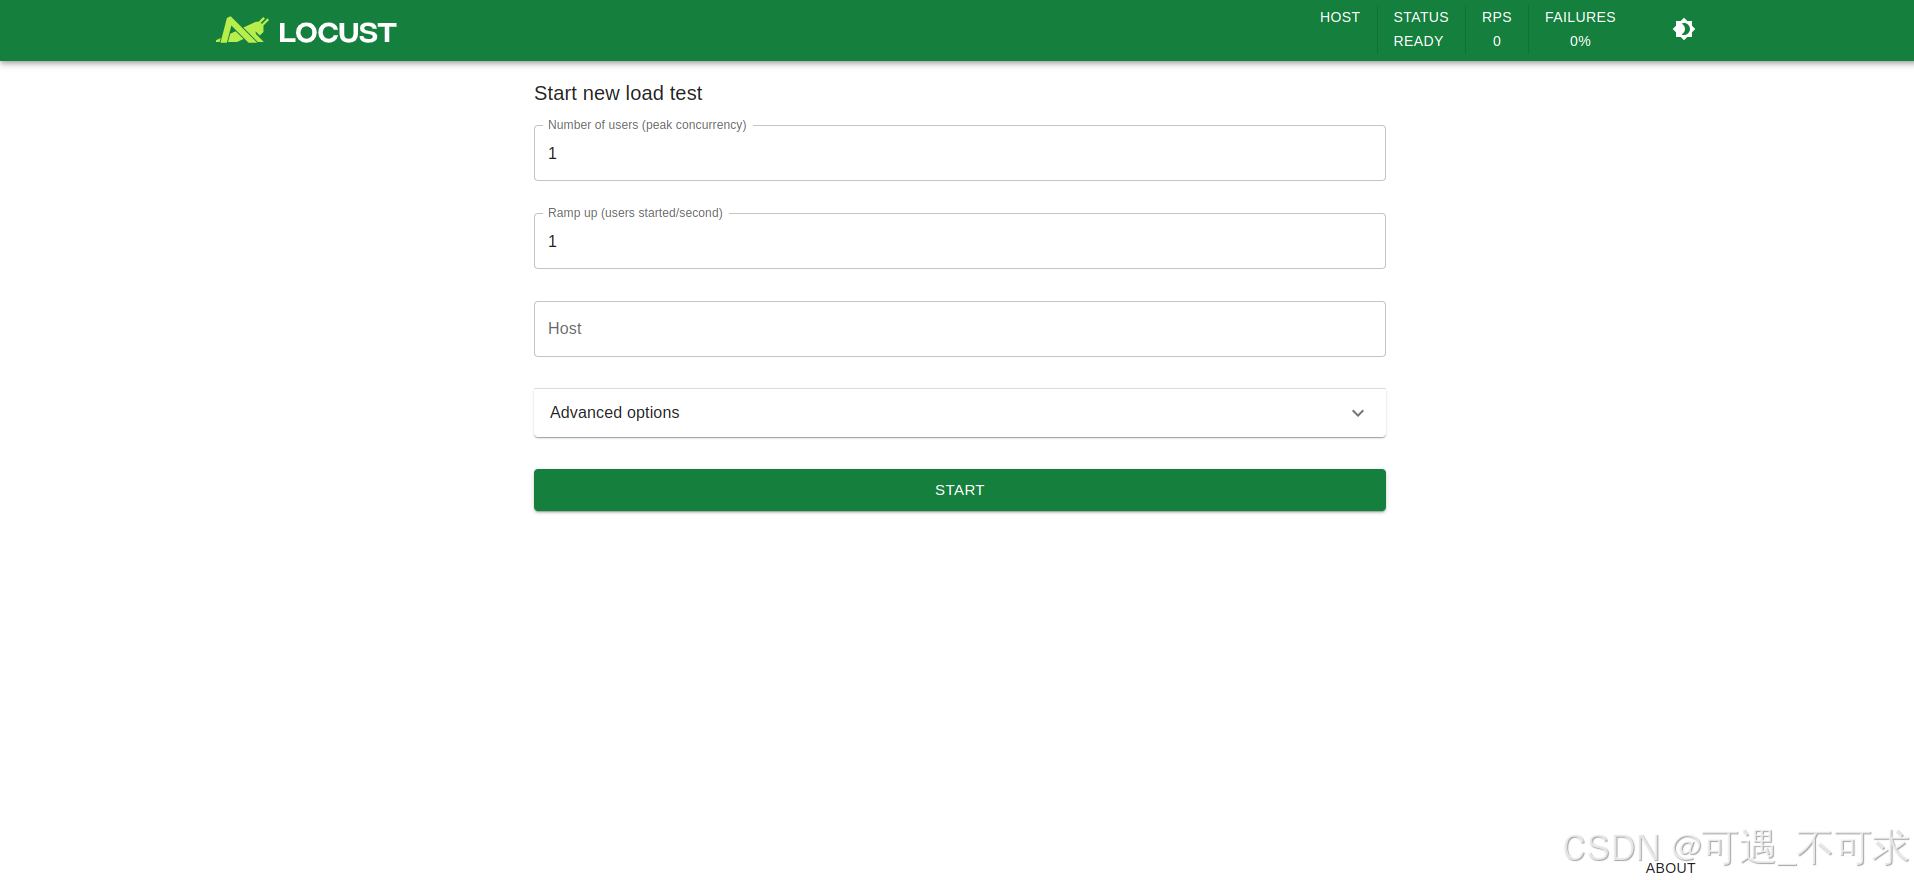
提供服务器的主机名并尝试一下!
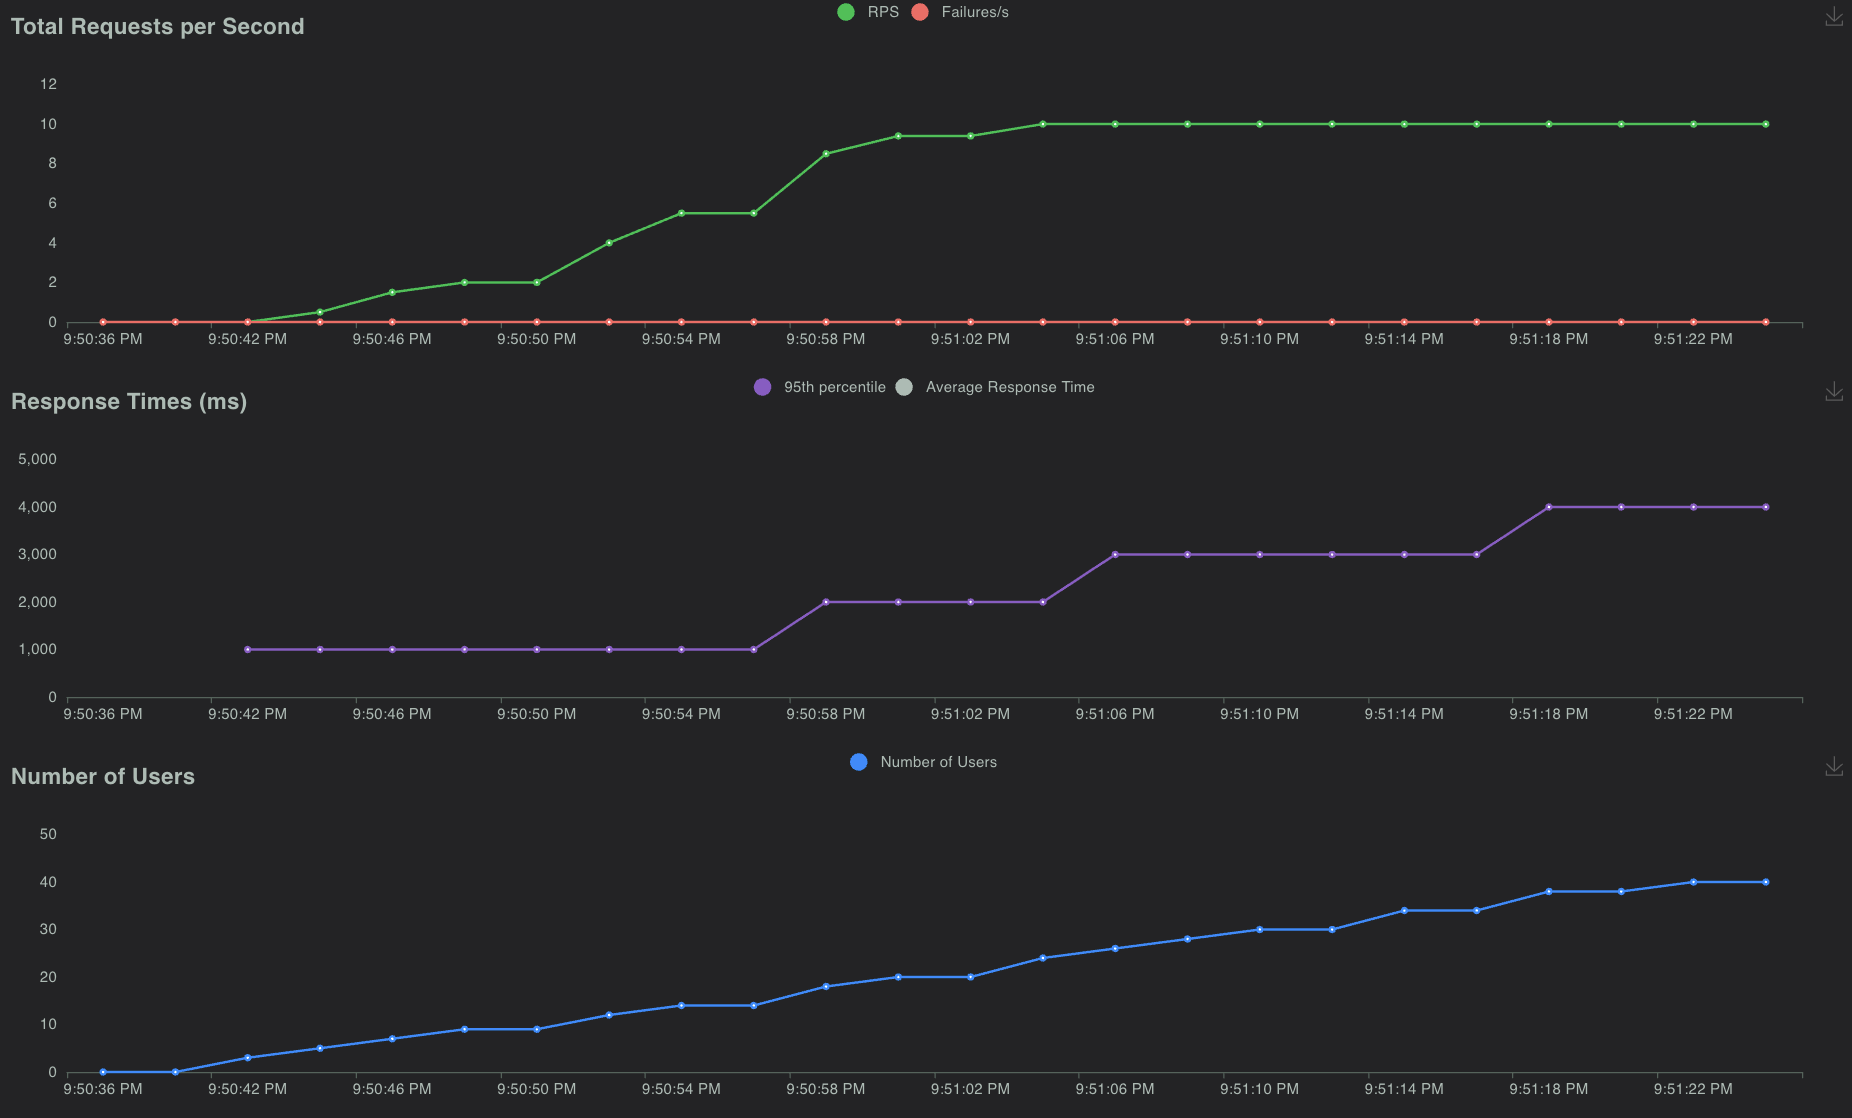
以下屏幕截图显示了使用50个并发用户运行此测试时的样子,爬坡率为1个用户/秒。

在图表选项卡下,可以找到每秒请求数(RPS)、响应时间和运行用户数等信息:
使用方法
完整示例:
import time
from locust import HttpUser, task, betweenclass QuickstartUser(HttpUser):wait_time = between(1, 5)@taskdef hello_world(self):self.client.get("/hello")self.client.get("/world")@task(3)def view_items(self):for item_id in range(10):self.client.get(f"/item?id={item_id}", name="/item")time.sleep(1)def on_start(self):self.client.post("/login", json={"username":"foo", "password":"bar"})
在这里,我们为将要模拟的用户定义一个类。它继承自HttpUser,HttpUser为每个用户提供了一个客户端属性,这是HttpSession的一个实例,可用于向我们想要负载测试的目标系统发出HTTP请求。当测试开始时,locust将为它模拟的每个用户创建一个此类的实例,每个用户都将开始在自己的线程中运行。
要使文件成为有效的locostfile,它必须至少包含一个从User继承的类。
class QuickstartUser(HttpUser):
定义wait_time,它将使模拟用户在执行每个任务(见下文)后等待1到5秒。
wait_time = between(1, 5)
用@task修饰的方法是locustfile的核心。对于每个正在运行的用户,Locust都会创建一个greenlet(协程或“微线程”),它将调用这些方法。任务中的代码是按顺序执行的(它只是常规的Python代码),因此在收到/hello的响应之前,不会调用/world。
@task
def hello_world(self):self.client.get("/hello")self.client.get("/world")
我们通过用@task装饰两个方法来声明两个任务,其中一个方法被赋予了更高的权重(3)。当我们的QuickstartUser运行时,它将选择一个声明的任务(在本例中为hello_world或view_items)并执行它。任务是随机选择的,但你可以给它们不同的权重。上述配置将使Locust选择view_items的可能性是hello_world的三倍。当任务执行完毕后,用户将在指定的等待时间内睡眠(在这种情况下为1到5秒)。然后,它将选择一个新任务。
请注意,只有用@task修饰的方法才会被选中,因此您可以以任何方式定义自己的内部辅助方法。
@task
def hello_world(self):...@task(3)
def view_items(self):...
self.client属性允许进行由Locust记录的HTTP调用。有关如何发出其他类型的请求、验证响应等的信息。
self.client.get("/hello")
在view_items任务中,我们使用变量查询参数加载10个不同的URL。为了在Locust的统计数据中不获得10个单独的条目——因为统计数据是在URL上分组的——我们使用name参数将所有这些请求分组到一个名为“/item”的条目下。
@task(3)
def view_items(self):for item_id in range(10):self.client.get(f"/item?id={item_id}", name="/item")time.sleep(1)
此外,我们还声明了一个on.start方法。当每个模拟用户启动时,都将调用具有此名称的方法。
def on_start(self):self.client.post("/login", json={"username":"foo", "password":"bar"})
User class
用户类代表系统的一种用户/场景类型。当您进行测试运行时,您可以指定要模拟的并发用户数,Locust将为每个用户创建一个实例。您可以向这些类/实例添加任何您喜欢的属性,但有些属性对Locust具有特殊意义:
wait_time属性
用户的wait_time方法可以很容易地在每次任务执行后引入延迟。如果没有指定wait_time,则下一个任务将在完成后立即执行。
在固定时间内保持恒定
介于最小值和最大值之间的随机时间
例如,要让每个用户在每次任务执行之间等待0.5到10秒:
from locust import User, task, betweenclass MyUser(User):@taskdef my_task(self):print("executing my_task")wait_time = between(0.5, 10)
-
constant_throughput:表示一个自适应时间,确保任务每秒最多运行X次。
-
constant_pacing:用于自适应时间,确保任务每X秒(最多)运行一次(它是constant_throughput的数学逆)。
也可以直接在类上声明自己的wait_time方法。例如,以下User类将睡眠一秒钟,然后两秒钟,然后三秒钟,以此类推。
class MyUser(User):last_wait_time = 0def wait_time(self):self.last_wait_time += 1return self.last_wait_time...
weight和fixed_count属性
如果文件中存在多个用户类,并且在命令行上没有指定用户类,则Locust将生成相等数量的每个用户类。您还可以通过将用户类作为命令行参数传递,从同一个locostfile中指定要使用的用户类:
locust -f locust_file.py WebUser MobileUser
如果你想模拟更多的特定类型的用户,你可以在这些类上设置一个权重属性。下面的代码将使Locust生成的WebUsers数量是MobileUsers的3倍:
class WebUser(User):weight = 3...class MobileUser(User):weight = 1...
此外,您还可以设置fixed_count属性。在这种情况下,权重属性将被忽略,只会生成确切数量的用户。这些用户是在任何常规的、加权的用户之前生成的。在下面的示例中,将只生成一个AdminUser实例,以便更准确地控制请求计数,而与总用户计数无关。
class AdminUser(User):wait_time = constant(600)fixed_count = 1@taskdef restart_app(self):...class WebUser(User):
host属性
host属性是一个URL前缀(例如。https://google.com)到您要测试的主机。它会自动添加到请求中,因此您可以执行self.client.get(“/”)等操作。
您可以在Locust的web UI或命令行中使用–host选项覆盖此值。
tasks属性
User类可以使用@task装饰器将任务声明为其下的方法,但也可以使用tasks属性指定任务,这将在下面进行更详细的描述。
environment属性
对用户运行环境的引用。使用此功能与环境或其中包含的跑步者进行交互。例如,要阻止运行者执行任务方法:
self.environment.runner.quit()
如果在独立的locust实例上运行,这将停止整个运行。如果在工作节点上运行,它将停止该特定节点。
on_start和on_stop方法
用户(和TaskSet)可以声明on-start方法和/或on-stop方法。用户将在开始运行时调用其on-start方法,在停止运行时调用它的on-stop方法。对于TaskSet,当模拟用户开始执行该TaskSet时,调用on.start方法,当模拟的用户停止执行该TaskSet时(当调用interrupt()或用户被杀死时),调用on_stop方法。
Tasks
当负载测试开始时,将为每个模拟用户创建一个User类的实例,他们将开始在自己的greenlet中运行。当这些用户运行时,他们会选择要执行的任务,休眠一段时间,然后选择一个新任务等等。
@task装饰器
为用户添加任务的最简单方法是使用task装饰器。
from locust import User, task, constantclass MyUser(User):wait_time = constant(1)@taskdef my_task(self):print("User instance (%r) executing my_task" % self)
@task接受一个可选的权重参数,可用于指定任务的执行比率。在以下示例中,任务2被选中的可能性是任务1的两倍:
from locust import User, task, betweenclass MyUser(User):wait_time = between(5, 15)@task(3)def task1(self):pass@task(6)def task2(self):pass
tasks属性
定义用户任务的另一种方法是设置任务属性。
tasks属性是tasks列表或Task:int字典,其中Task是python可调用对象或TaskSet类。如果任务是一个普通的python函数,它们会收到一个参数,即执行任务的User实例。
以下是一个声明为普通python函数的User任务的示例:
from locust import User, constantdef my_task(user):passclass MyUser(User):tasks = [my_task]wait_time = constant(1)
如果任务属性指定为列表,则每次执行任务时,都会从任务属性中随机选择。然而,如果任务是一个字典——以可调用对象作为键,以整数作为值——则将随机选择要执行的任务,但以整数作为比率。因此,对于一个看起来像这样的任务:
{my_task: 3, another_task: 1}
my_task被执行的可能性是另一个task的3倍。
在内部,上面的dict实际上会扩展成一个列表(任务属性也会更新),看起来像这样:
[my_task, my_task, my_task, another_task]
然后使用Python的random.choice()从列表中选择任务。
@tag装饰器
通过使用@tag装饰器标记任务,您可以使用–tags和–exclude tags参数来挑剔测试期间执行的任务。考虑以下示例:
from locust import User, constant, task, tagclass MyUser(User):wait_time = constant(1)@tag('tag1')@taskdef task1(self):pass@tag('tag1', 'tag2')@taskdef task2(self):pass@tag('tag3')@taskdef task3(self):pass@taskdef task4(self):pass
如果您使用–tags tag1开始此测试,则在测试期间只会执行task1和task2。如果从–tags tag2 tag3开始,则只会执行task2和task3。
–exclude-tags的行为将完全相反。因此,如果您以–exclude-tags tag3开始测试,则只会执行任务1、任务2和任务4。排除总是胜过包含,所以如果一个任务有一个你包含的标签和一个你排除的标签,它就不会被执行。
Events
如果你想在测试中运行一些设置代码,通常将其放在locustfile的模块级别就足够了,但有时你需要在运行的特定时间做一些事情。为了满足这一需求,Locust提供了事件钩子。
test_start和test_stop
如果你需要在负载测试的开始或停止时运行一些代码,你应该使用test_start和test_stop事件。您可以在locustfile的模块级别为这些事件设置监听器:
from locust import events@events.test_start.add_listener
def on_test_start(environment, **kwargs):print("A new test is starting")@events.test_stop.add_listener
def on_test_stop(environment, **kwargs):print("A new test is ending")
init
init事件在每个Locust进程开始时触发。这在分布式模式下特别有用,在这种模式下,每个工作进程(而不是每个用户)都需要一个机会来进行一些初始化。例如,假设你有一个全局状态,所有从这个过程中产生的用户都需要它:
from locust import events
from locust.runners import MasterRunner@events.init.add_listener
def on_locust_init(environment, **kwargs):if isinstance(environment.runner, MasterRunner):print("I'm on master node")else:print("I'm on a worker or standalone node")
HttpUser class
HttpUser是最常用的User。它添加了一个用于发出HTTP请求的客户端属性。
from locust import HttpUser, task, betweenclass MyUser(HttpUser):wait_time = between(5, 15)@task(4)def index(self):self.client.get("/")@task(1)def about(self):self.client.get("/about/")
client属性/HttpSession
client是HttpSession的一个实例。HttpSession是requests.Session的子类,因此其功能有很好的文档记录,许多人应该熟悉。HttpSession添加的主要是将请求结果报告到Locust中(成功/失败、响应时间、响应长度、名称)。
它包含所有HTTP方法的方法:get、post、put…
就像requests.Session一样,它在请求之间保留Cookie,因此可以轻松用于登录网站。
发出POST请求,查看响应,并隐式重用我们为第二个请求获得的任何会话cookie
response = self.client.post("/login", {"username":"testuser", "password":"secret"})
print("Response status code:", response.status_code)
print("Response text:", response.text)
response = self.client.get("/my-profile")
HttpSession捕获任何请求。Session抛出的RequestException(由连接错误、超时或类似原因引起),而是返回一个虚拟的Response对象,其status_code设置为0,内容设置为None。
验证响应
如果HTTP响应代码正常(<400),则认为请求成功,但对响应进行一些额外的验证通常是有用的。
您可以使用catch_response参数、with语句和response.failure()调用将请求标记为失败
with self.client.get("/", catch_response=True) as response:if response.text != "Success":response.failure("Got wrong response")elif response.elapsed.total_seconds() > 0.5:response.failure("Request took too long")
您还可以将请求标记为成功,即使响应代码不正确:
with self.client.get("/does_not_exist/", catch_response=True) as response:if response.status_code == 404:response.success()
您甚至可以通过抛出异常并在with块外捕获它来避免记录请求。或者你可以抛出一个locust exception,就像下面的例子一样,让locust捕捉它。
from locust.exception import RescheduleTask
...
with self.client.get("/does_not_exist/", catch_response=True) as response:if response.status_code == 404:raise RescheduleTask()
REST/JSON APIs
FastHttpUser提供了一个现成的rest方法,但你也可以自己做:
from json import JSONDecodeError
...
with self.client.post("/", json={"foo": 42, "bar": None}, catch_response=True) as response:try:if response.json()["greeting"] != "hello":response.failure("Did not get expected value in greeting")except JSONDecodeError:response.failure("Response could not be decoded as JSON")except KeyError:response.failure("Response did not contain expected key 'greeting'")
分组请求
网站的URL包含某种动态参数的页面很常见。通常,在用户统计数据中将这些URL分组在一起是有意义的。这可以通过将name参数传递给HttpSession的不同请求方法来实现。
例子:
# Statistics for these requests will be grouped under: /blog/?id=[id]
for i in range(10):self.client.get("/blog?id=%i" % i, name="/blog?id=[id]")
可能存在无法将参数传递到请求函数的情况,例如在与包装Requests会话的库/SDK交互时。通过设置client.request_name属性,提供了一种对请求进行分组的替代方法。
# Statistics for these requests will be grouped under: /blog/?id=[id]
self.client.request_name="/blog?id=[id]"
for i in range(10):self.client.get("/blog?id=%i" % i)
self.client.request_name=None
如果你想用最少的样板链接多个分组,你可以使用client.rename_request()上下文管理器。
@task
def multiple_groupings_example(self):# Statistics for these requests will be grouped under: /blog/?id=[id]with self.client.rename_request("/blog?id=[id]"):for i in range(10):self.client.get("/blog?id=%i" % i)# Statistics for these requests will be grouped under: /article/?id=[id]with self.client.rename_request("/article?id=[id]"):for i in range(10):self.client.get("/article?id=%i" % i)
使用catch_response并直接访问request_meta,您甚至可以根据响应中的内容重命名请求。
with self.client.get("/", catch_response=True) as resp:resp.request_meta["name"] = resp.json()["name"]
HTTP代理设置
为了提高性能,我们通过设置请求来配置请求,使其不在环境中查找HTTP代理设置。会话的trust_env属性为False。如果你不想这样,你可以手动将locost_instance.client.trust_env设置为True。
连接重用
默认情况下,连接由HttpUser重用,即使在任务运行之间也是如此。为了避免连接重用,您可以执行以下操作:
self.client.get("/", headers={"Connection": "close"})
self.client.get("/new_connection_here")
或者,您可以关闭整个请求。会话对象(这也会删除Cookie、关闭SSL会话等)。这会有一些CPU开销(由于SSL重新协商等原因,下一个请求的响应时间会更高),所以除非你真的需要,否则不要使用它。
self.client.get("/")
self.client.close()
self.client.get("/new_connection_here")
连接池
当每个HttpUser创建新的HttpSession时,每个用户实例都有自己的连接池。这类似于真实用户(浏览器)与web服务器的交互方式。
如果您想共享连接,可以使用单个池管理器。为此,请将pool_manager类属性设置为urllib3.PoolManager的实例。
from locust import HttpUser
from urllib3 import PoolManagerclass MyUser(HttpUser):# All instances of this class will be limited to 10 concurrent connections at most.pool_manager = PoolManager(maxsize=10, block=True)