夜莺监控V8(Nightingale)二进制部署教程(保姆级)
夜莺监控部署
前置工作
1. 部署好mysql
2. 部署好redis
3. 部署好prometheus
夜莺压缩包下载
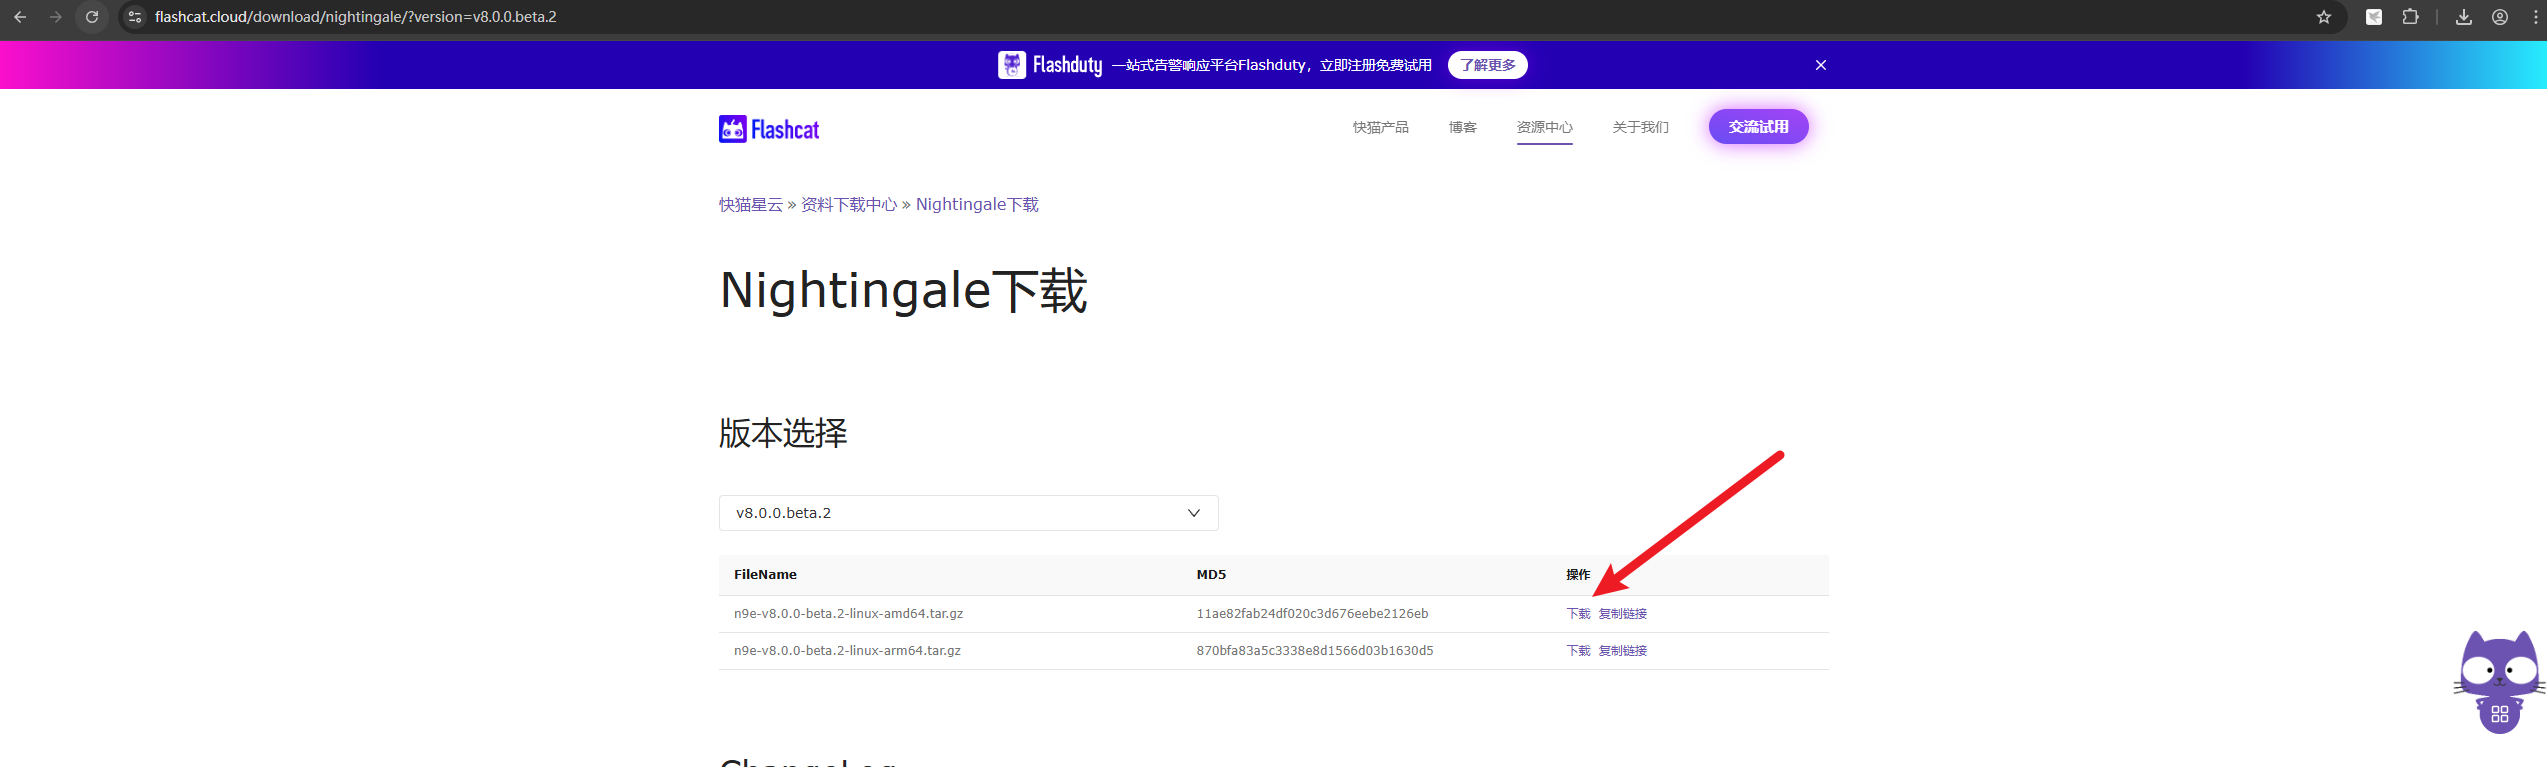
本教程基于Centos7系统下的二进制方式部署,先去官网进行压缩包下载
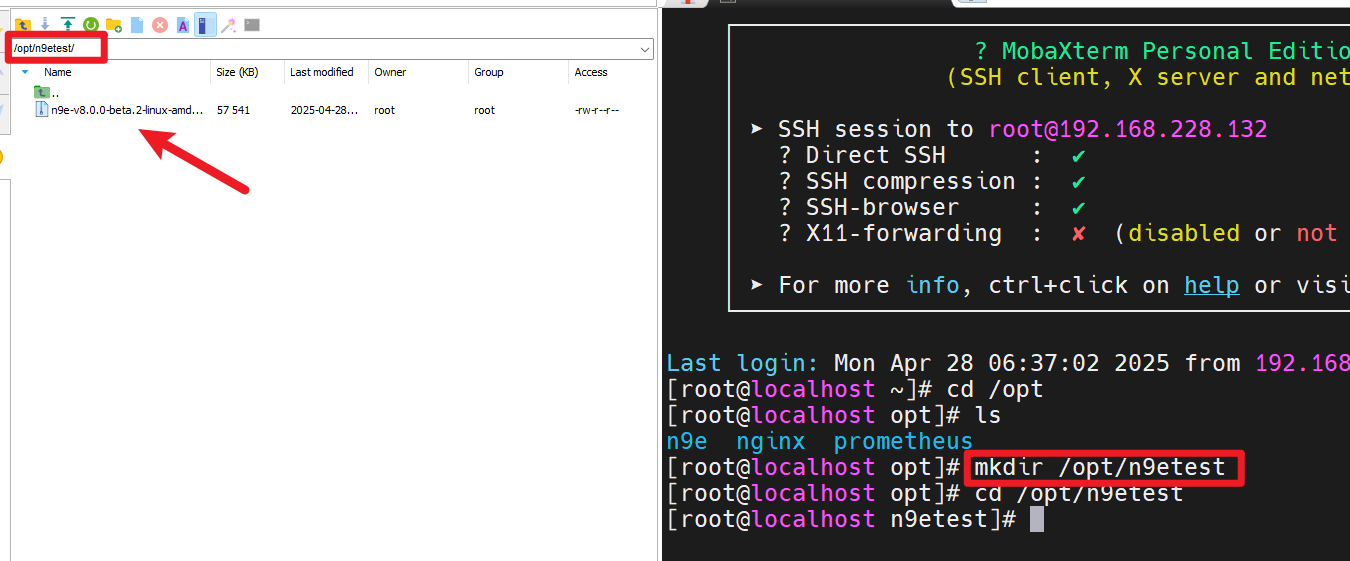
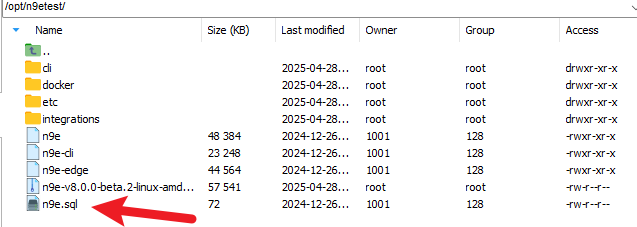
在系统创建/opt/n9etest目录,并将压缩包拖进目录
mkdir /opt/n9etest
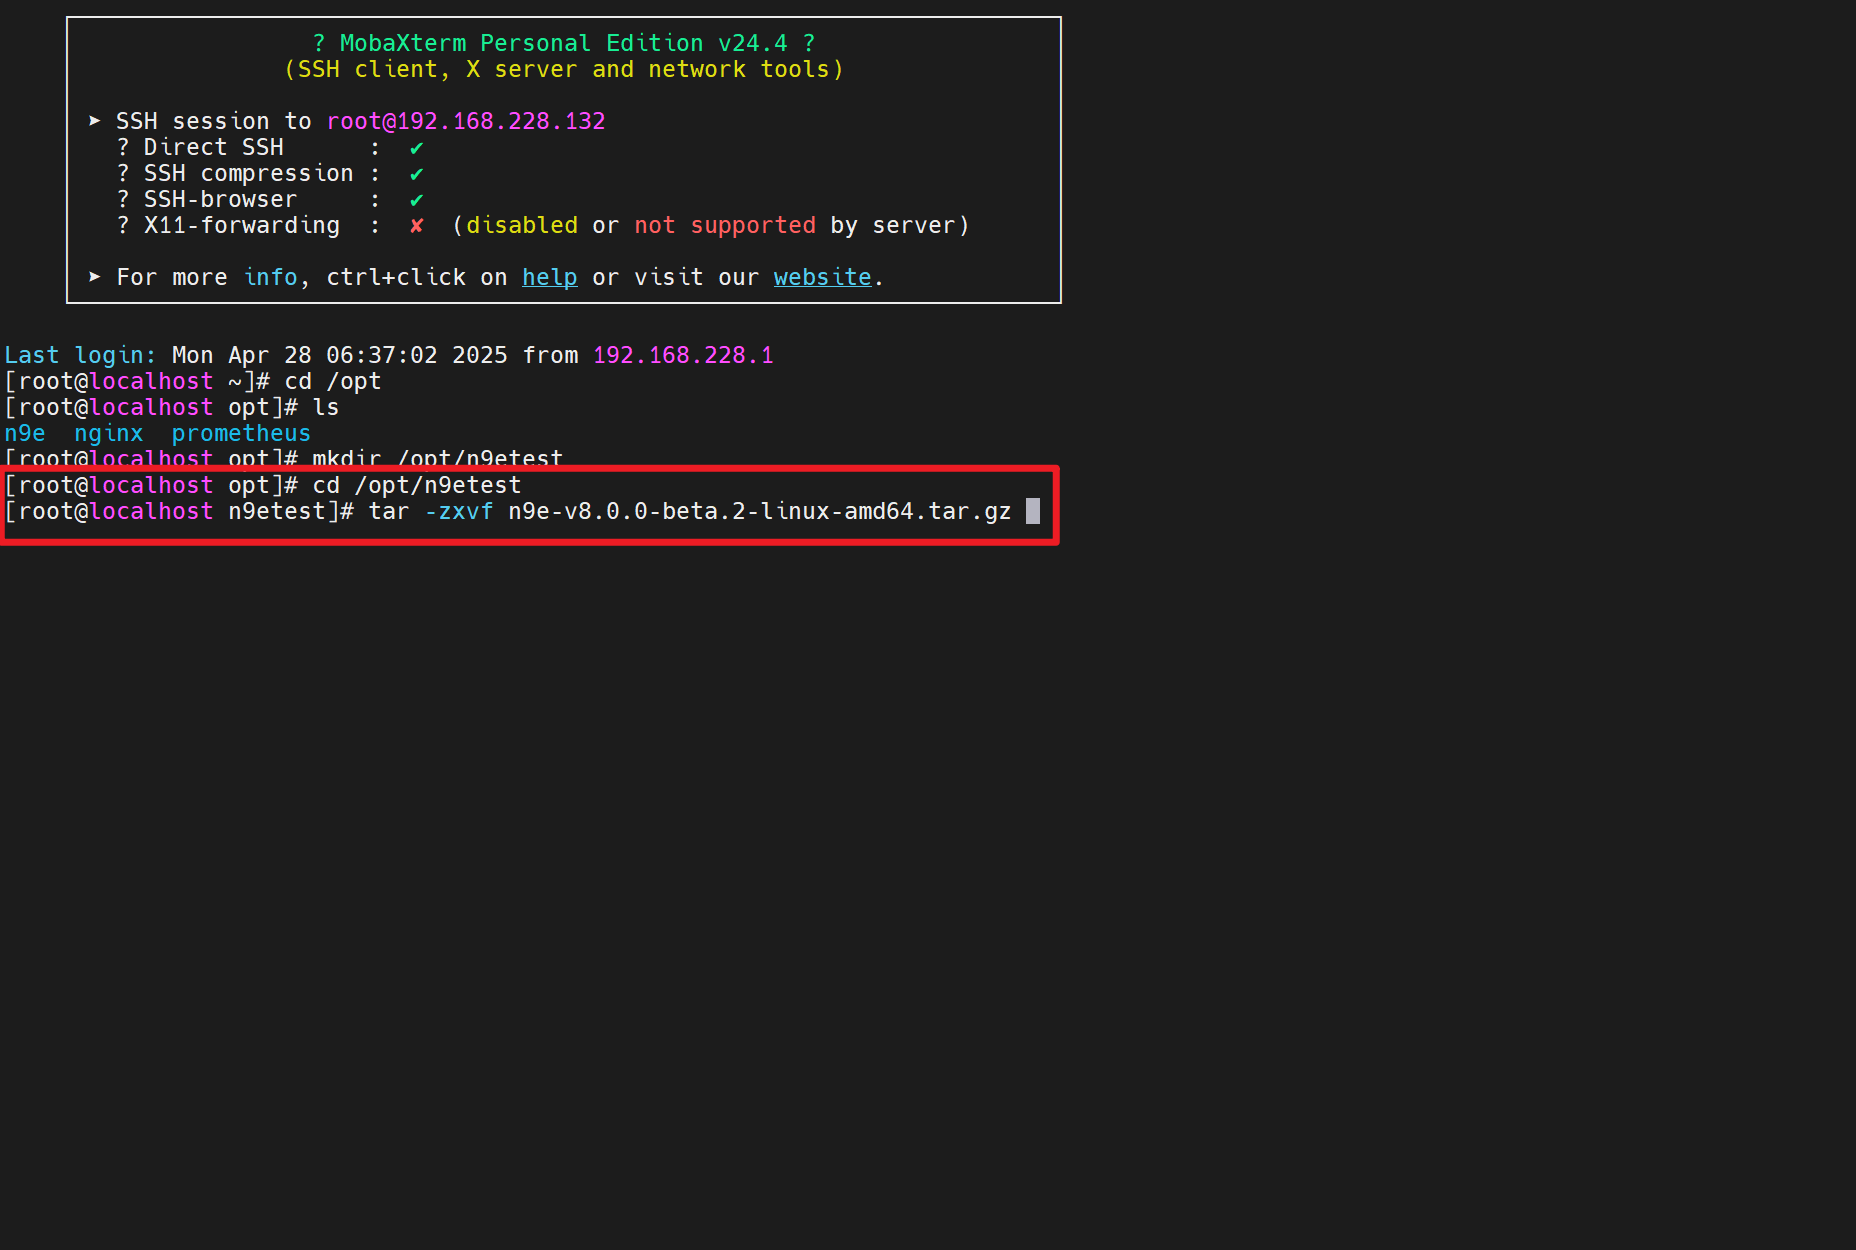
进入/opt/n9etest,解压文件
cd /opt/n9etest
tar -zxvf n9e-v8.0.0-beta.2-linux-amd64.tar.gz
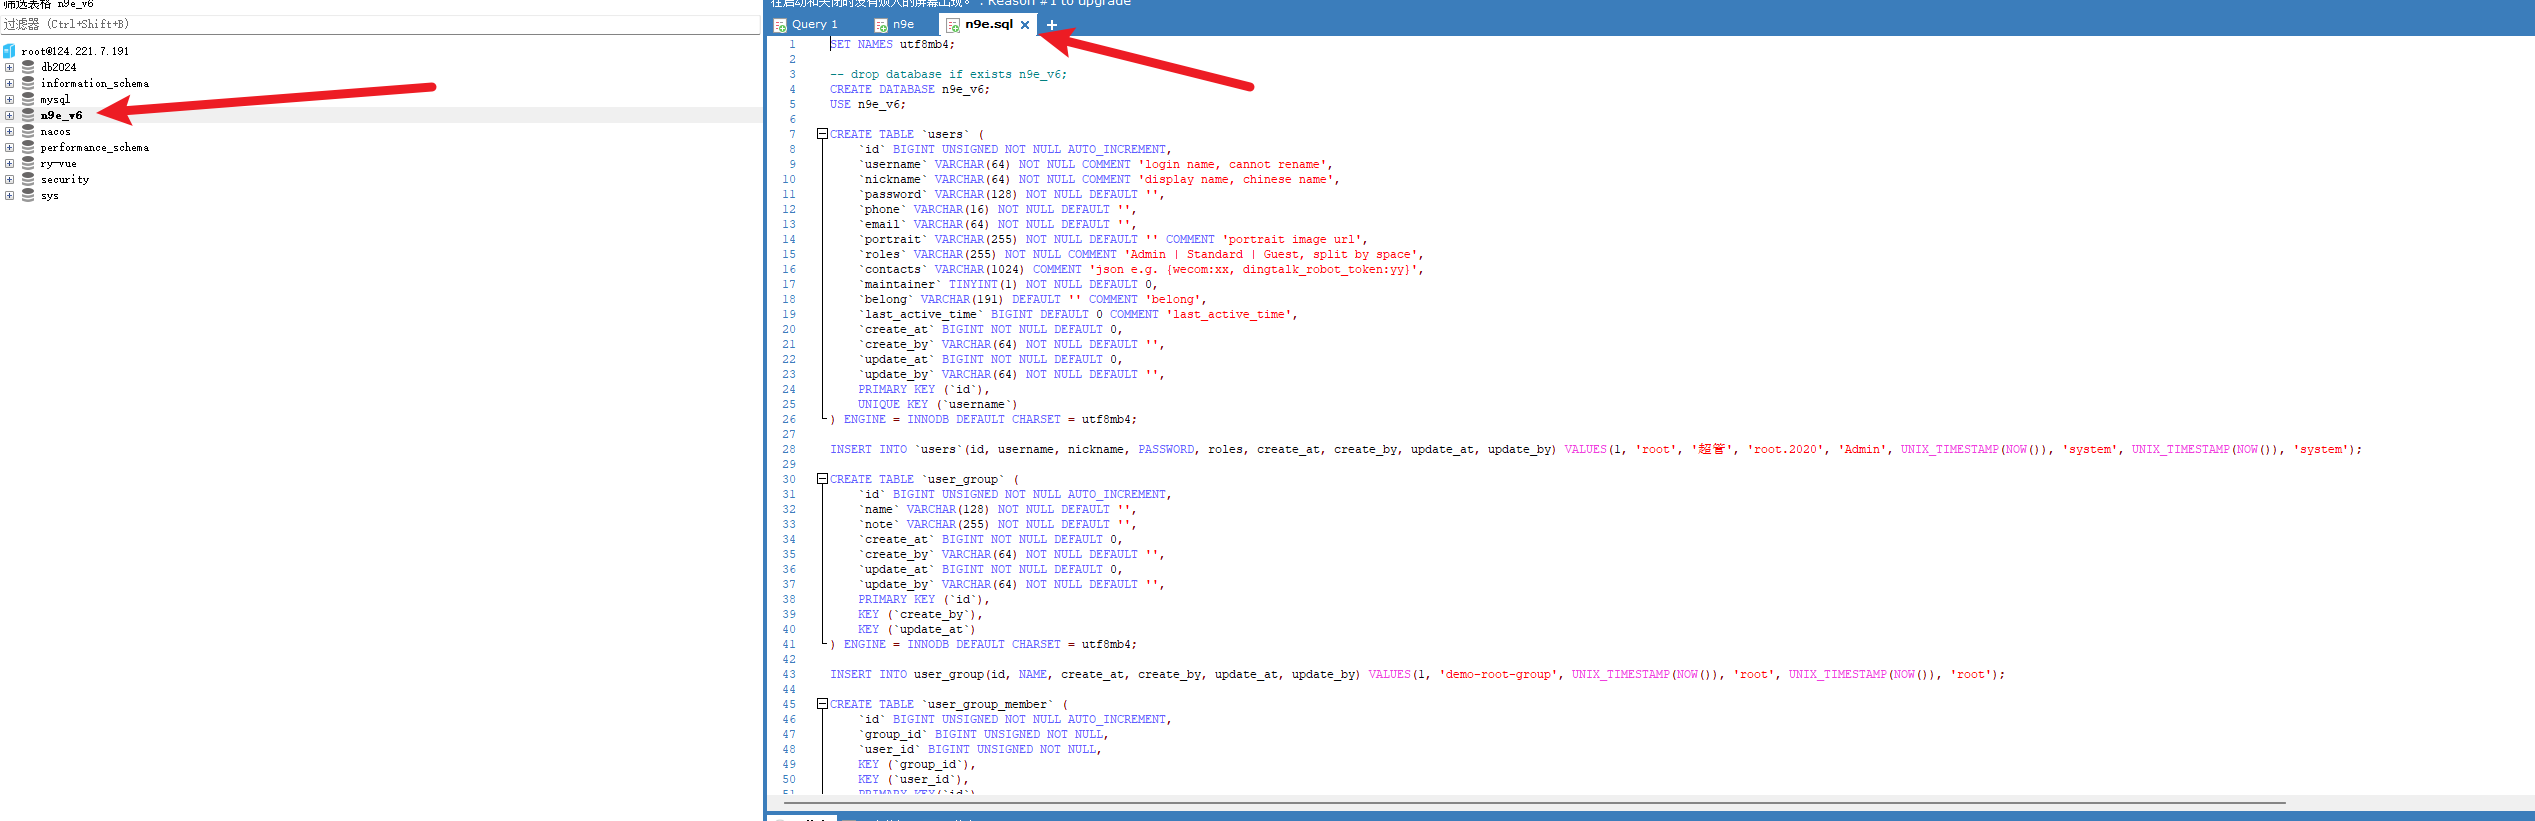
解压后有个mysql脚本,将其拖出来到数据库执行
执行n9e.sql后会创建一个n9e_v6的数据库,并且设置一个账号root,密码为root.2020
进入/opt/n9etest/etc修改配置文件config.toml
cd /opt/n9etest/etc
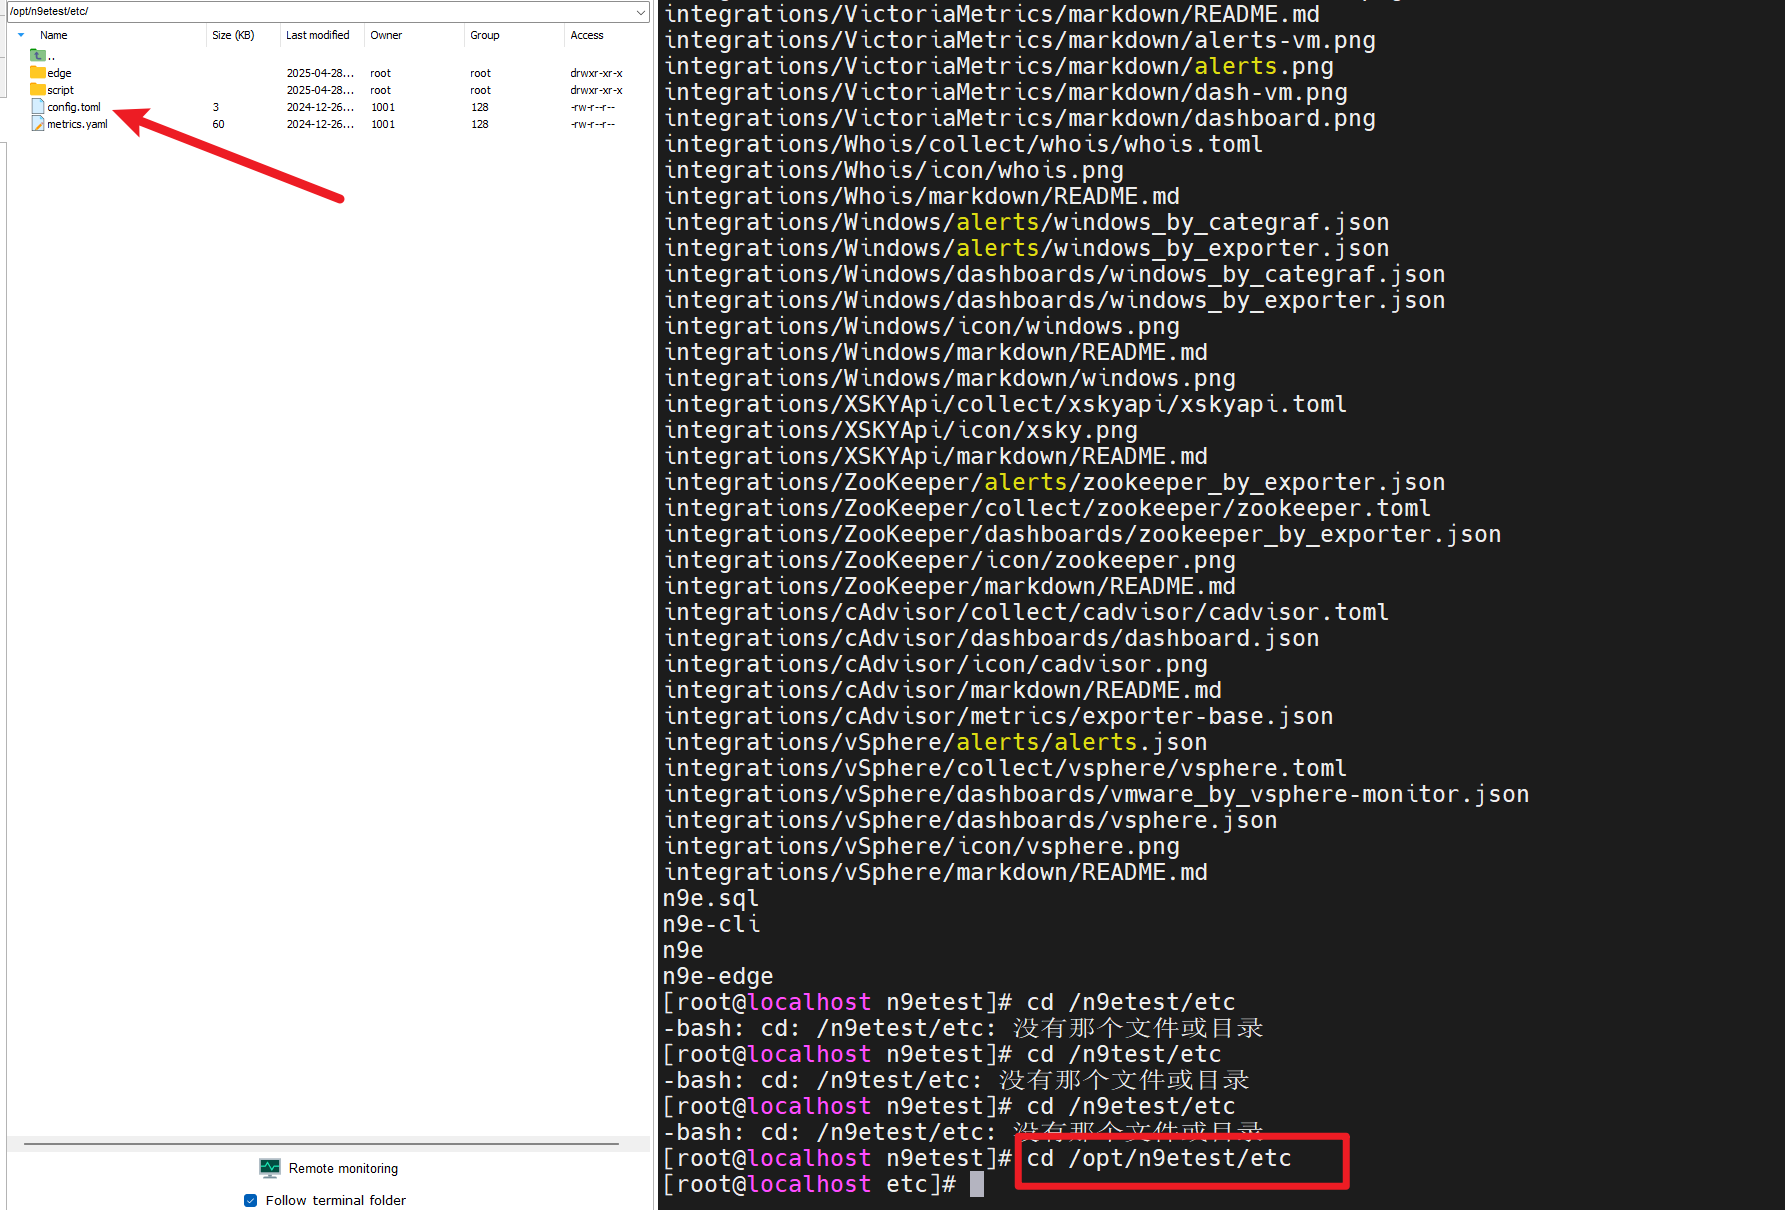
这里我用的是MobaXterm连接工具,直接打开编辑就好了,不用vi指令这里有两点要改
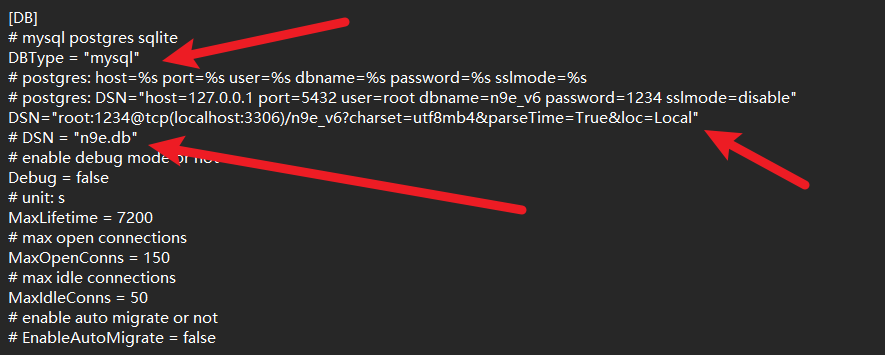
1.修改数据库
[DB]
# mysql postgres sqlite
DBType = "mysql" # 这里原来是sqlite,把它改为mysql
# postgres: host=%s port=%s user=%s dbname=%s password=%s sslmode=%s
# postgres: DSN="host=127.0.0.1 port=5432 user=root dbname=n9e_v6 password=1234 sslmode=disable"
DSN="root:1234@tcp(localhost:3306)/n9e_v6?charset=utf8mb4&parseTime=True&loc=Local" #这里原来是# mysql:DSN... 把# mysql:去掉
# DSN = "n9e.db" #这里原来是没注释的,我们用了上面的mysql就把这条注释掉2.修改redis
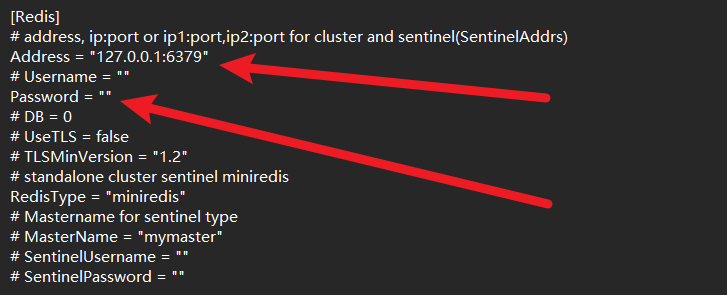
[Redis]
# address, ip:port or ip1:port,ip2:port for cluster and sentinel(SentinelAddrs)
Address = "127.0.0.1:6379" # 这里填自己redis地址
# Username = ""
Password = "" # 如果redis有设置密码,就填这里并且取消注释
这个是原来的配置文件
[Global]
RunMode = "release"[Log]
# log write dir
Dir = "logs"
# log level: DEBUG INFO WARNING ERROR
Level = "DEBUG"
# stdout, stderr, file
Output = "stdout"
# # rotate by time
# KeepHours = 4
# # rotate by size
# RotateNum = 3
# # unit: MB
# RotateSize = 256[HTTP]
# http listening address
Host = "0.0.0.0"
# http listening port
Port = 17000
# https cert file path
CertFile = ""
# https key file path
KeyFile = ""
# whether print access log
PrintAccessLog = false
# whether enable pprof
PProf = true
# expose prometheus /metrics?
ExposeMetrics = true
# http graceful shutdown timeout, unit: s
ShutdownTimeout = 30
# max content length: 64M
MaxContentLength = 67108864
# http server read timeout, unit: s
ReadTimeout = 20
# http server write timeout, unit: s
WriteTimeout = 40
# http server idle timeout, unit: s
IdleTimeout = 120[HTTP.ShowCaptcha]
Enable = false [HTTP.APIForAgent]
Enable = true
# [HTTP.APIForAgent.BasicAuth]
# user001 = "ccc26da7b9aba533cbb263a36c07dcc5"[HTTP.APIForService]
Enable = false
[HTTP.APIForService.BasicAuth]
user001 = "ccc26da7b9aba533cbb263a36c07dcc5"[HTTP.JWTAuth]
# unit: min
AccessExpired = 1500
# unit: min
RefreshExpired = 10080
RedisKeyPrefix = "/jwt/"[HTTP.ProxyAuth]
# if proxy auth enabled, jwt auth is disabled
Enable = false
# username key in http proxy header
HeaderUserNameKey = "X-User-Name"
DefaultRoles = ["Standard"][HTTP.RSA]
# open RSA
OpenRSA = false[DB]
# mysql postgres sqlite
DBType = "sqlite"
# postgres: host=%s port=%s user=%s dbname=%s password=%s sslmode=%s
# postgres: DSN="host=127.0.0.1 port=5432 user=root dbname=n9e_v6 password=1234 sslmode=disable"
# mysql: DSN="root:1234@tcp(localhost:3306)/n9e_v6?charset=utf8mb4&parseTime=True&loc=Local"
DSN = "n9e.db"
# enable debug mode or not
Debug = false
# unit: s
MaxLifetime = 7200
# max open connections
MaxOpenConns = 150
# max idle connections
MaxIdleConns = 50
# enable auto migrate or not
# EnableAutoMigrate = false[Redis]
# address, ip:port or ip1:port,ip2:port for cluster and sentinel(SentinelAddrs)
Address = "127.0.0.1:6379"
# Username = ""
# Password = ""
# DB = 0
# UseTLS = false
# TLSMinVersion = "1.2"
# standalone cluster sentinel miniredis
RedisType = "miniredis"
# Mastername for sentinel type
# MasterName = "mymaster"
# SentinelUsername = ""
# SentinelPassword = ""[Alert]
[Alert.Heartbeat]
# auto detect if blank
IP = ""
# unit ms
Interval = 1000
EngineName = "default"# [Alert.Alerting]
# NotifyConcurrency = 10[Center]
MetricsYamlFile = "./etc/metrics.yaml"
I18NHeaderKey = "X-Language"[Center.AnonymousAccess]
PromQuerier = true
AlertDetail = true[Pushgw]
# use target labels in database instead of in series
LabelRewrite = true
# # default busigroup key name
# BusiGroupLabelKey = "busigroup"
ForceUseServerTS = true# [Pushgw.DebugSample]
# ident = "xx"
# __name__ = "xx"# [Pushgw.WriterOpt]
# QueueMaxSize = 1000000
# QueuePopSize = 1000
# AllQueueMaxSize = 1000000
# fresh time, unit ms
# AllQueueMaxSizeInterval = 200[[Pushgw.Writers]]
# Url = "http://127.0.0.1:8480/insert/0/prometheus/api/v1/write"
Url = "http://127.0.0.1:9090/api/v1/write"
# Basic auth username
BasicAuthUser = ""
# Basic auth password
BasicAuthPass = ""
# timeout settings, unit: ms
Headers = ["X-From", "n9e"]
Timeout = 10000
DialTimeout = 3000
TLSHandshakeTimeout = 30000
ExpectContinueTimeout = 1000
IdleConnTimeout = 90000
# time duration, unit: ms
KeepAlive = 30000
MaxConnsPerHost = 0
MaxIdleConns = 100
MaxIdleConnsPerHost = 100
## Optional TLS Config
# UseTLS = false
# TLSCA = "/etc/n9e/ca.pem"
# TLSCert = "/etc/n9e/cert.pem"
# TLSKey = "/etc/n9e/key.pem"
# InsecureSkipVerify = false
# [[Pushgw.Writers.WriteRelabels]]
# Action = "replace"
# SourceLabels = ["__address__"]
# Regex = "([^:]+)(?::\\d+)?"
# Replacement = "$1:80"
# TargetLabel = "__address__"[Ibex]
Enable = false
RPCListen = "0.0.0.0:20090"
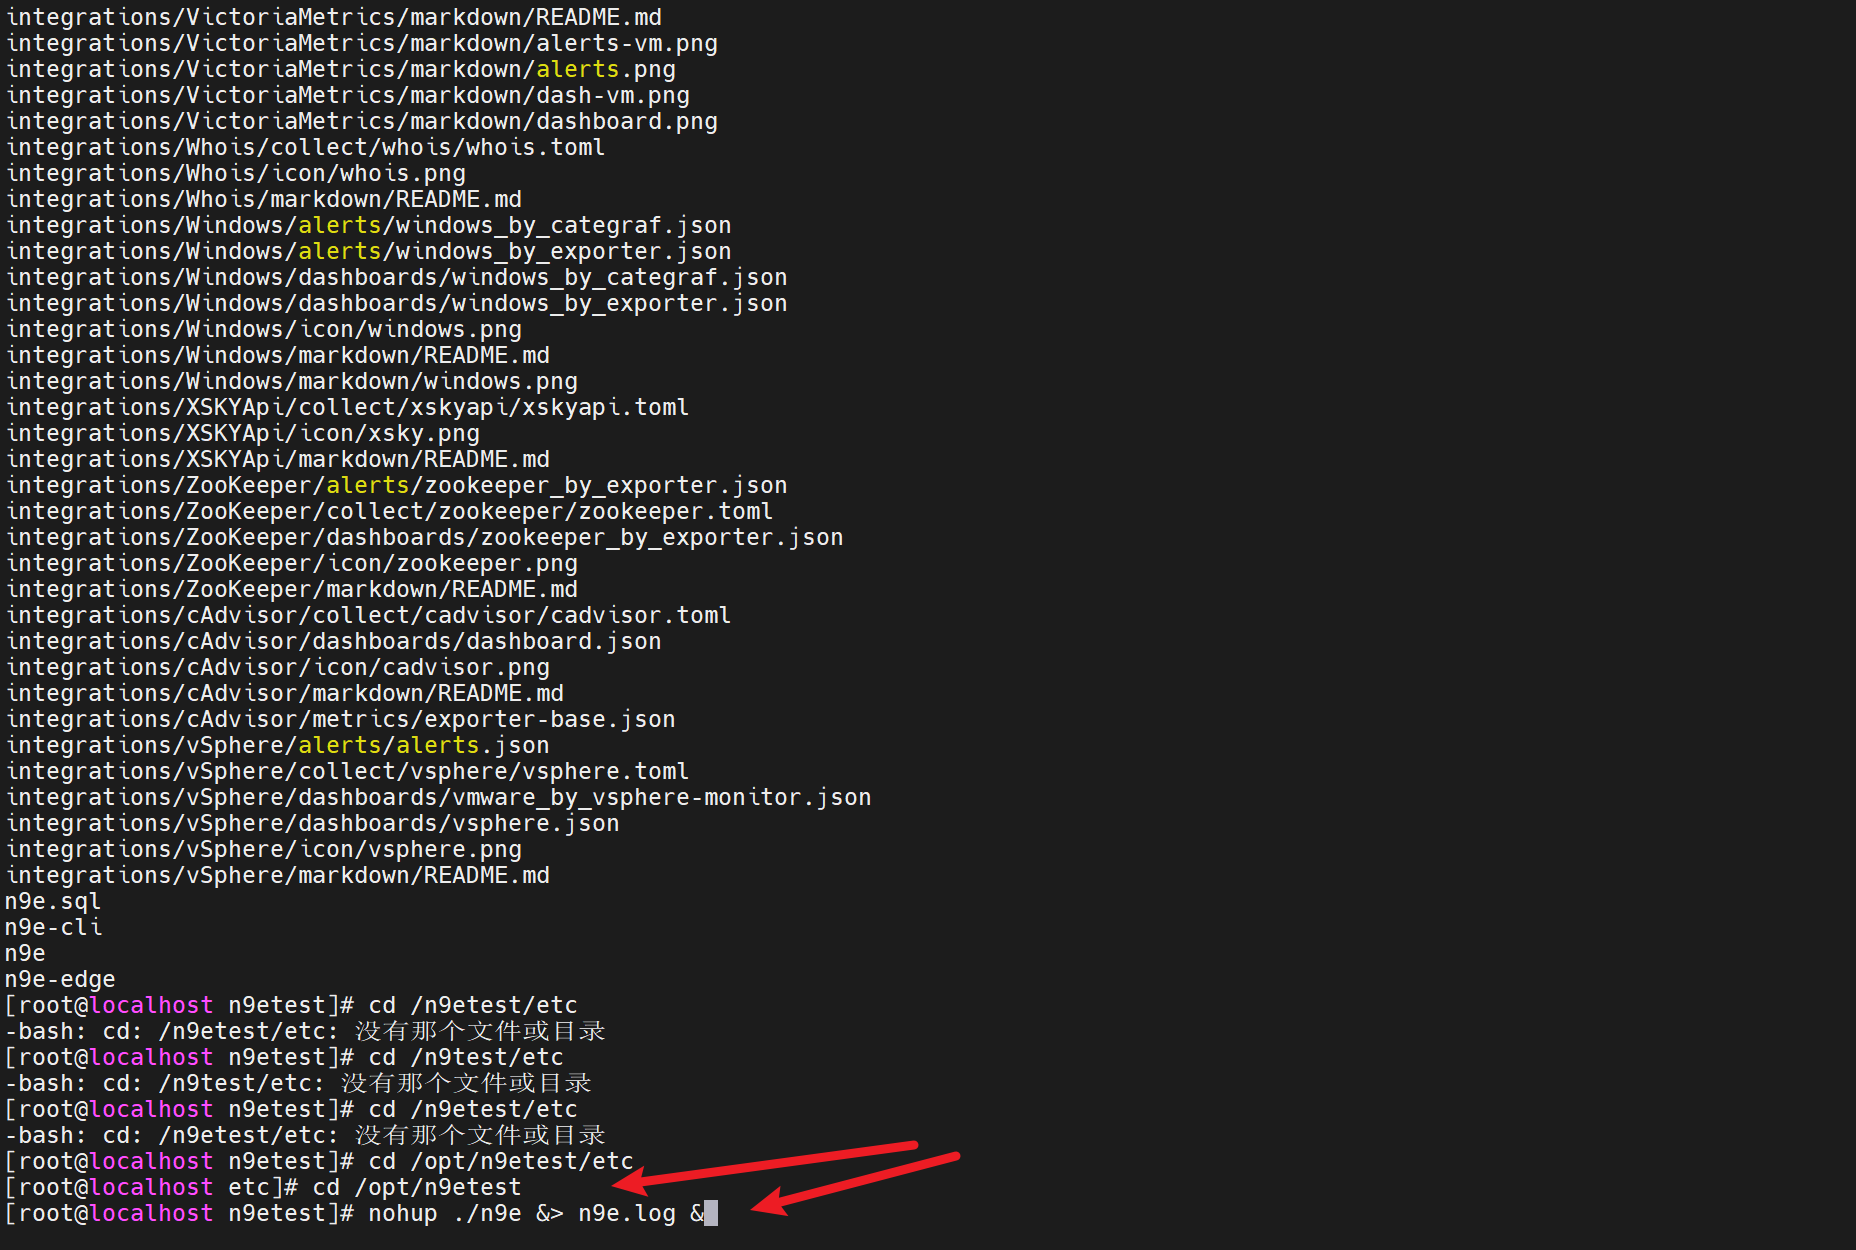
进入/opt/n9etest,启动夜莺。这里我就不启动了,因为本机已经启动过一个
cd /opt/n9etest
nohup ./n9e &> n9e.log &
如果有防火墙就打开17000端口,夜莺默认端口是17000,可以通过配置文件修改端口
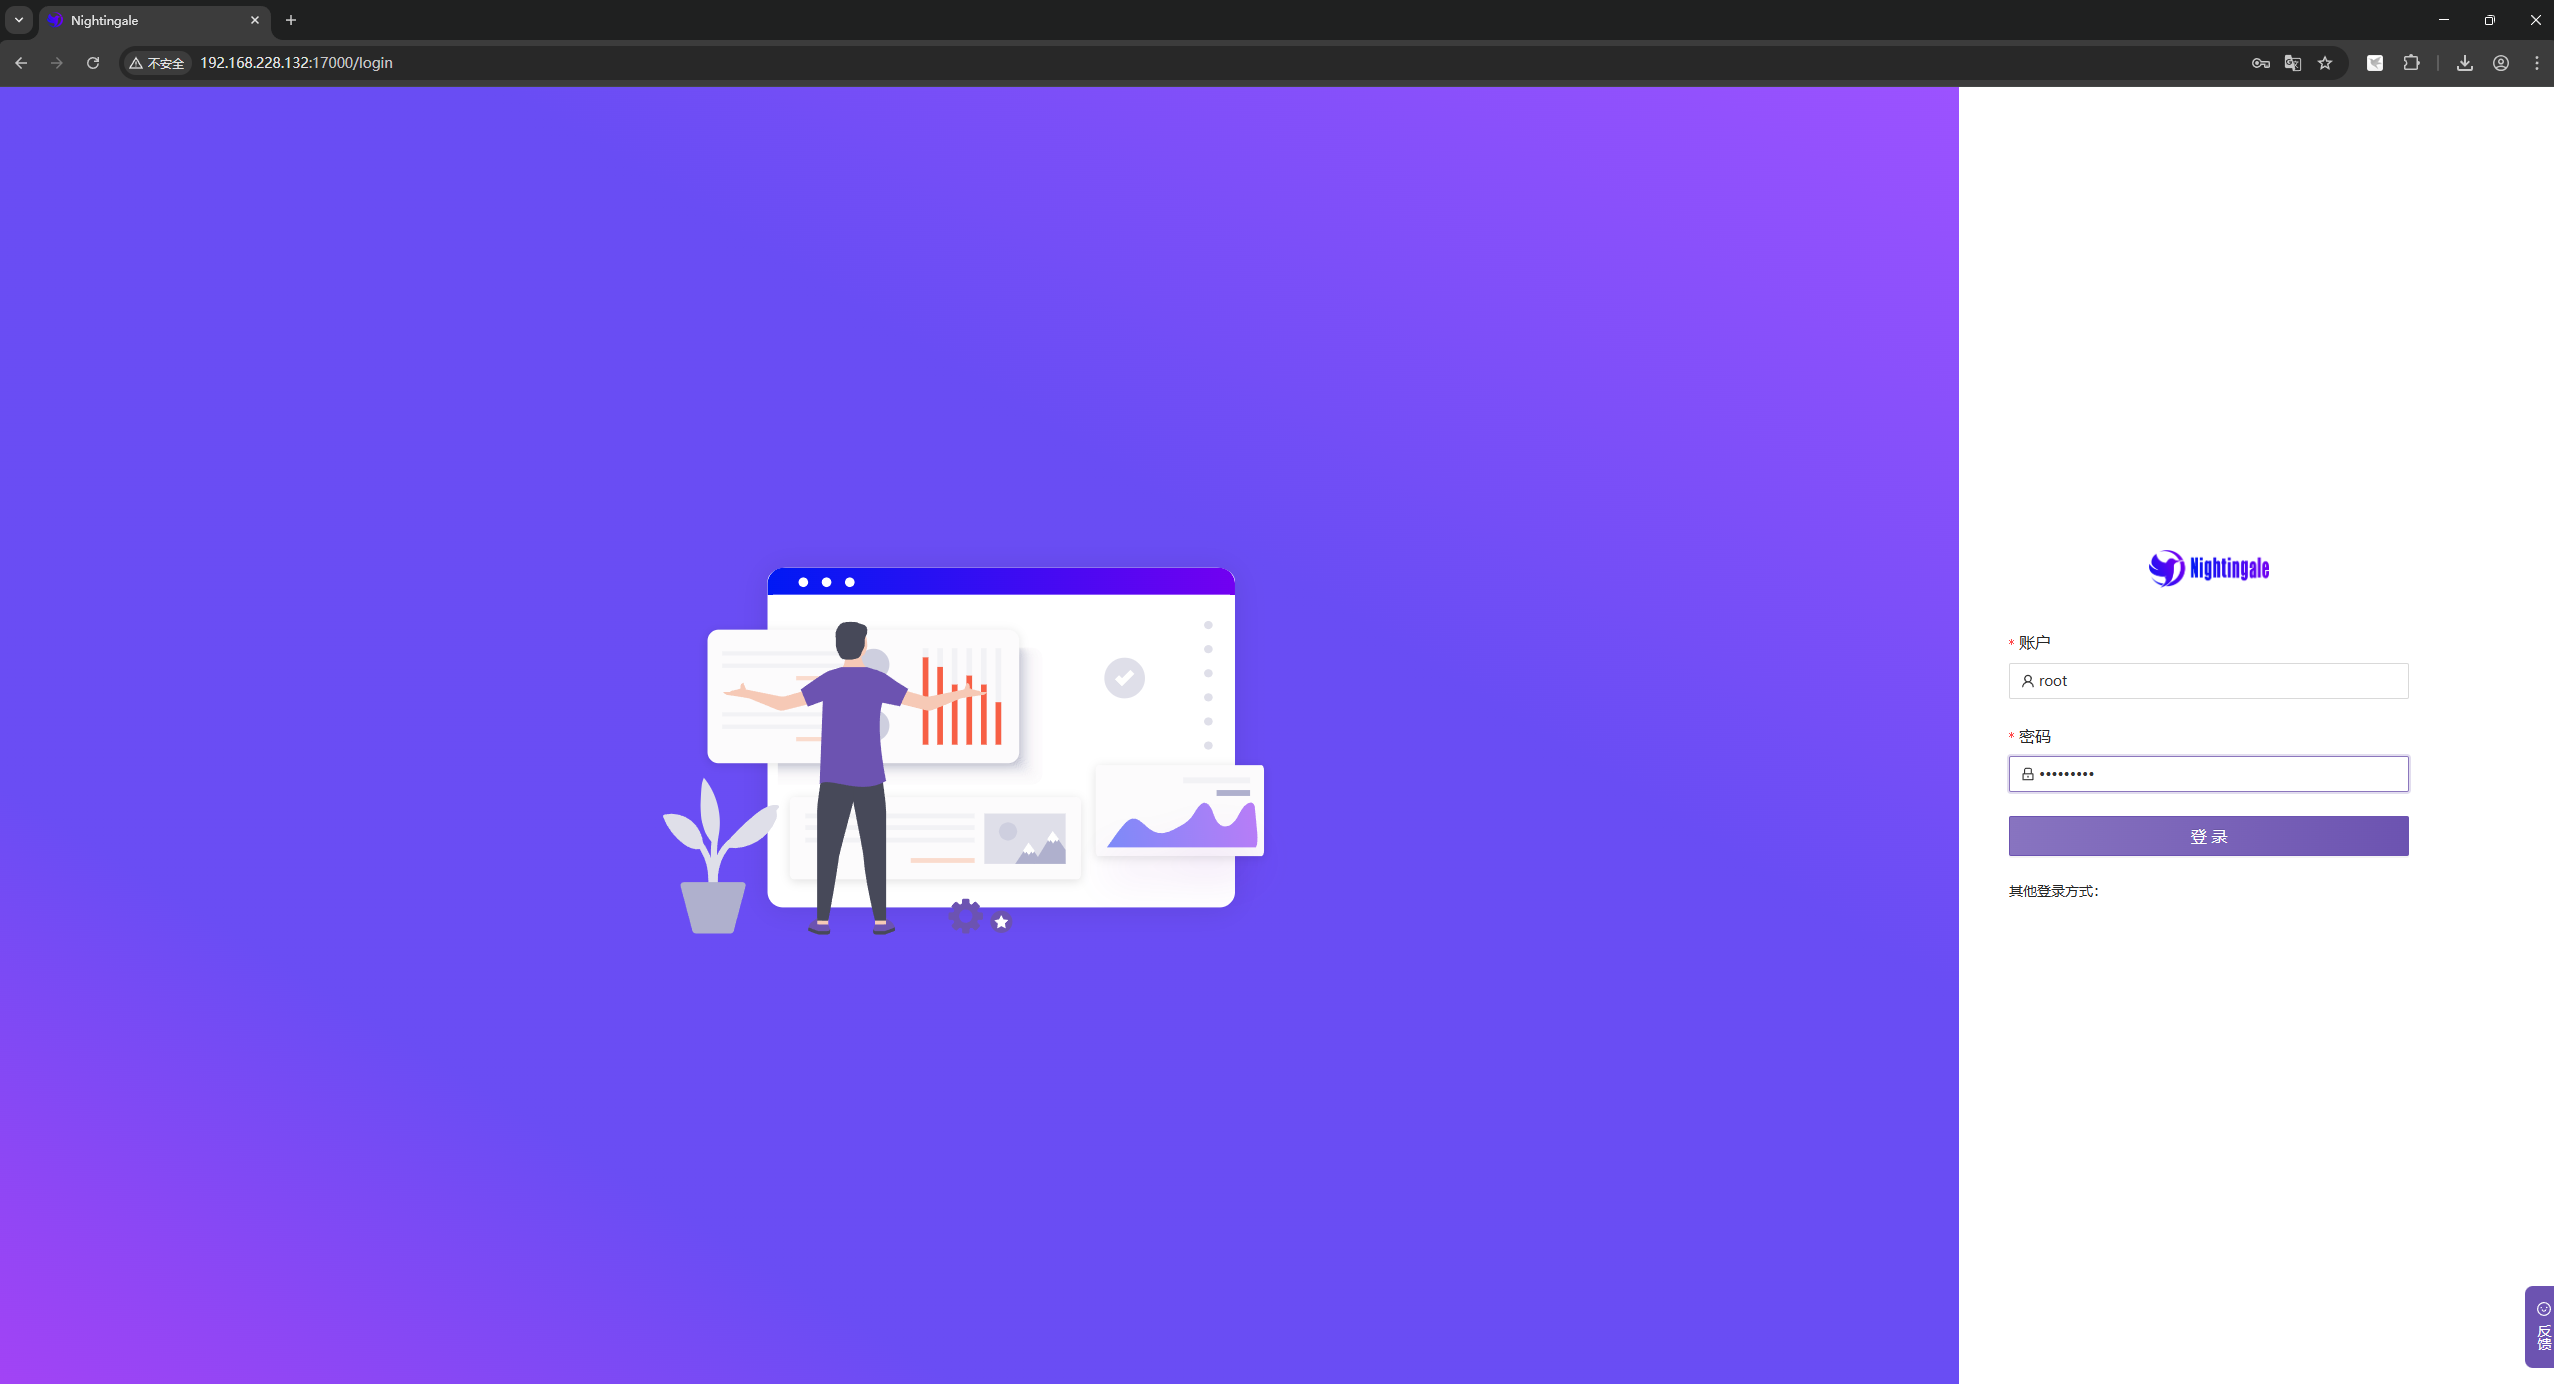
测试夜莺是否能访问
直接通过浏览器访问 ip:17000就可以了
账号:root
密码:root.2020
可以和nginx搭配,然后修改本机host指向服务器地址。通过域名n9e.banny.com方式访问夜莺监控
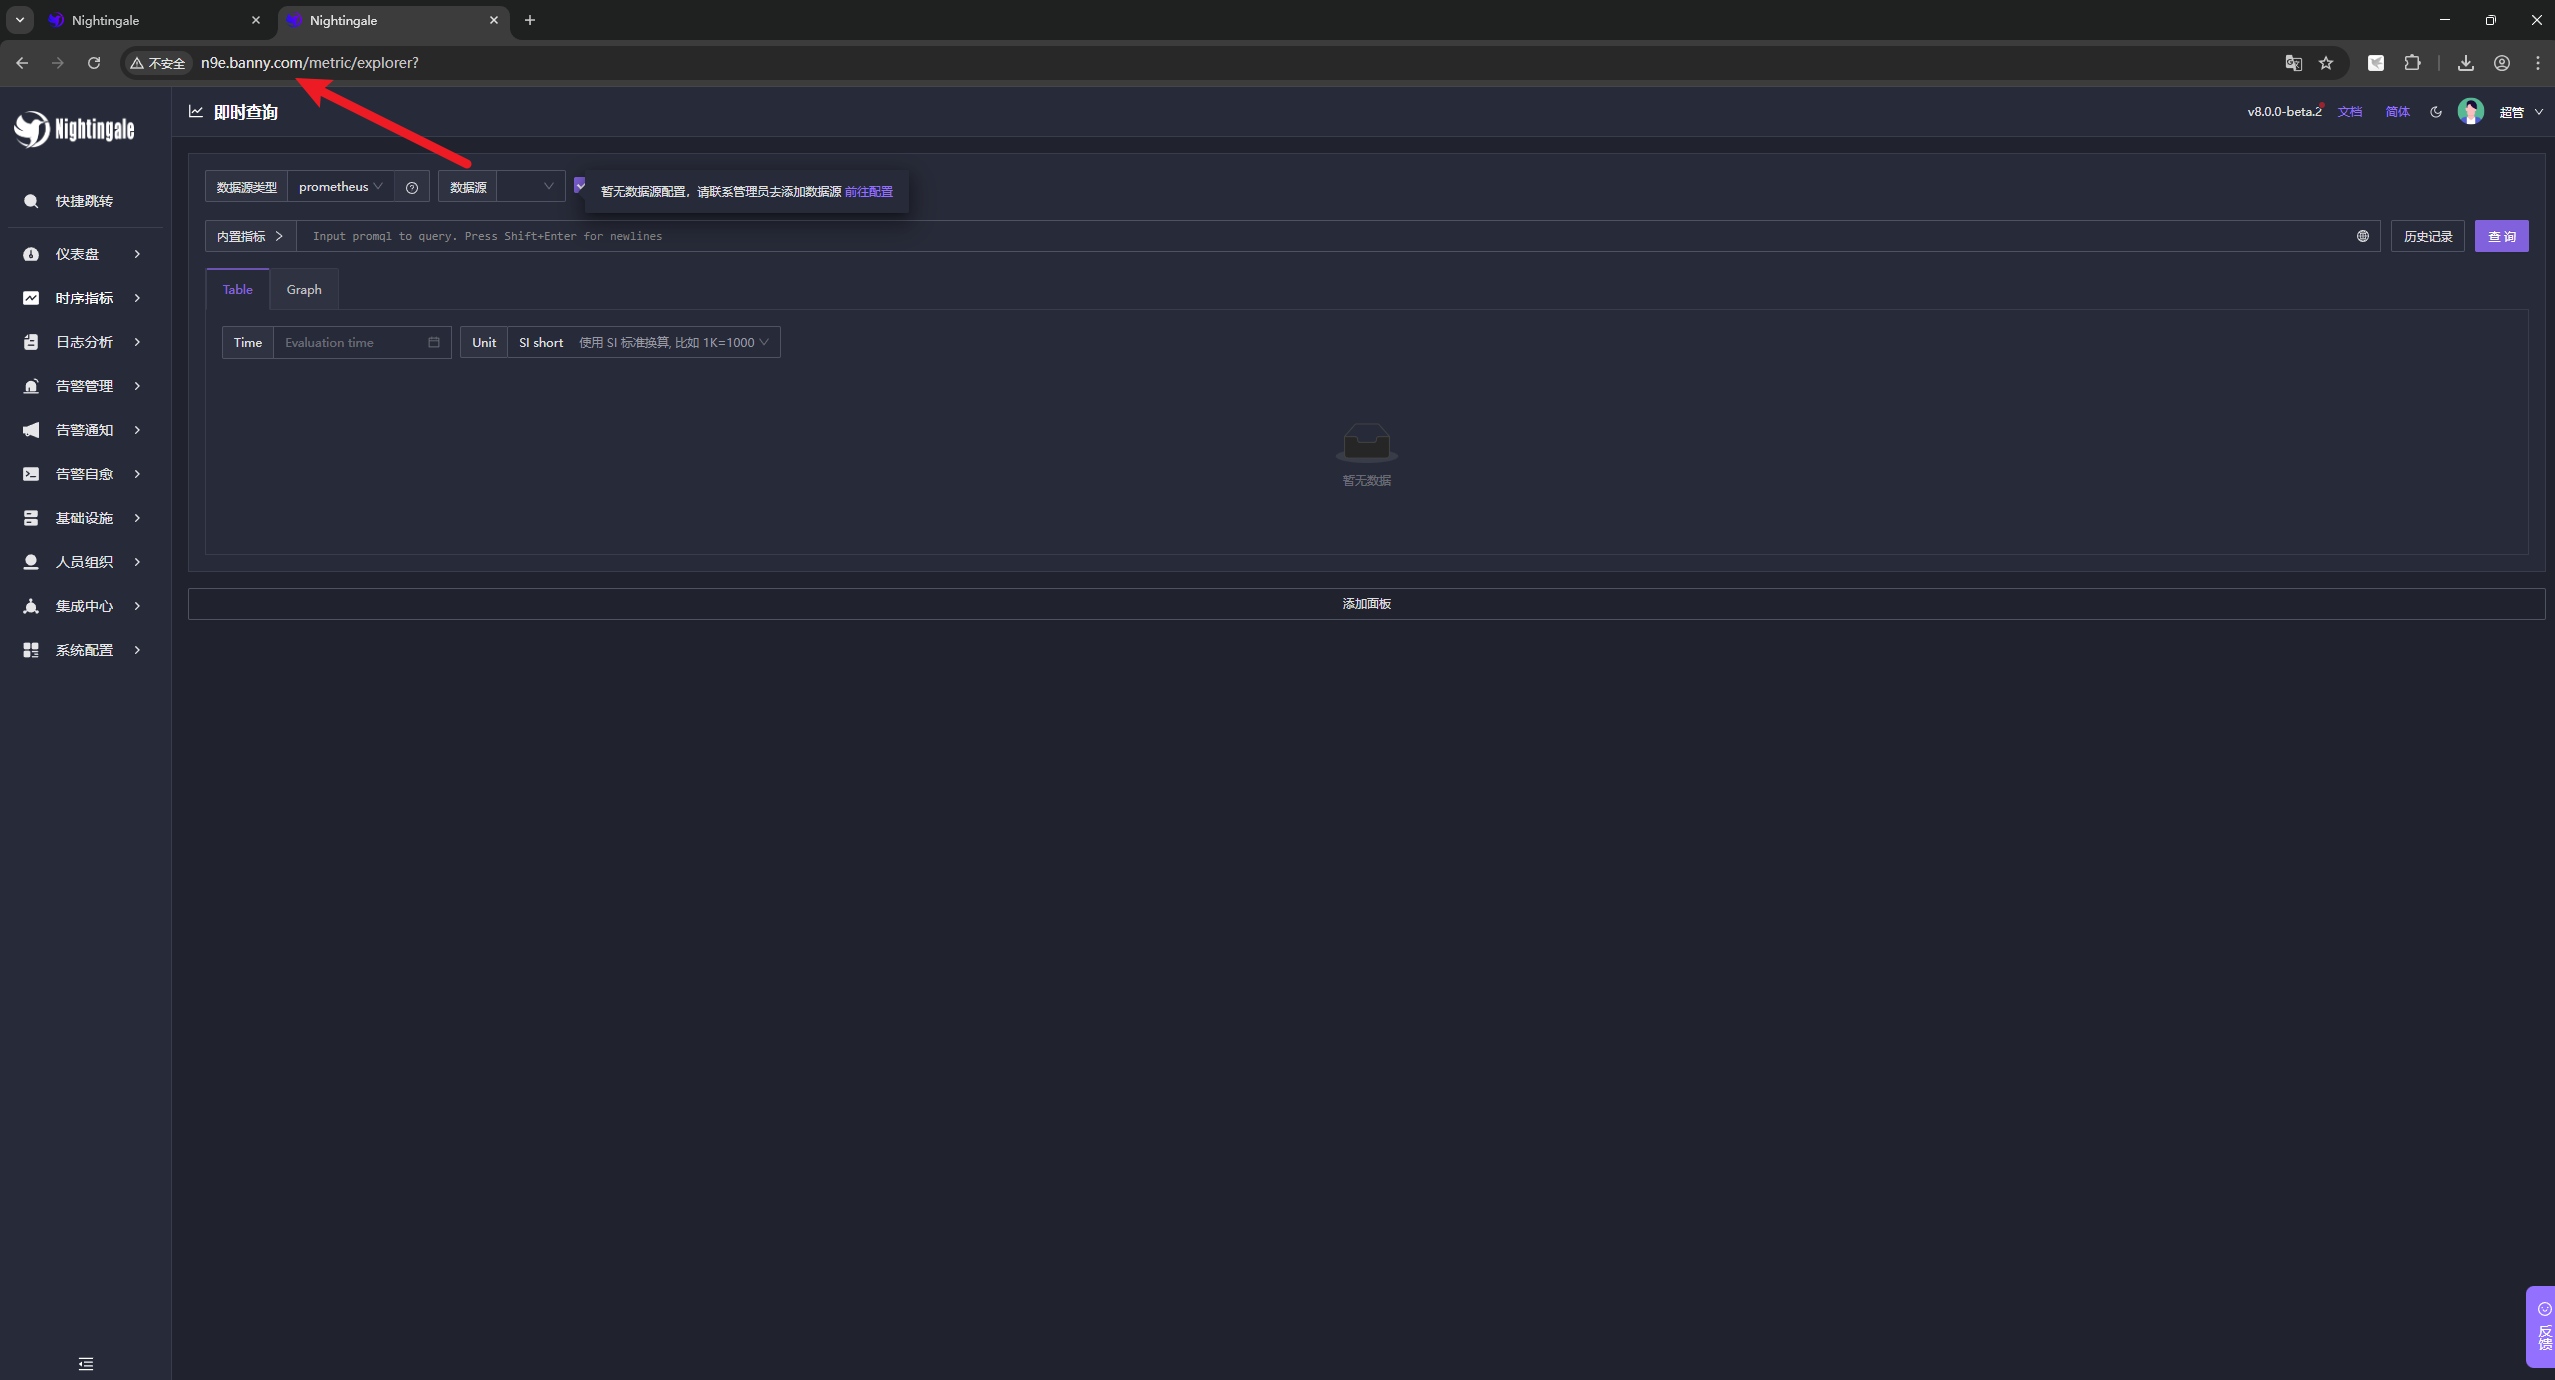
数据源配置
进入集成中心-数据源。配置prometheus

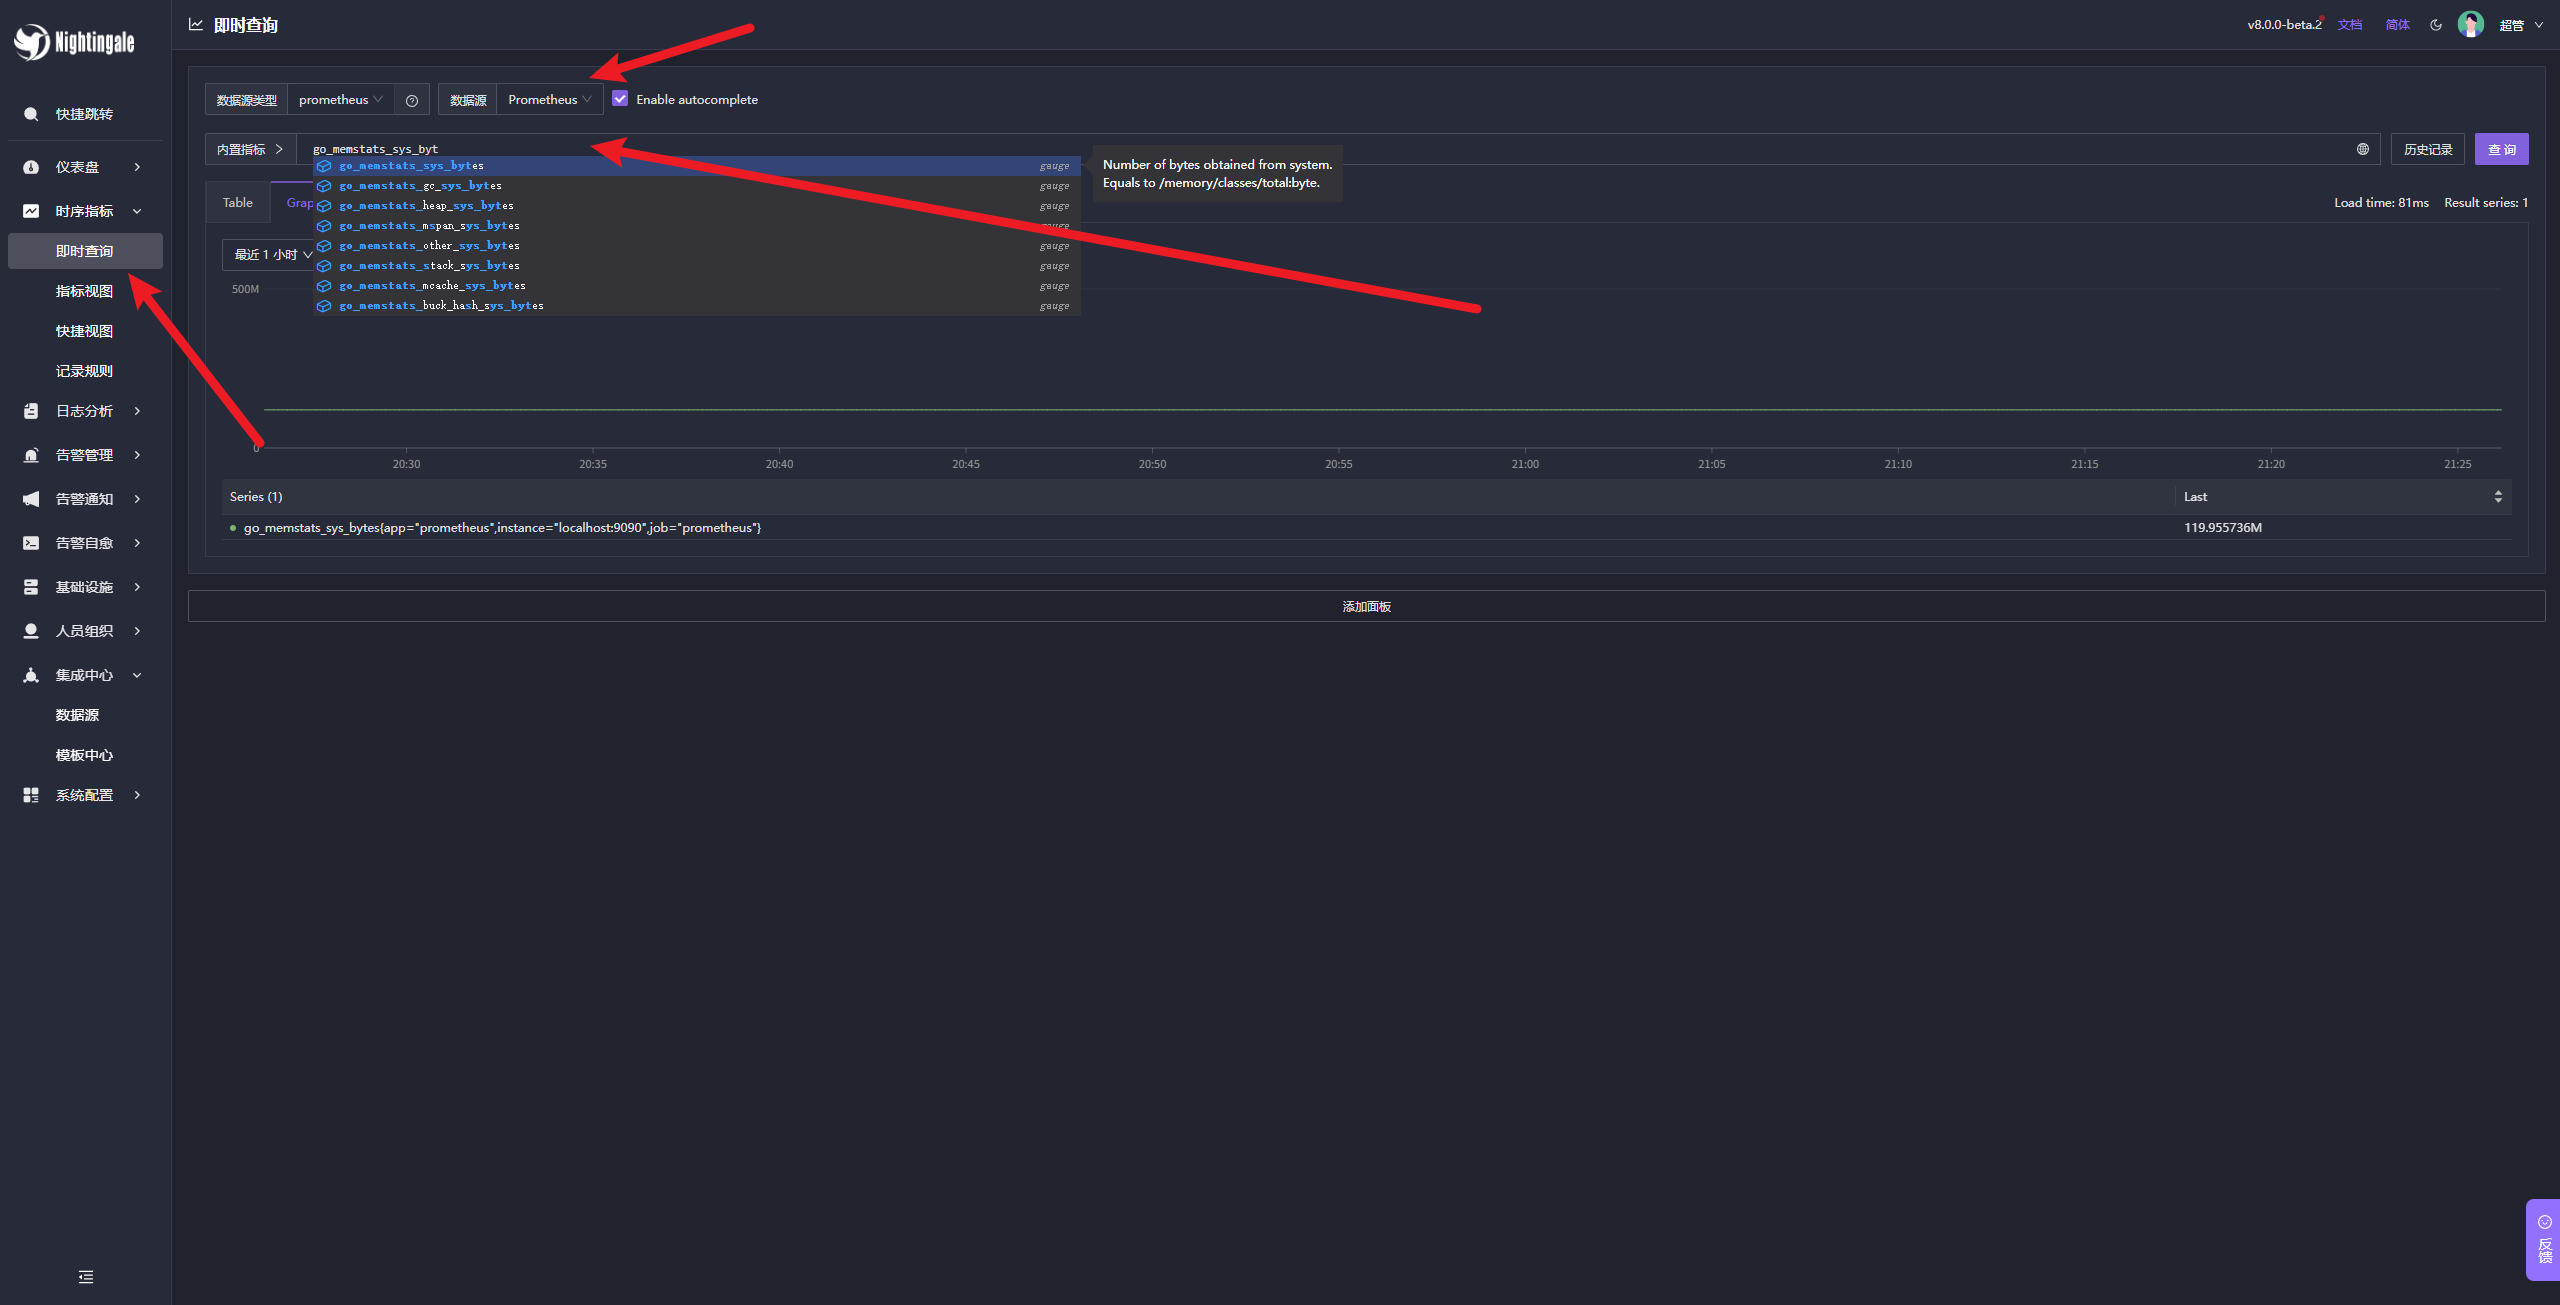
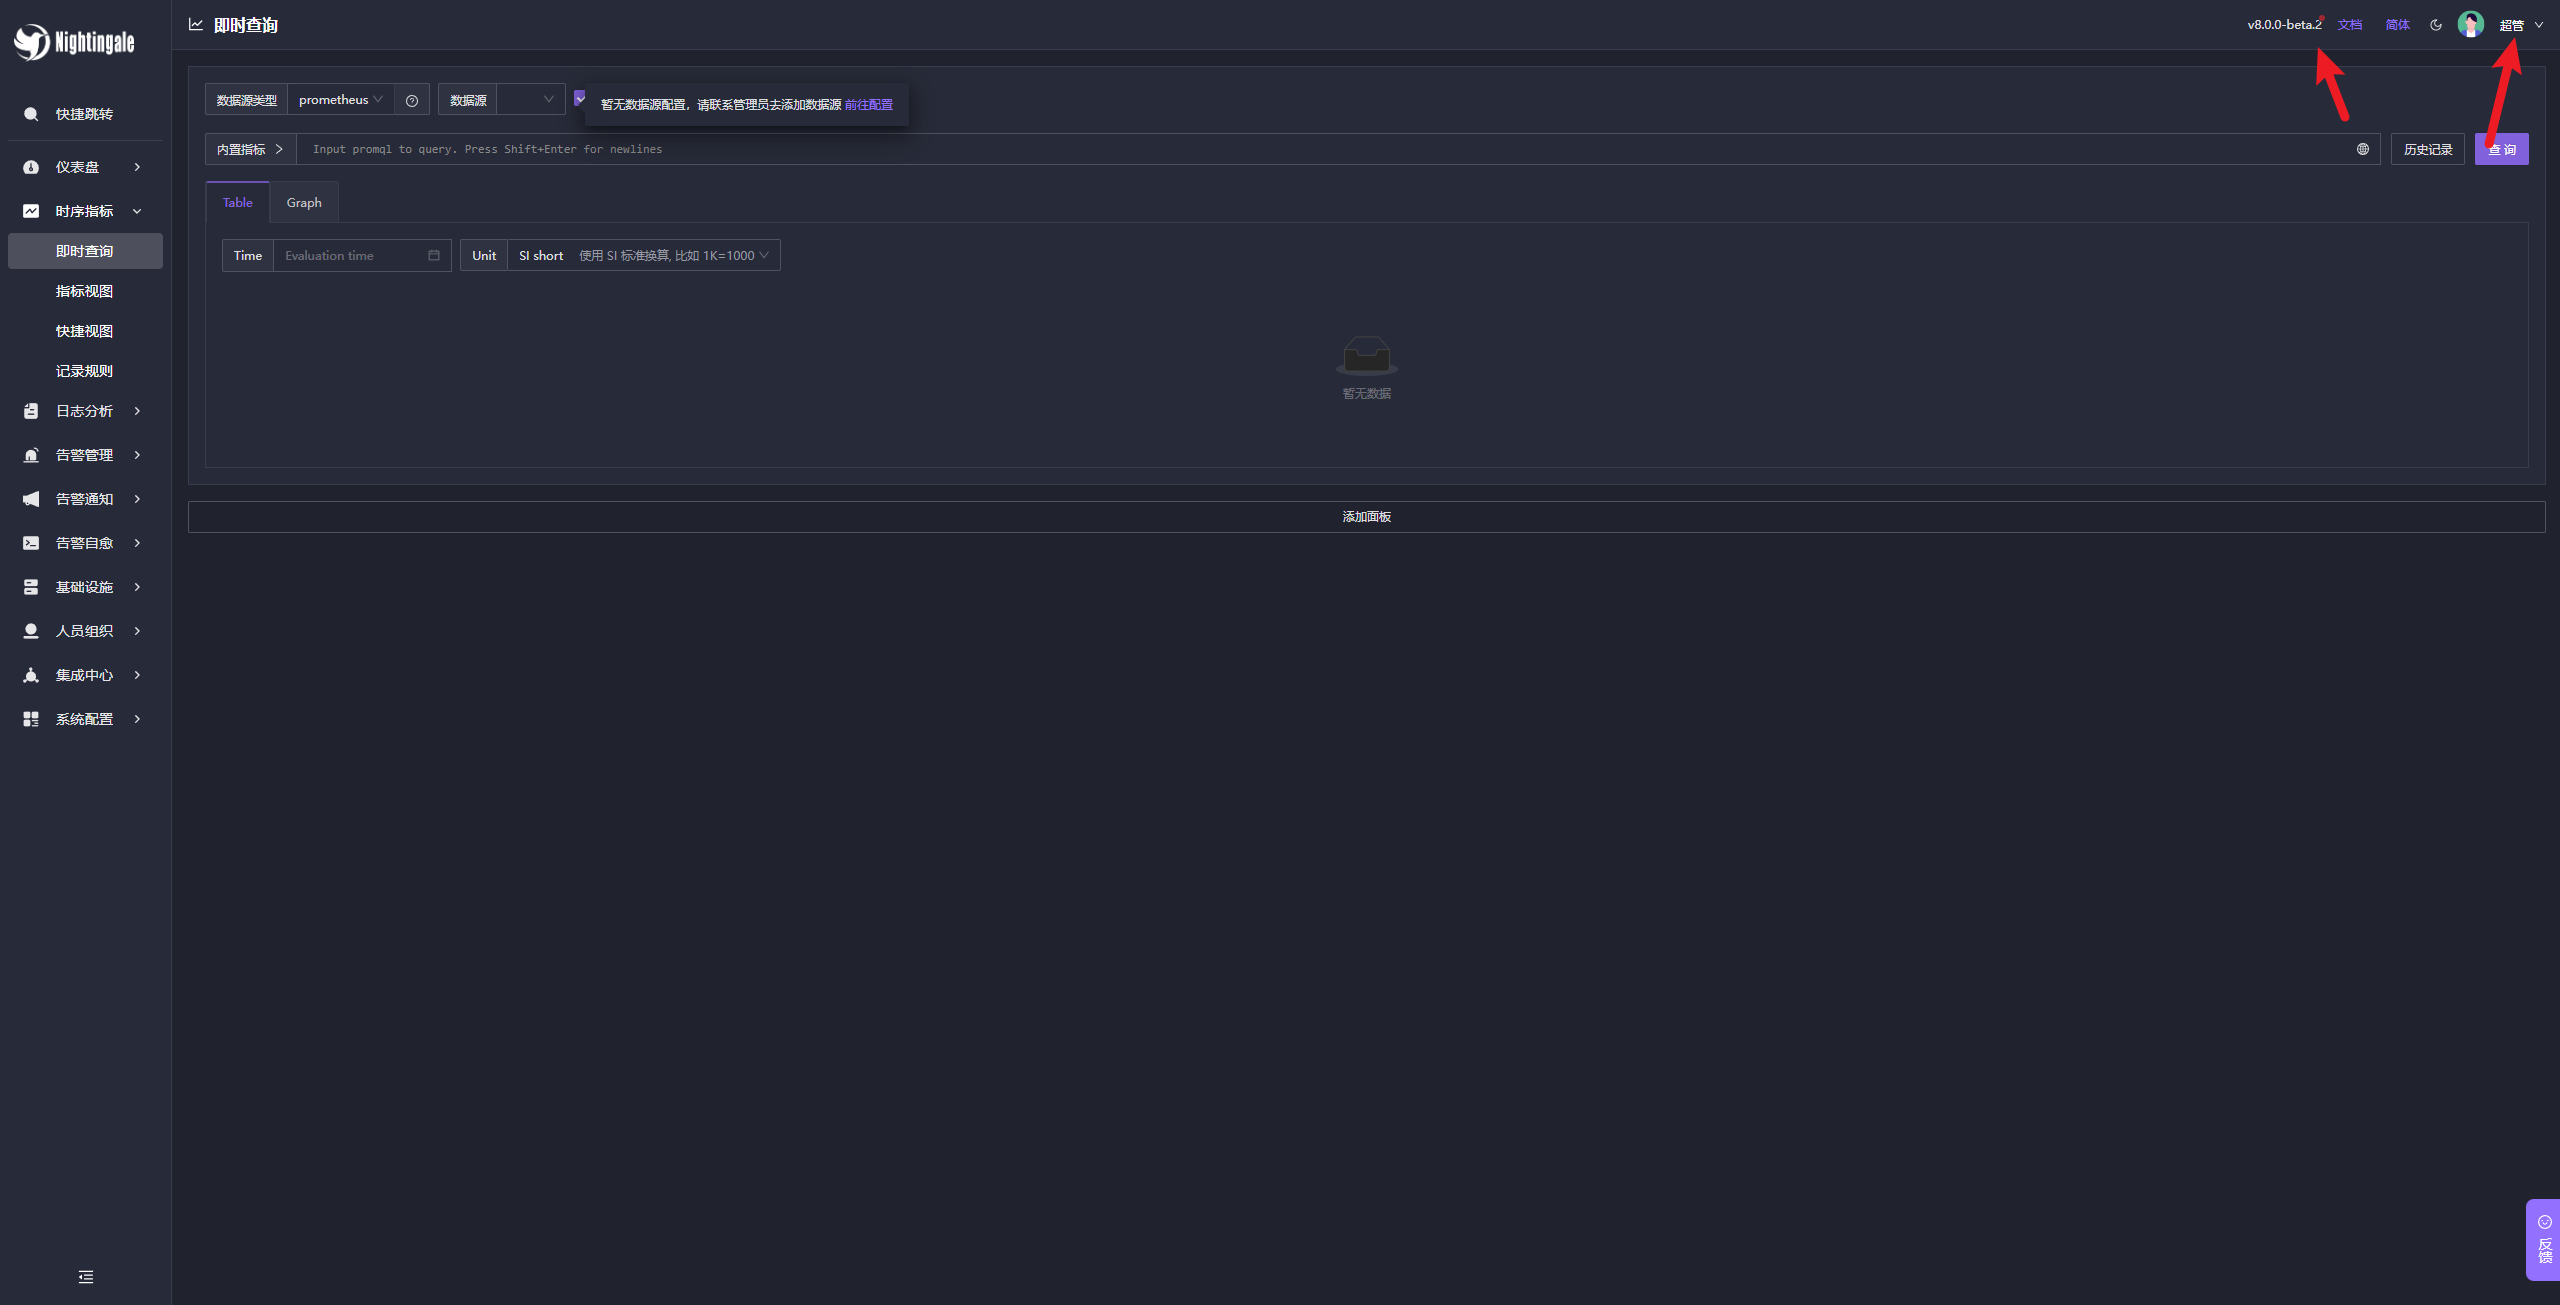
测试是否能拿到prometheus指标
进入时序指标-即时查询。输入sys看是否会跳出指标,随便点一个然后查询