5分钟——快速搭建后端springboot项目
- 1. idea新建工程
- 2. 构建pom.xml文件
- 3. 构建application.yml配置文件
- 4. 构建springboot启动类
- 5. 补充增删改查代码
- 6. 运行代码
- 7. 下一章
1. idea新建工程
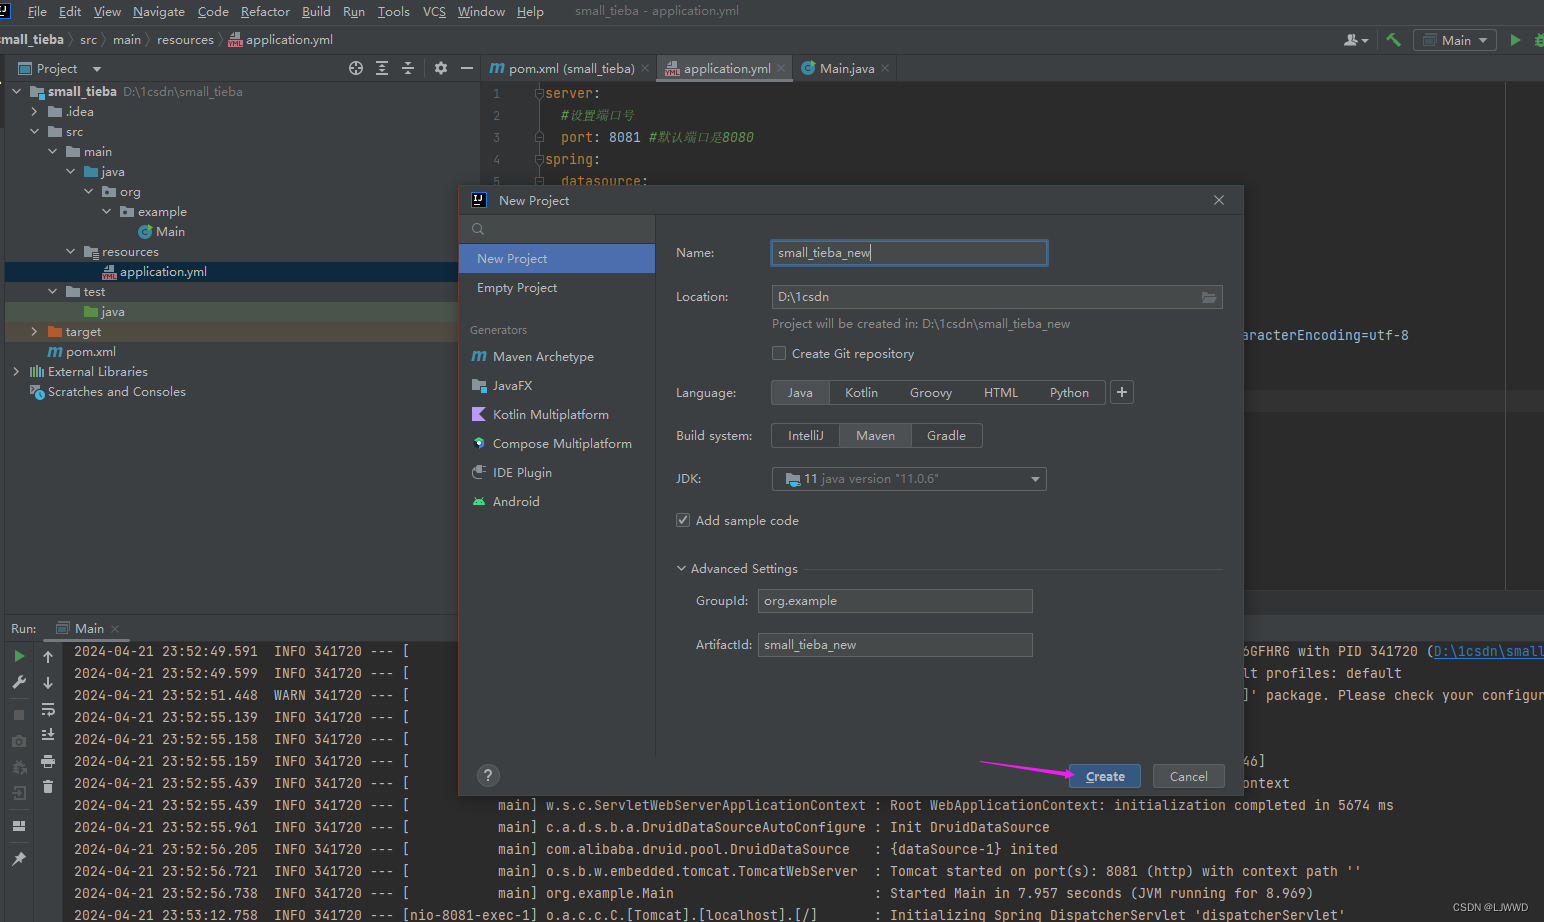
点击右上角新建一个代码工程
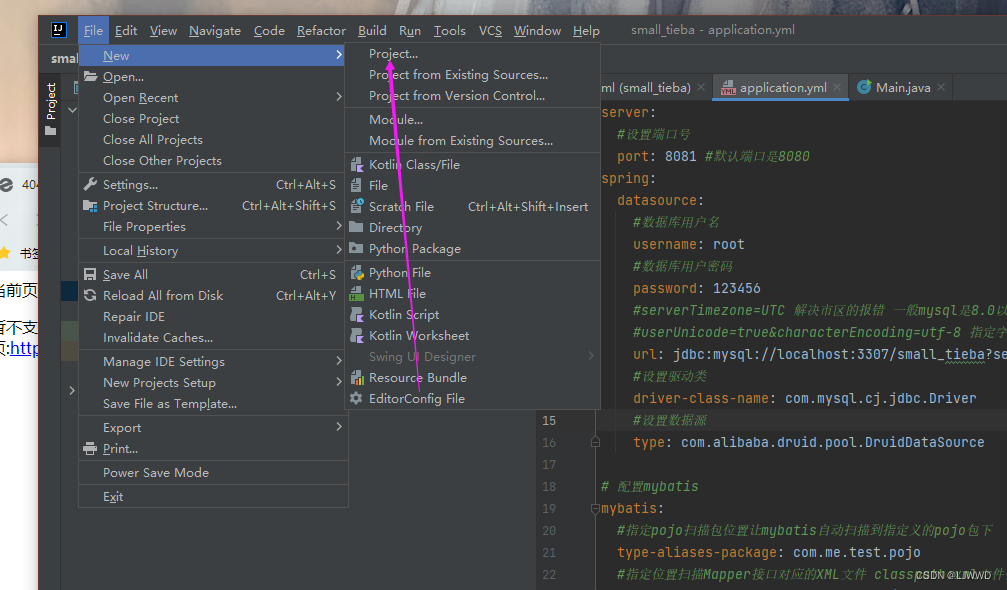
别的地方不太一样也不用太担心,先创建一个工程就好。
name: small_tieba_new
groupId: org.example
ArtifactId: small_tieba_new
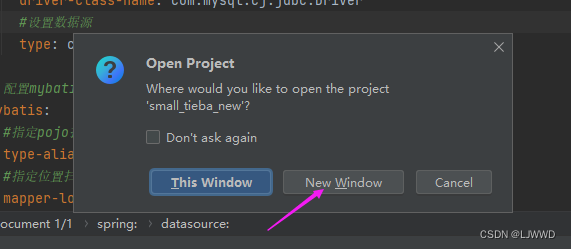
如果有这个弹窗,点击新窗口就好
2. 构建pom.xml文件
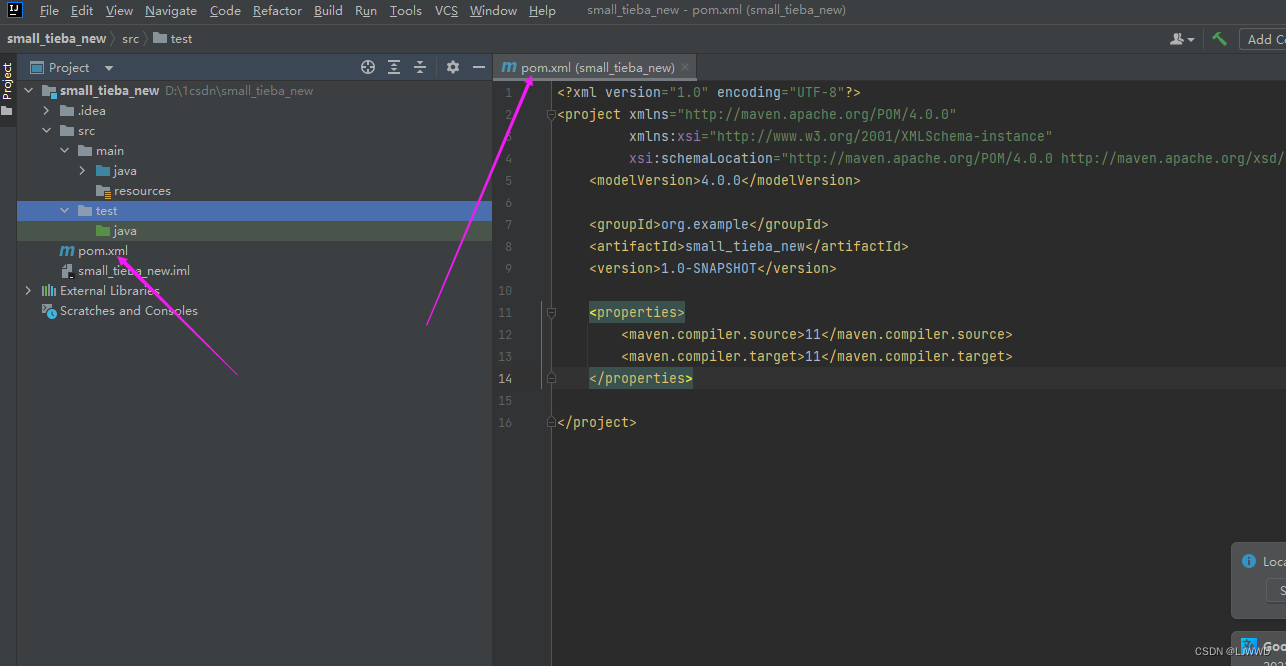
创建后之后就是这个样子,现在我们先填充一下pom.xml文件。
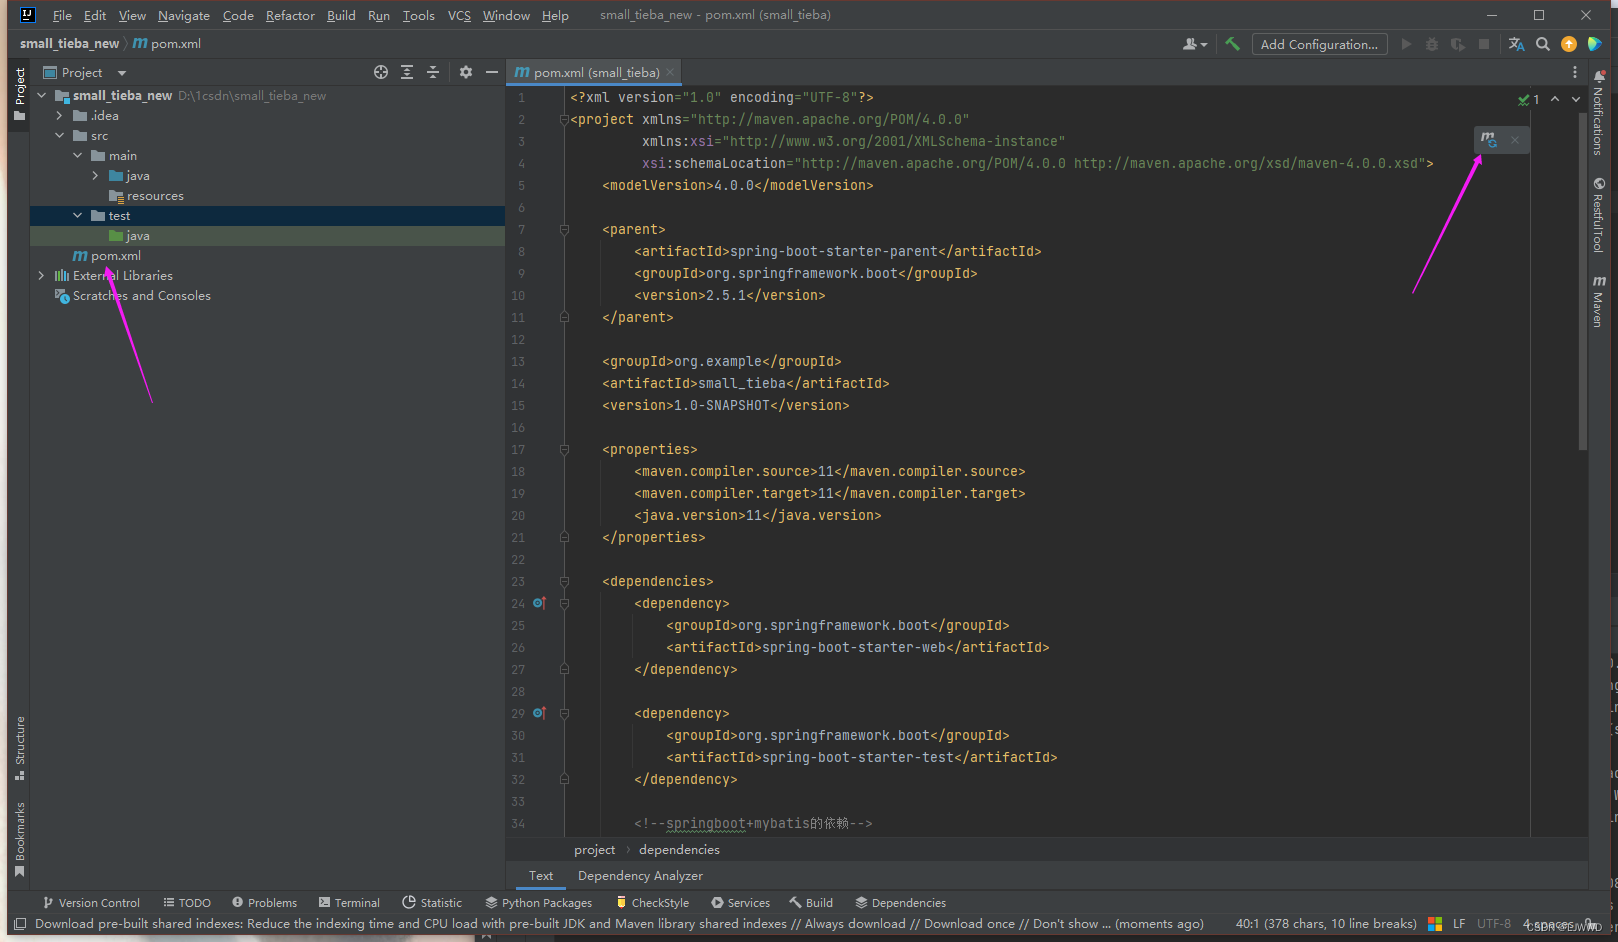
把下面的代码粘贴进pom.xml文件后点击一下右上角的小圆圈。(如果有pom.xml文件直接全选文件内容然后粘贴就好。如果没有则在相同位置新建一个名为pom.xml文件然后再粘贴下面提供的代码就好)
<?xml version="1.0" encoding="UTF-8"?>
<project xmlns="http://maven.apache.org/POM/4.0.0"xmlns:xsi="http://www.w3.org/2001/XMLSchema-instance"xsi:schemaLocation="http://maven.apache.org/POM/4.0.0 http://maven.apache.org/xsd/maven-4.0.0.xsd"><modelVersion>4.0.0</modelVersion><parent><artifactId>spring-boot-starter-parent</artifactId><groupId>org.springframework.boot</groupId><version>2.5.1</version></parent><groupId>org.example</groupId><artifactId>small_tieba</artifactId><version>1.0-SNAPSHOT</version><properties><maven.compiler.source>11</maven.compiler.source><maven.compiler.target>11</maven.compiler.target><java.version>11</java.version></properties><dependencies><dependency><groupId>org.springframework.boot</groupId><artifactId>spring-boot-starter-web</artifactId></dependency><dependency><groupId>org.springframework.boot</groupId><artifactId>spring-boot-starter-test</artifactId></dependency><dependency><groupId>com.baomidou</groupId><artifactId>mybatis-plus-boot-starter</artifactId><version>3.5.0</version></dependency><!--MySQL数据库驱动--><dependency><groupId>mysql</groupId><artifactId>mysql-connector-java</artifactId></dependency><!--druid数据库连接池依赖--><dependency><groupId>com.alibaba</groupId><artifactId>druid-spring-boot-starter</artifactId><version>1.2.8</version></dependency><!--Lombok依赖(可以配置也可以不用配置具体看自己)--><dependency><groupId>org.projectlombok</groupId><artifactId>lombok</artifactId></dependency></dependencies><build><plugins><plugin><groupId>org.springframework.boot</groupId><artifactId>spring-boot-maven-plugin</artifactId></plugin></plugins></build></project>
3. 构建application.yml配置文件
右键resources,新建一个文件
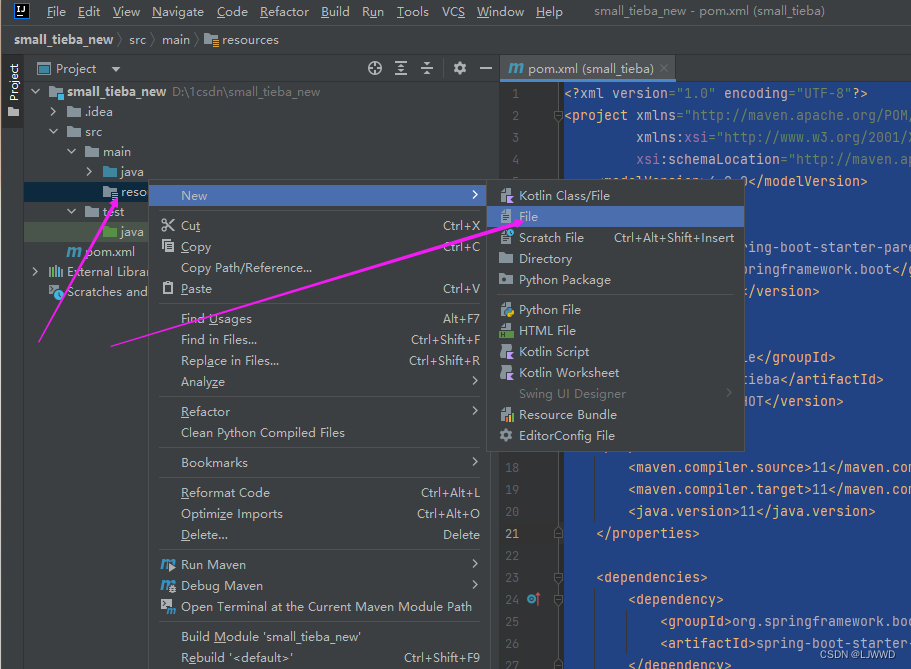
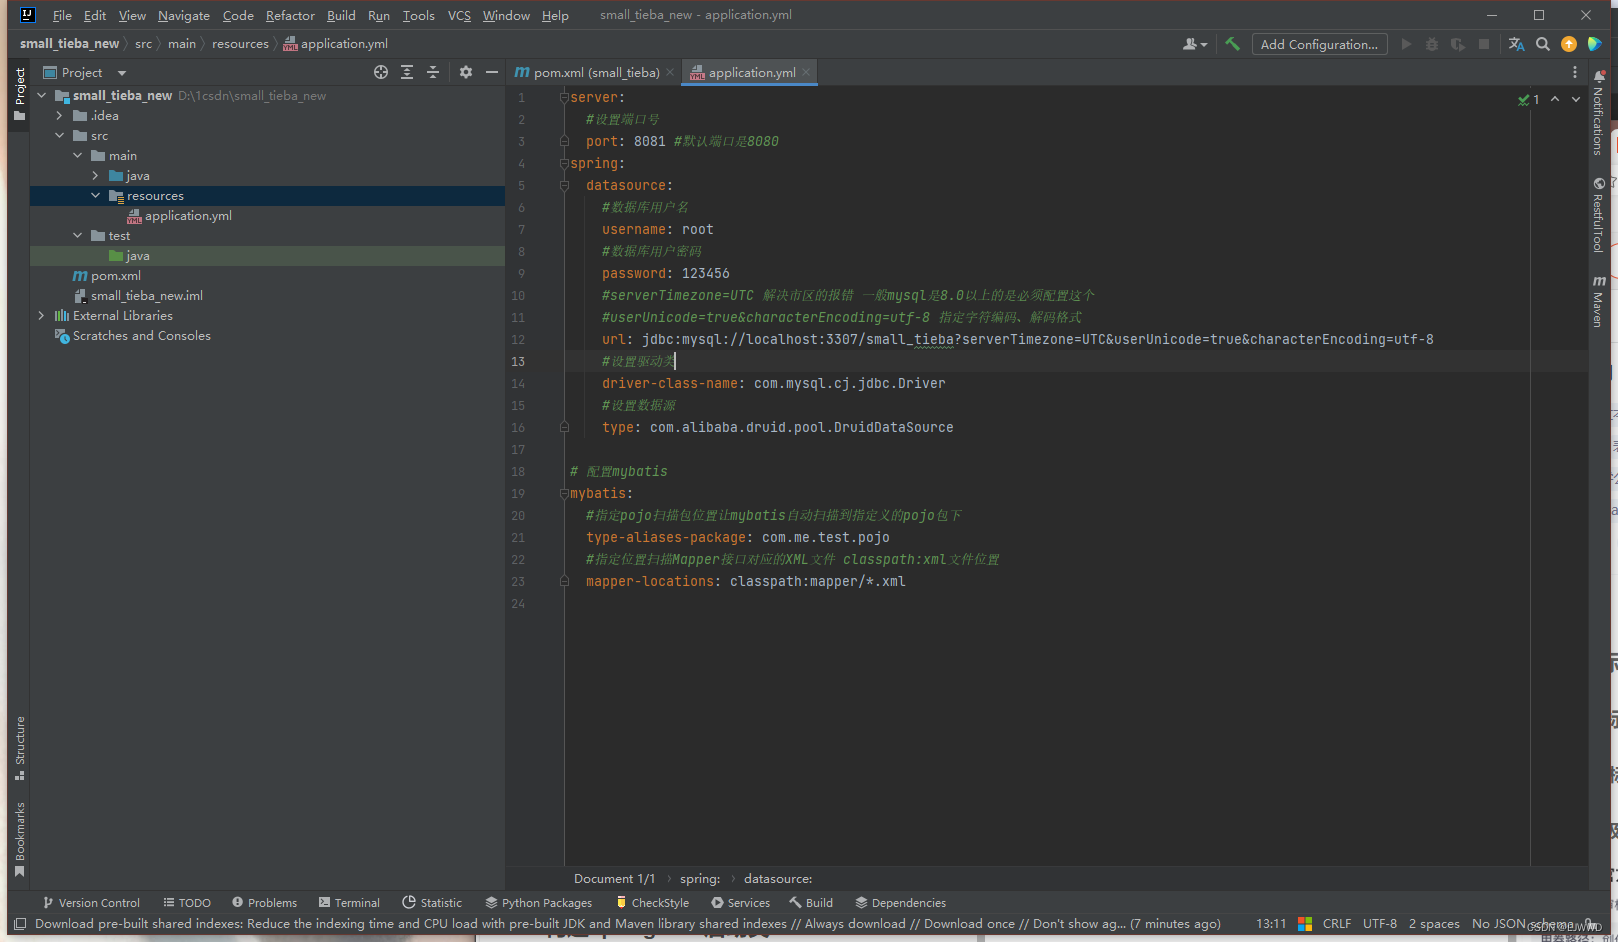
名字叫做 application.yml, 然后再把下列代码粘贴进去。
server:#设置端口号port: 8081 #默认端口是8080
spring:datasource:#数据库用户名username: root#数据库用户密码password: 123456#serverTimezone=UTC 解决市区的报错 一般mysql是8.0以上的是必须配置这个#userUnicode=true&characterEncoding=utf-8 指定字符编码、解码格式url: jdbc:mysql://localhost:3307/small_tieba?serverTimezone=UTC&userUnicode=true&characterEncoding=utf-8#设置驱动类driver-class-name: com.mysql.cj.jdbc.Driver#设置数据源type: com.alibaba.druid.pool.DruidDataSource# 配置mybatis
mybatis:#指定pojo扫描包位置让mybatis自动扫描到指定义的pojo包下type-aliases-package: com.me.test.pojo#指定位置扫描Mapper接口对应的XML文件 classpath:xml文件位置mapper-locations: classpath:mapper/*.xml
完成后的样子~
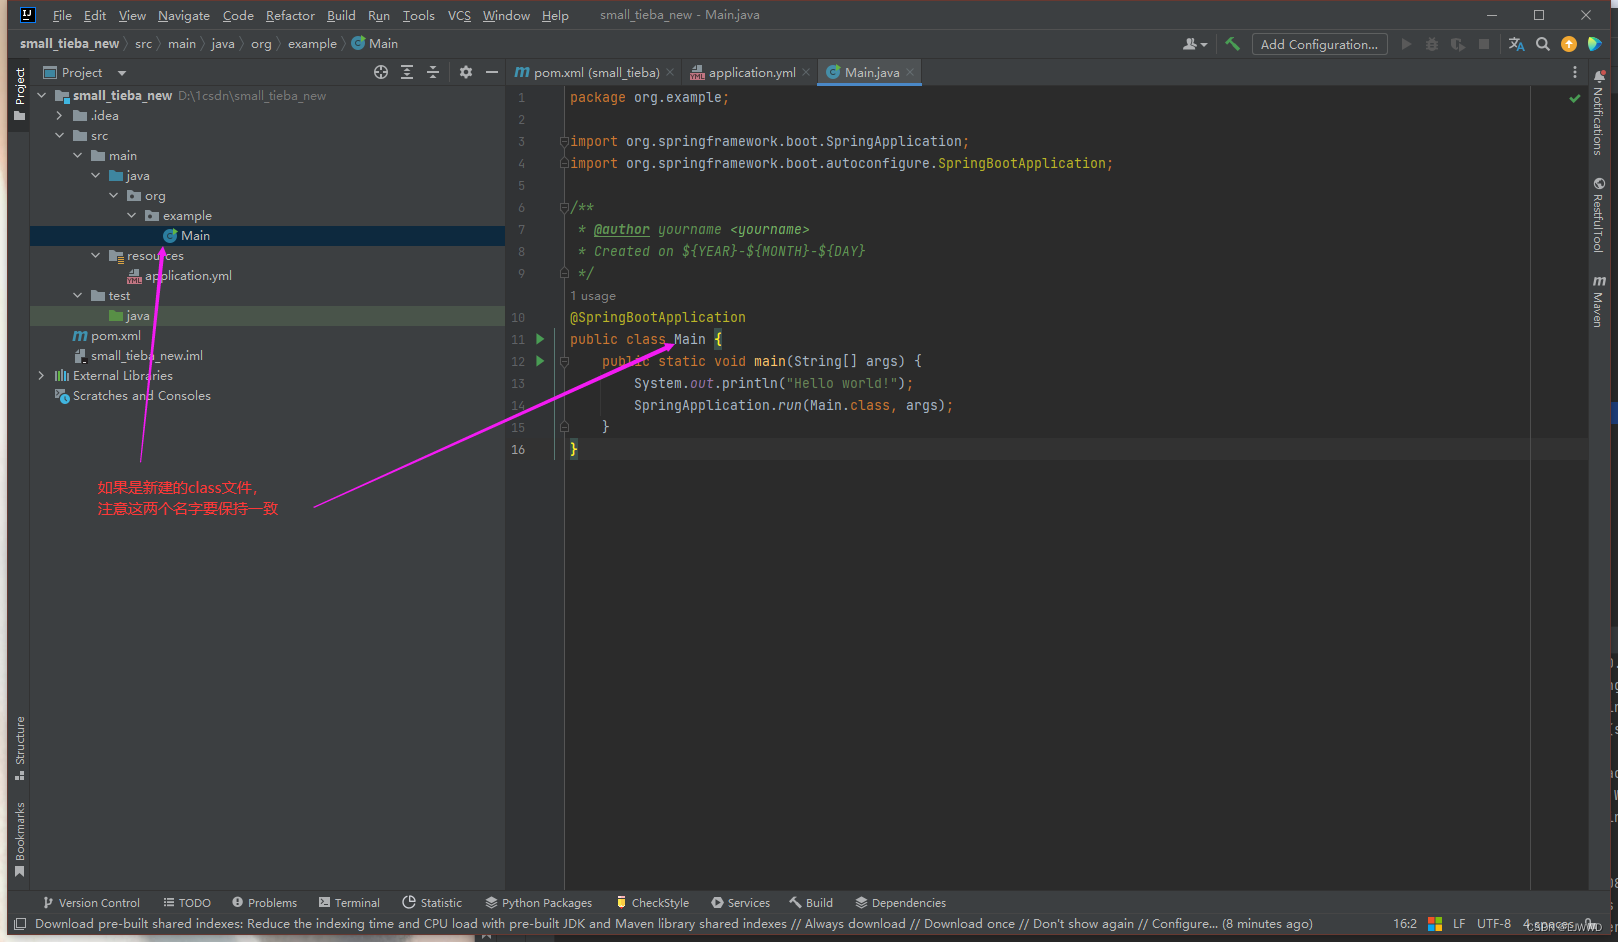
4. 构建springboot启动类
修改Main文件的内容(如果没有则自己新建一个class文件):
package org.example;import org.springframework.boot.SpringApplication;
import org.springframework.boot.autoconfigure.SpringBootApplication;/*** @author yourname <yourname>* Created on ${YEAR}-${MONTH}-${DAY}*/
@SpringBootApplication
public class Main {public static void main(String[] args) {System.out.println("Hello world!");SpringApplication.run(Main.class, args);}
}
完成后的样子~
5. 补充增删改查代码
新建文件夹补充代码。
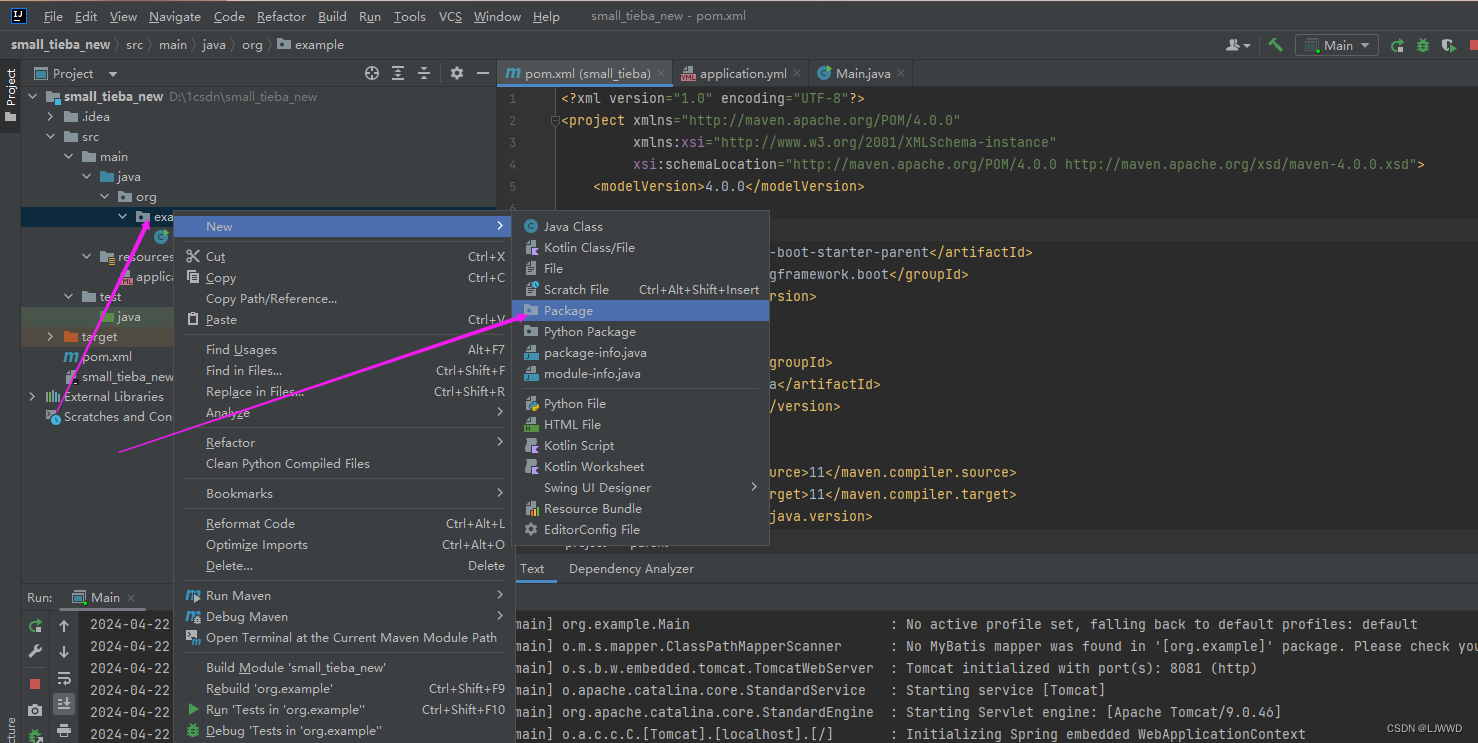
然后在新建好的文件夹里面新建类(Class)文件
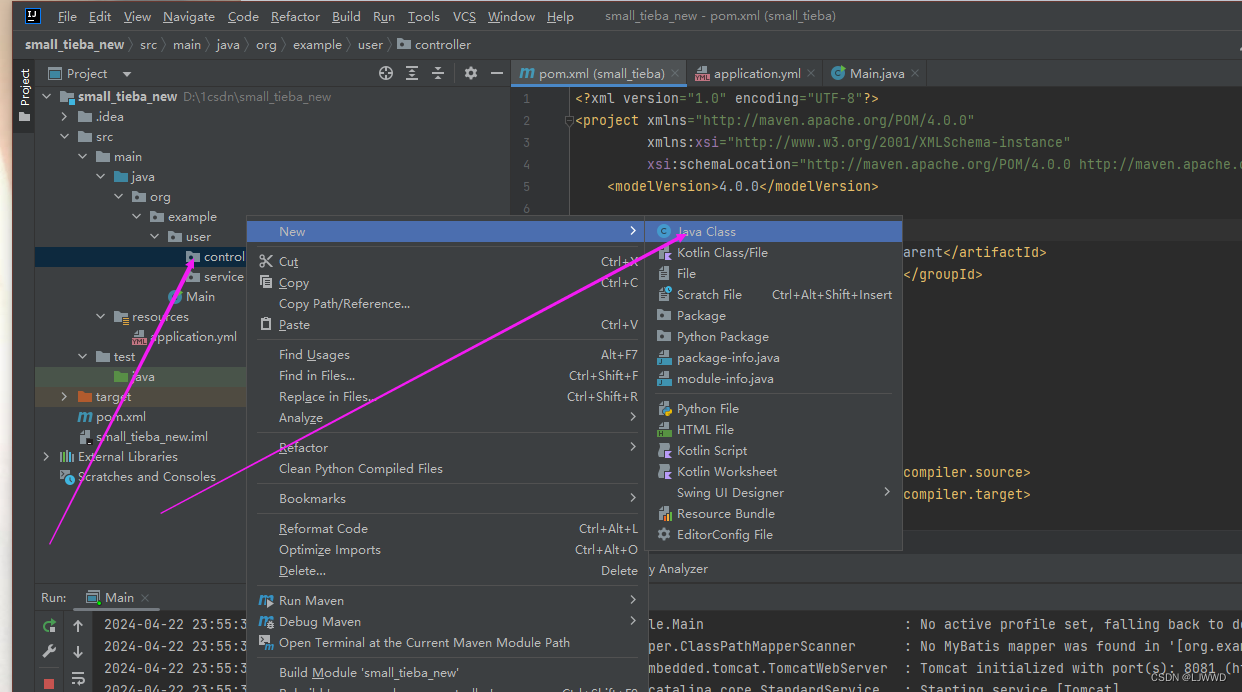
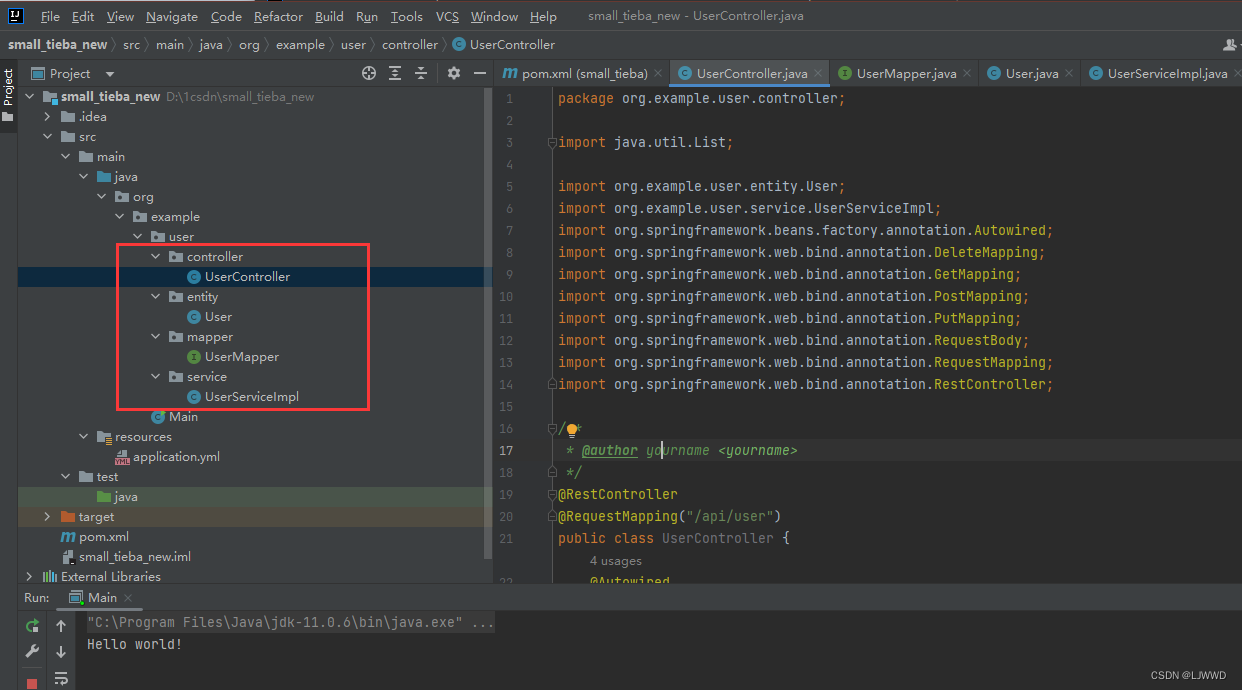
然后将下面的代码分别粘贴到对应的类(Class)文件中
UserController
package org.example.user.controller;import java.util.List;import org.example.user.entity.User;
import org.example.user.service.UserServiceImpl;
import org.springframework.beans.factory.annotation.Autowired;
import org.springframework.web.bind.annotation.DeleteMapping;
import org.springframework.web.bind.annotation.GetMapping;
import org.springframework.web.bind.annotation.PostMapping;
import org.springframework.web.bind.annotation.PutMapping;
import org.springframework.web.bind.annotation.RequestBody;
import org.springframework.web.bind.annotation.RequestMapping;
import org.springframework.web.bind.annotation.RestController;/*** @author yourname <yourname>*/
@RestController
@RequestMapping("/api/user")
public class UserController {@Autowiredprivate UserServiceImpl userService;/*** 查询所有*/@GetMappingList<User> getAll(){List<User> user = userService.getUser();return user;}/*** 新增*/@PostMappingvoid add(@RequestBody User user){userService.insertUser(user);}/*** 修改*/@PutMappingvoid update(@RequestBody User user){userService.updateUser(user);}/*** 通过id删除*/@DeleteMappingvoid deleteById(@RequestBody User user){userService.delUser(user.getId());}
}
entity.User
package org.example.user.entity;import com.baomidou.mybatisplus.annotation.IdType;
import com.baomidou.mybatisplus.annotation.TableId;import lombok.Data;/*** User实体类*/
@Data
public class User {@TableId(type = IdType.AUTO)private Integer id;private String username;}
mapper.UserMapper
package org.example.user.mapper;import org.apache.ibatis.annotations.Mapper;
import org.example.user.entity.User;
import com.baomidou.mybatisplus.core.mapper.BaseMapper;/*** <p>* UserMapper 接口* </p>*/
@Mapper
public interface UserMapper extends BaseMapper<User> {}
service.UserServiceImpl
package org.example.user.service;import java.util.List;import org.example.user.entity.User;
import org.example.user.mapper.UserMapper;
import org.springframework.beans.factory.annotation.Autowired;
import org.springframework.stereotype.Service;/*** @author yourname <yourname>* Created on 2024-04-22*/
@Service
public class UserServiceImpl {@Autowiredprivate UserMapper userMapper;/*** 新增user*/public void insertUser(User user) {userMapper.insert(user);}/*** 通过userId删除user*/public void delUser(Integer userId) {userMapper.deleteById(userId);}/*** 通过userId修改user*/public void updateUser(User user) {userMapper.updateById(user);}/*** 获取所有user*/public List<User> getUser() {List<User> users = userMapper.selectList(null);return users;}}
完成后的样子~
6. 运行代码
运行main函数

可以看见Started Main in 12.841 seconds就代表运行成功啦

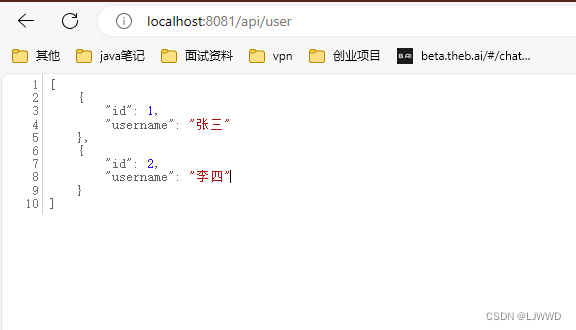
打开浏览器输入网址:http://localhost:8081/api/user 就能看见我们数据库中的内容了
7. 下一章
5分钟——测试搭建的springboot接口(二)