登录功能的实现
欢迎来到“雪碧聊技术”CSDN博客!
在这里,您将踏入一个专注于Java开发技术的知识殿堂。无论您是Java编程的初学者,还是具有一定经验的开发者,相信我的博客都能为您提供宝贵的学习资源和实用技巧。作为您的技术向导,我将不断探索Java的深邃世界,分享最新的技术动态、实战经验以及项目心得。
让我们一同在Java的广阔天地中遨游,携手提升技术能力,共创美好未来!感谢您的关注与支持,期待在“雪碧聊技术”与您共同成长!

目录
一、前端实现
1、在src目录下,创建前端页面views/login.vue
2、编写路由,请求与组件的对应关系
3、在App.vue中添加路由标签
4、启动项目,测试效果
5、编写登录页面Login.vue的内容(根据自己的喜好来)
注意:如果想在vue页面中,添加一些原生的JavaScript代码,可通过如下方式
6、页面效果展示
一、前端实现
1、在src目录下,创建前端页面views/login.vue

2、编写路由,请求与组件的对应关系

3、在App.vue中添加路由标签

4、启动项目,测试效果

5、编写登录页面Login.vue的内容(根据自己的喜好来)
以下页面仅供参考。
<template><div class="login"><h1>Login</h1><form action=""><input type="text" placeholder="账号"><input type="text" placeholder="密码"><button>登录</button></form></div>
</template><script>
export default{//该页面挂载时,添加如下的原生JavaScript代码mounted(){//利用此方式,将原生的JavaScript代码,写入vue页面//获取loginlet login = document.querySelector('.login')let span;let inTime,outTime//用于优化观感let isIn=true//鼠标进入事件的开关let isOut//鼠标离开事件的开关//鼠标进入事件login.addEventListener('mouseenter', function (e){isOut = false if(isIn){inTime = new Date().getTime()//生成span元素span = document.createElement('span')login.appendChild(span)//span去使用in动画span.style.animation = 'in .5s ease-out forwards'//计算top和left的值let top = e.clientY - e.target.offsetToplet left = e.clientX - e.target.offsetLeftspan.style.top = top + 'px'span.style.left = left + 'px'//关闭开关1isIn = false//打开开关2isOut=true}})//鼠标离开事件login.addEventListener('mouseleave',function(e){if(isOut){outTime = new Date().getTime()let passTime = outTime - inTimeif (passTime < 500) {setTimeout(mouseleave, 500 - passTime)} else {mouseleave()}}//鼠标离开login卡片的事件function mouseleave() {span.style.animation = 'out .5s ease-out forwards'//计算top和left的值let top = e.clientY - e.target.offsetToplet left = e.clientX - e.target.offsetLeftspan.style.top = top + 'px'span.style.left = left + 'px'//打开开关setTimeout(function () {login.removeChild(span)isIn = true}, 500)}})}
}
</script><style>
*
{margin: 0;padding: 0;color: #eee;
}body
{display: flex;flex-direction: column;justify-content: center;align-items: center;height: 100vh;background-color: #2c3e50;
}.login
{/* 超出部分隐藏(这是关键) */overflow: hidden;position: relative;display: flex;flex-direction: column;justify-content: center;align-items: center;width: 300px;height: 450px;background-color: #34495e;border-radius: 10px;box-shadow: 10px 10px 20px rgba(33, 44, 55, 3);
}h1
{font-size: 45px;font-weight:400;/* 提高层级(为了让动画不会挡住表单内容) */z-index: 1;
}form
{display: flex;flex-direction: column;justify-content: space-around;align-items: center;width: 100%;height: 230px;/* 提高层级(为了让动画不会挡住表单内容) */z-index: 1;
}input
{width: 200px;height: 40px;background-color: transparent;border: none;border-bottom: 2px solid #eee;font-size: 16px;outline: none;
}input::placeholder
{font-size: 12px;color:#eee;
}button
{width:180px;height:36px;border:1px solid #eee;border-radius: 18px;background-color: transparent;font-size: 14px;cursor: pointer;
}span
{position:absolute;top:0;left:0;width:0;height:0;background-color: #916968;/* 鼠标居中 */transform: translate(-50%, -50%);/* 圆的形式展开 */border-radius: 50%;
}/*鼠标进入login时的动画*/
@keyframes in
{0%{width:0;height:0;}100%{width:1200px;height:1200px;}
}/*鼠标离开login时的动画*/
@keyframes out
{0%{width: 1200px;height: 1200px;}100%{width: 0;height: 0;}
}
</style>
注意1:如果想在vue页面中,添加一些原生的JavaScript代码,可通过如下方式

注意2:如果使用的是语法糖(setup),则可通过下面的方式

6、页面效果展示

二、封装axios,用来发送登录请求
1、下载axios
npm install axios
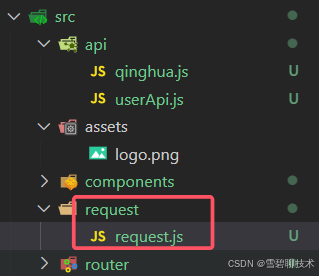
2、创建request/request.js,二次封装axios
//1、导入axios
import axios from 'axios'//2、创建axios对象
const service = axios.create({//axios请求的基础链接,只有换后端服务器时(如本地项目部署到云服务器),才会改动这个baseURL:'https://api.xygeng.cn'});//3、给axios对象,设置【请求拦截器】,前端每次给后端发送数据时要做的事
service.interceptors.request.use(config => {return config;
},error => {Promise.reject(error);
})//4、给axios对象,设置【响应拦截器】,后端响应给前端数据时要做的事
service.interceptors.response.use((response) => {return response.data;},error => {return Promise.reject(new Error(error.response.data))}
)//5、暴露axios对象service
export default service
3、创建api/userApi.js,编写登录api
import request from '@/request/request'//编写方法“用户登录”,并将其暴露出去
export function login(data){return request.post('/user/login',data);
}
4、在登录按钮事件中,发送前端请求
数据库实现、后端实现
目前不需要,我们只编写前端代码