衡石分析平台系统管理手册-功能配置之AI 助手集成嵌入指南
AI 助手集成嵌入指南
本文档将引导您通过几个简单的步骤,将 AI 助手集成或嵌入到您的系统中。HENGSHI SENSE AI 助手提供了多种集成方式,您可以通过 iframe、JS SDK 或 API 调用等方式将 AI 助手嵌入集成到您的系统中。
1. 通过 iframe 集成
iframe 集成方式是最简单的一种,您只需要在您的 HTML 文件中(或 Vue/React 组件中)添加一个 iframe 元素,并设置其 src 属性为 AI 助手的 URL。
html
<iframesrc="https://develop.hengshi.org/copilot"width="100%"height="100%">
</iframe>
url query string 参数说明
我们提供了一些可选的 URL 参数,您可以根据需要进行调整。
数据来源
您可以通过以下方式指定与 AI 助手对话时的数据来源:
- 与图表所在数据源对话
?appId={应用 ID}&chartId={图表 ID}- 与数据包数据模型对话
?dataAppId={数据包 ID}&datasetId={数据集 ID}主题颜色
您可以通过以下方式指定 AI 助手对话内图表的主题颜色:
?chartTheme={仪表盘主题 ID}1
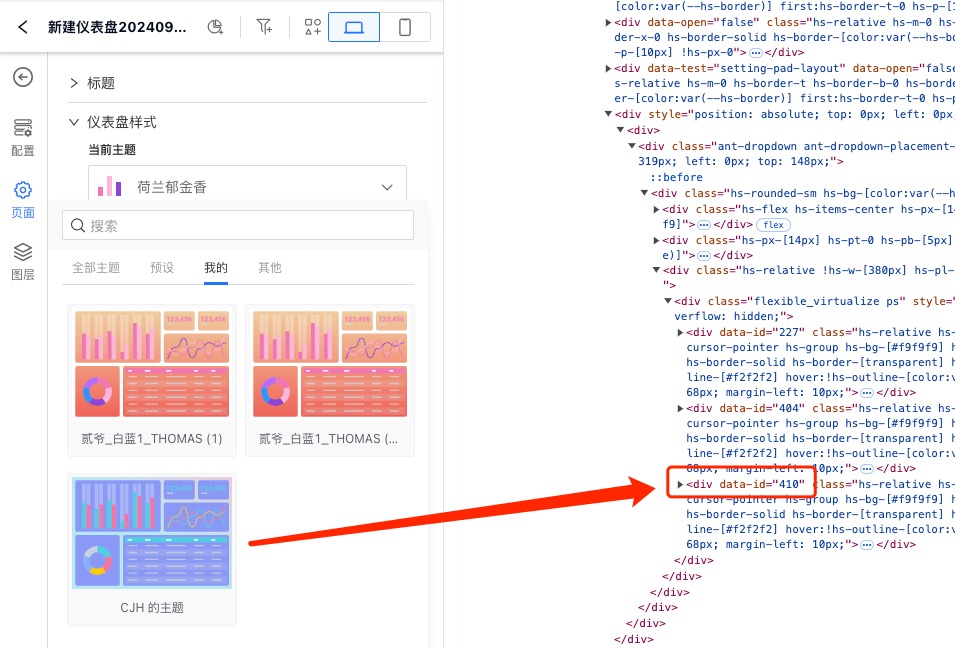
仪表盘主题 ID 可以在您的应用创作区仪表盘编辑时,在主题下拉菜单中找到,如下图所示:
只显示指定对话
我们还提供了 conversationId 和 chatUid 参数,且允许以逗号分割传递多个值,用于指定只显示指定对话。这两个参数可以单独使用,也可以组合使用。
?conversationId={对话ID1,对话ID2}&chatUid={uid1,uid2}登录认证
若您需要在其他系统中集成时,可能需要进行登录认证,可以通过 jwt 参数传递登录信息:
?activeAuth=jwt-param&jwtParam={JWT 参数}2. 通过 JS SDK 集成
JS SDK 集成方式需要您在您的 HTML 文件中(或 Vue/React 组件中)引入 AI 助手的 JS 文件,并调用相关 API。这将需要您拥有一定的 JavaScript 开发经验。
获取 Copilot SDK 链接
您可以进入系统内设置->功能配置->AI 助手->控制台页面,点击选项->Copilot SDK打开集成页面指南,在抽屉弹窗中,您将找到用于集成的 SDK 链接,例如
https://develop.hengshi.org/assets/hengshi-copilot@5.3.js1
在其他系统中集成 Copilot SDK
我们提供了在 vue、react、纯 js 等前端框架中集成 Copilot SDK 的示例代码,您可以根据需要进行选择,这要求您需要有一定的前端开发经验。
HTMLReactVue
js
<!DOCTYPE html>
<html lang="zh-CN">
<head><meta charset="UTF-8"><meta name="viewport" content="width=device-width, initial-scale=1.0"><title>AI助手</title><script type="text/javascript" src="https://develop.hengshi.org/assets/hengshi-copilot@5.3-SNAPSHOT.js" defer></script><style>/* 添加样式(如果需要) */</style>
</head>
<body><button id="trigger-ai">唤起AI助手</button><div id="copilot-root" style="display: none;"></div><script>const copilotConfig = {locale: 'zh-CN',draggable: {enable: true,minWidth: 440,minHeight: 440,position: {x: window.innerWidth - 480,y: 20,},size: {width: 440,height: window.innerHeight * 0.8,},onDragStop: onDragStop,onResize: onResize,},userConfig: {dataAppId: 130870,datasetId: 1,},};let copilotInstance = null;const button = document.getElementById('trigger-ai');const copilotRoot = document.getElementById('copilot-root');button.addEventListener('click', toggleCopilot);function onDragStop(event, position) {copilotConfig.draggable.position = position;}function onResize(event, position, size) {copilotConfig.draggable.position = position;copilotConfig.draggable.size = size;}function launchCopilot() {if (typeof Copilot === 'undefined') {(function(fn) {fn(launchCopilot);})(requestIdleCallback || setTimeout);} else {if (!copilotInstance) {copilotInstance = new Copilot(copilotRoot, copilotConfig);copilotRoot.style.display = 'block';button.textContent = '关闭AI助手';}}}function destroyCopilot() {if (copilotInstance) {copilotInstance.destroy();copilotInstance = null;copilotRoot.style.display = 'none';button.textContent = '唤起AI助手';}}function toggleCopilot() {if (copilotInstance) {destroyCopilot();} else {launchCopilot();}}</script>
</body>
</html>登录认证
集成 SDK 时,您可能需要进行登录认证。我们提供两种方式:
- SSO 单点登录:如果您的系统已与衡石系统集成,无需额外登录。
- JWT 认证:通过以下代码使用 JWT 进行登录认证:
js
fetch('https://develop.hengshi.org/api/auth/login-info?activeAuth=jwt-param&jwtParam=您的 JWT 参数').then(response => {// 登录成功,继续使用 SDK}).catch(error => {// 登录失败,处理错误});提示
确保您已经在 '设置->组织管理->认证方式->JWT 请求参数' 中配置了 JWT。
请将 '您的 JWT 参数' 替换为实际的 JWT 参数。
在衡石系统内的仪表盘里集成 Copilot
在衡石系统中调用 Copilot 方式与上述 HTML 方式是类似的。
首先,在全局 JS 文件中通过代码加载 Copilot SDK:
js
// 1. 保持 copilot sdk 与系统的 store 数据同步
window.__INITIAL_STATE__ = window._hs_store_.getState();
// 2. 引入 copilot sdk 代码
var script = document.createElement('script');
script.src = 'https://develop.hengshi.org/assets/hengshi-copilot@5.3-SNAPSHOT.js';
script.async = true;
script.onload = function() {// 3. 重置 sdk base urlwindow.__hs_sdk_base_url__ = undefined;// 4. 创建 sdk 容器var copilotRoot = document.createElement('div');copilotRoot.id = 'copilot-root';copilotRoot.style.width = '100%';copilotRoot.style.height = '100%';copilotRoot.style.position = 'fixed';copilotRoot.style.inset = '0';copilotRoot.style.zIndex = '9999';copilotRoot.style.pointerEvents = 'none';document.body.appendChild(copilotRoot);// 5. 赋值给自定义 sandbox 变量以便自定义 js 能使用window.myJS = window.myJS || {};window.myJS.innerWidth = window.innerWidth;window.myJS.innerHeight = window.innerHeight;window.myJS.Copilot = Copilot;window.myJS.CopilotRoot = copilotRoot;
};
document.body.appendChild(script);
然后,您可以在仪表盘中使用控件按钮来唤起 Copilot,在按钮控件的设置中添加点击事件,执行相应的 JS 代码。
js
if (!myJS) {throw new Error('hengshi copilot sdk not loaded yet');
}
if (!myJS.copilotConfig) {var stylesheet = `html.hengshi-copilot-sdk, html.hengshi-copilot-sdk body {width:100% !important; height: 100% !important;}html.hengshi-copilot-sdk body.hst {background: transparent;}.react-draggable {pointer-events: all;}`;myJS.copilotConfig = {locale: 'zh-CN',stylesheet: stylesheet,closable: true, // 设置对话框可关闭draggable: { // 设置对话框拖动功能,不需要拖动功能可以设置为 false 或不设置enable: true,minWidth: 440,minHeight: 440,position: {x: myJS.innerWidth - 480,y: 20,},size: {width: 440,height: myJS.innerHeight * 0.8,},// 设定记住拖动的位置和大小onDragStop: onDragStop,onResize: onResize,},// 设置对话数据来源userConfig: {dataAppId: 354, // 数据包 iddatasetId: 26, // 数据集 id},};
}
function onDragStop(event, position) {myJS.copilotConfig.draggable.position = position;
}
function onResize(event, position, size) {myJS.copilotConfig.draggable.position = position;myJS.copilotConfig.draggable.size = size;
}
function launchCopilot() {if (typeof myJS.Copilot === 'undefined') {(function (fn) {fn(launchCopilot);})(requestIdleCallback || setTimeout);} else {myJS.copilot = new myJS.Copilot(myJS.CopilotRoot, myJS.copilotConfig);}
}
if (myJS.copilot) {myJS.copilot.destroy();myJS.copilot = null;
} else {launchCopilot();
}
Copilot 配置项
您可以根据需要调整配置项:
ts
// Copilot 配置定义
interface ICopilotConfig {userConfig: {appId: number;chartId?: number;dataAppId: number;datasetId?: number;};closable?: boolean;draggable?: boolean | {enable: boolean;minWidth: number;minHeight: number;bounds: 'window' | 'parent';position: {x: number;y: number;};size: {width: number;height: number;};};locale?: string;stylesheet?: string;className?: string;style?: React.CSSProperties;bodyClassName?: string;bodyStyle?: React.CSSProperties;header?: string | React.ReactElement;systemMsg?: string;parser?: {selectText: string;onSelect: (chart: any) => void;};chartTheme?: string | Theme;
}
interface Theme {base?: string | number;background?: string;color?: string;fontSize?: number;fontFamily?: any;fontWeight?: string;textAlign?: string;borderColor?: string;borderWidth?: number;borderStyle?: string;borderRadius?: number;boxShadow?: string;chartBackground?: string;chartPadding?: number;schema?: string[];mapTheme?: string;
}// 创建 Copilot 配置对象
const copilotConfig: ICopilotConfig = {userConfig: {// appId 和 datasetId 或 chartId 必须提供其中之一// 示例:appId: 130870, datasetId: 1 // 数据包 id + 数据集 id// 或者// appId: 130870, chartId: 1 // 应用 id + 图表 id},closable: true, // 可选,是否显示关闭按钮,默认为 falsedraggable: {enable: false,minWidth: 400,minHeight: 400,bounds: 'window',position: {x: window.innerWidth - 480,y: 20,},size: {width: 440,height: window.innerHeight * 0.8,},},locale: 'zh-CN', // 可选,语言设置,默认为中文简体stylesheet: '', // 可选,自定义 CSS 样式className: '', // 可选,自定义类名style: {}, // 可选,自定义样式bodyClassName: '', // 可选,对话框内容容器的类名bodyStyle: {}, // 可选,对话框内容容器的样式header: '', // 可选,标题内额外内容systemMsg: '欢迎使用智能分析助手', // 可选,欢迎语,默认值parser: {selectText: '选择图表', // 按钮文案onSelect: (chart) => {// 点击按钮时触发的事件,chart 参数需要根据实际使用场景定义类型console.log('图表选择事件', chart);},},chartTheme: 'HAWAII_SEA', // 可选,图表主题,参考仪表盘主题
};
自定义 AI 助手样式
如果您想自定义 AI 助手的样式,可以通过以下 CSS 代码实现:
css
/* 示例: 使用 css 批量自定义皮肤样式 */
*, ::before, ::after {--brand: #4CAF50; // 这是系统整体的品牌色
}
/* 设置 AI 助手对话框根元素样式 */
.hengshi-copilot-sdk .hst-copilot {position: fixed;// z-index: 1; // 按需设定top: 10vh;right: 50px;width: 440px;height: 80vh;border-width: 1px;
}
/* 设置 AI 助手 标题 元素样式 */
.hengshi-copilot-sdk .hst-copilot-header {color: #fff;background-color: darkslategray;
}
/* 设置 AI 助手 对话区域 元素样式 */
.hengshi-copilot-sdk .hst-copilot-conversations {border-color: #aaa;background-color: darkslategray;height: calc(100% - 50px);
}
/* 设置 AI 助手 消息 元素样式 */
.hengshi-copilot-sdk .hst-copilot-msg,
/* 设置 AI 助手 消息下方 ICON 操作 元素样式 */
.hengshi-copilot-sdk .hst-copilot-msg > .hs-relative > *,
/* 设置 AI 助手 辅助信息 元素样式 */
.hengshi-copilot-sdk .hst-copilot-mark {color: #fff;
}
.hengshi-copilot-sdk .hst-copilot-mark .hs-bg-\[color\:var\(--hs-bg-lighter\)\] {background-color: transparent;
}
/* 设置 AI 助手 消息下方 ICON 操作 hover 时 元素背景样式 */
.hengshi-copilot-sdk .hover\:hs-bg-\[\#eee\]:hover {--tw-bg-opacity: .2;
}
/* 设置 AI 助手 AI 消息气泡 元素样式 */
.hengshi-copilot-sdk .hst-copilot-msg-bot .hst-copilot-msg-inner,
/* 设置 AI 助手 用户消息气泡 元素样式 */
.hengshi-copilot-sdk .hst-copilot-msg-user .hst-copilot-msg-inner {border-color: darkgray;background-color: darkgray;
}
/* 设置 AI 助手推荐问题的问题气泡背景色 */
.hengshi-copilot-sdk .hst-copilot-msg-inner .hst-copilot-msg-inner {background-color: slategray !important;
}
/* 设置 AI 助手 输入内容区域 元素样式 */
.hengshi-copilot-sdk .hst-copilot-prompt {color: #fff;background-color: darkslategray;
}
/* 设置 AI 助手 输入框 元素样式 */
.hengshi-copilot-sdk .hst-copilot-prompt textarea {color: #fff;border-color: darkgray !important;
}
.hengshi-copilot-sdk .hst-copilot-prompt .hs-from-\[\#f1f1f1\],
.hengshi-copilot-sdk .hst-copilot-prompt .hs-to-\[\#f1f1f1\] {--tw-gradient-to: darkslategray;
}
将上述 css 作为字符串传递在 Copilot 配置中的 stylesheet 即可:
ts
// 创建 Copilot 配置对象
const copilotConfig: ICopilotConfig = {...stylesheet: css, ...
};
3. API 集成
API 方式的集成也有前端和后端两种方式,前端方式直接调用 Copilot SDK 提供的 js API,后端方式则通过 http 接口。
JS SDK API
1. 通过 JS 介入
Copilot SDK 提供了 headless 模式,即不需要 UI,只需要调用 js API,通过 http 接口与后端进行交互,这意味着你可以将 Copilot SDK 集成到你已有的前端项目(如你自己的 AI 助手)中,只需要在需要的地方调用 js API 即可。
CopilotConfig 中传递 headless: true 即可启用 headless 模式,此时 Copilot UI 将不会渲染到页面中,你可以调用 js API 来控制 Copilot 的行为。
与 UI 模式的加载方式一样,在 new Copilot 后返回的 copilot 实例中,提供了下列 Copilot 状态、数据及函数:
js
{api: {...},// Copilot 状态isLoading: false,// 当前会话列表,数据格式参照// https://api.hengshi.com/conversation.html#conversationconversations: [],setConversations: () => {},currentConversationId: null,setCurrentConversationId: () => {},runningChatUid: null,setRunningChatUid: () => {},setChat: (id, chatUid, chat) => {},// 获取历史对话列表onFetchConversations: (offset = 0, limit = 10) => {},// 创建对话onCreateConversation: prompt => {},onFetchConversation: id => {},onClearConversations: () => {},onFetchPreviousConversations: () => {},// 创建问答onCreateChat: body => {},onDeleteChat: (id, chatUid) => {},onFetchSuggestions: refresh => {},onFetchFavorites: () => {},onCancelChatFavorite: (id, chatUid) => {},// 渲染图表renderChart: (container, { id, chart, chartTheme }) => {},
}
2. 通过 JS 调用 HTTP API
在上述 copilot 实例中,api 对象中提供了所有 HTTP API 的调用方法,你可以通过调用这些方法来与后端进行交互,如:
js
// 1. 创建对话
const { body: { data: conversation }} = await copilot.api.requestCreateConversation({body: {title: '这里是本次对话的标题',},
}).value;
/**
conversation = {"id": 135,"title": "这里是本次对话的标题","createdBy": 268,"createdAt": "2024-09-14 15:47:23","updatedBy": 268,"updatedAt": "2024-09-14 15:47:23"
}
*/
// 2. 创建问答
const { body: { data: chat }} = await copilot.api.requestCreateChat({id: conversation.id,body: {prompt: '哪个导演拍的电影票房最高', // 这里是用户的问题userConfig: { // 参照上述 copilotConfig 中的 userConfigdataAppId: 129150,datasetId: 1,}},qs: {sync: true, // 是否同步执行timeout: 1000 * 60, // 超时时间,单位为毫秒},
}).value;
/**
chat = {"conversationId": 135,"prompt": "哪个导演拍的电影票房最高","answer": "克里斯托弗·诺兰导演拍的电影票房最高。","model": "gpt-4o","uid": "08ff93ca-1972-4916-b884-35fab6f91c64","temperature": 0,"createdBy": 268,"createdAt": "2024-09-14 15:47:23","updatedBy": 268,"updatedAt": "2024-09-14 15:47:23","responseAt": "2024-09-14 15:47:30","isDelete": false,"isContextEnd": false,"suggestQuestions": [],"statusList": ["PENDING","ANALYZE_REQUEST","HQL_SELECT_FIELDS","HQL_SELECT_FUNCTIONS","GENERATE_HQL_QUERY","DOING_HQL_QUERY","DOING_SUMMARY","DOING_QUESTION_SUGGESTING","DONE"],"userConfig": {"datasetId": 1,"dataAppId": 129150},"autoConfig": {"agentType": "HQL_AGENT"},"isCurrent": true,"usage": [{"completion_tokens": 24,"prompt_tokens": 4063,"total_tokens": 4087},{"completion_tokens": 5,"prompt_tokens": 1424,"total_tokens": 1429},{"completion_tokens": 49,"prompt_tokens": 3906,"total_tokens": 3955},{"completion_tokens": 16,"prompt_tokens": 299,"total_tokens": 315}],"chartCreatedAt": "2024-09-14 15:47:30","refineQuestion": "哪个导演拍的电影票房最高","favorite": false,"charts": [{"appId": 129150,"datasetId": 1,"options": {"axes": [{"op": "{{1}}.{director}","uid": "uid1","fieldName": "director","kind": "formula","datasetId": 1,"labelOrigin": "director","label": "director","isAggregate": false,"value": "{{coffe_产品表}}.{director}","dataset": 1,"fieldType": "string"},{"op": "max({{1}}.{votes})","uid": "uid2","fieldName": "votes","kind": "formula","datasetId": 1,"labelOrigin": "votes","label": "votes","isAggregate": true,"value": "max({{coffe_产品表}}.{votes})","dataset": 1,"fieldType": "number"}],"name": "Bar","limit": 1,"sort": [{"op": "uid2","kind": "reference","direction": "desc"},{"op": "uid1","kind": "reference","direction": "asc"}]},"dataAppId": 129150,"datasetIds": [1]}]
}
*/
后端 HTTP API 集成
后端 HTTP API 集成请参考 API 文档:从用户问题到获得数据的完整API调用例子